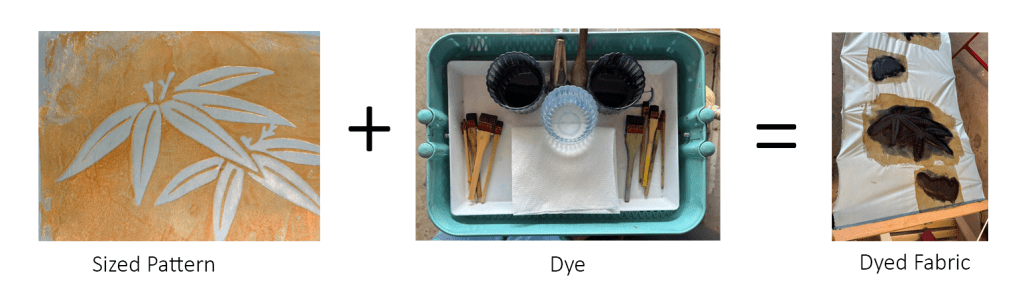
This article is the second article in a multipart series about stencil dyeing. This part covers an overview of the process, and the supplies needed to get started. It functions as a beginner how-to guide that prospective stencil dyers can follow along.
Katazome is a resist dye technique that uses paste applied through a stencil to resist dye applied directly to the fabric. Its history is discussed in the previous article in this series, History of Early Katazome.
Process Overview
The steps are simple, but there are many of them, and none can be skipped. Like many traditional crafts, katazome requires patience and attention to detail, but breaks and periods of rest are also built in. If you have space, you can stagger the process among multiple concurrent projects to keep yourself occupied, as professional dyehouses do – they store drying projects in the rafters of their shop or in neat stacks of cloth hanging between beams.
The process of katazome takes usually takes several days. It can take more or less depending on the weather and time of year; humidity and temperature play a factor in the drying time of multiple stages. You can shorten it by drying the paste in the sun, and using indigo instead of brushed dyes, but it is not an instant process. The expedient versions of the process are modern screenprinting and surizome, which applies dye directly through the stencil paper. If you are in a hurry, these are the alternatives I would pursue rather than trying to rush the process.
There’s a great video of the whole process here, it takes about 13 minutes to watch.
I encourage you not to take shortcuts. I am a curious person and I tried to take many shortcuts in my learning process because my books only said what to do, not why. I learned that every step is there for a reason, and cannot be omitted. I will do my best to explain the reason for each step, which Japanese authors often do not disclose, because I have learned from experience what happens which the step is skipped.
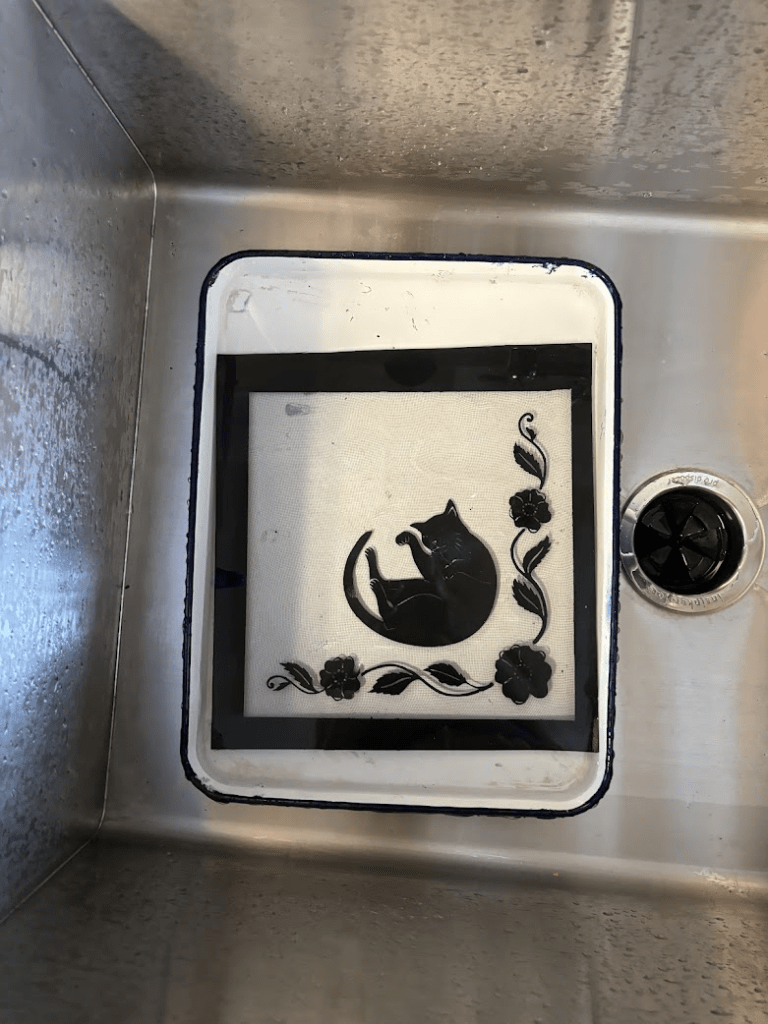
0. Stencils

You have to have a stencil for this process to work. You don’t need to make it yourself, in fact, there are many stencils available for sale at affordable prices. Aliexpress, Tanaka Nao, and Chidori Vintage all sell stencils that you can use for katazome at varying price points. Stencils are traditionally made from lacquer and kakishibu paper, and silk thread or gauze. However, modern stencil dyers use a range of materials, such as mylar, synthetic kakishibu paper, or vinyl overlaid on screen printing frames. This is partially due to the expense of kakishibu paper, but also because the other mediums have their own strengths for certain types of patterns and applications.
Cutting a stencil is as simple as taking a knife to paper or mylar. Personally, I use a siser romeo die cutter to cut my stencils, because I have some health challenges that make cutting by hand inaccessible. This allows me to make stencils much faster, but certain extremely intricate designs cannot be cut well on a die cutter. Most basic designs that have patterns good for beginner dyers are very easily cut on a die cutter.
Stencil cutting and design is covered in detail in the Stencil Cutting article, which will follow this article in a few weeks.
1. Fabric Preparation
In Japan, fabric was traditionally produced in narrow widths, and then sewn with minimal cutting into garments. Katazome evolved alongside this tradition, and most of the equipment and stencils made for it are meant for narrow width bolts. Wider equipment is sold, but it is much more expensive, and maneuvering and laying paste and dye for designs larger than about 20″ begins to become unwieldy. I strongly recommend starting out with narrower cloth, and then working your way into yard and yard and a half length as you get more experience.
You can buy narrow width cloth from places like Aikuma or Rakuten, or you can simply rip existing wide fabric into narrower widths. This is what I often do, because it is the cheapest way, and opens up many textile options. Cotton sheetings, muslins, poplins and lawns are some of the easiest fabrics to start with; Aikuma sells some affordable ones in narrow widths, but you can also buy something simple at your local quilting store. Look for something with a little bit of body to begin with, as very thin fabric can be challenging to dye as the dye seeps and spreads more easily. Smooth fabric is also easier, as pills can stick up and not absorb dye or paste as well. If the fabric is a bit stiff, it makes it easier to lay on the pasteboard, but it’s not a requirement.
I also recommend starting with plant fibers, and not plastic or protein fibers. Protein fibers like silk and wool are more expensive and require an additional steaming step at the end to set the dye. They also are very elastic and shifty when laying out. Cotton, hemp, linen, and ramie are usually cheaper than protein fibers, and if they are dyed with fiber reactive dyes they do not require a steaming step. Plastic fibers, like polyester or nylon, take a different class of dyes altogether, and they leach microplastics into the water supply every time they are washed. I would avoid them.
If you ordered fabric marked as prepared for dyeing, then a machine wash with a dyer’s detergent like synthraprol or dharma’s dyer detergent, is all that is needed. If your fabric is vintage, used, or of unknown provenance, you may wish to scour it first. Botanical Colors has a good primer on scouring if you’re unfamiliar, as do many dyeing manuals.
Once you have cleaned the fabric, rip it to size if you bought a wider width. If your fabric is thin or delicate or tends to fray, serge or zig zag the edges. This will keep the fabric from being ripped by the pins in the mounting process. I usually only need to do this with thin cottons, linens or silks.
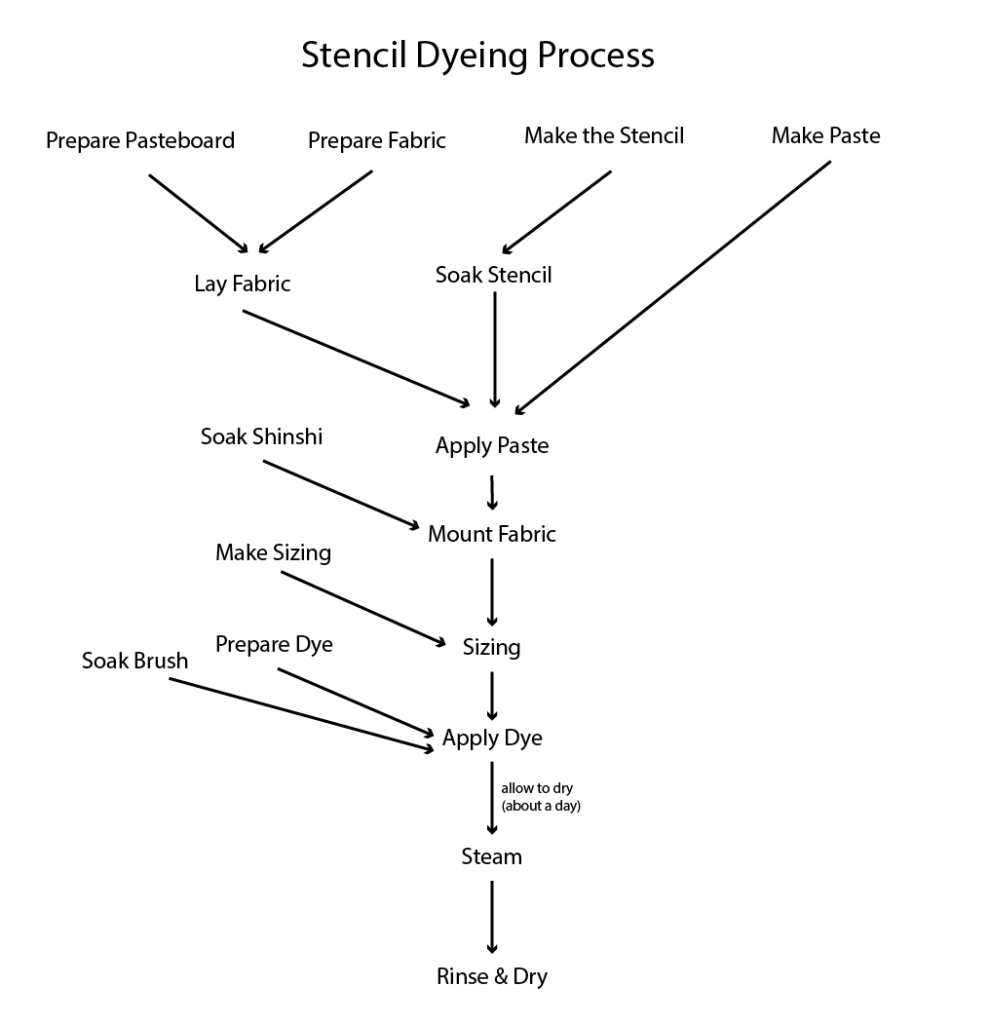
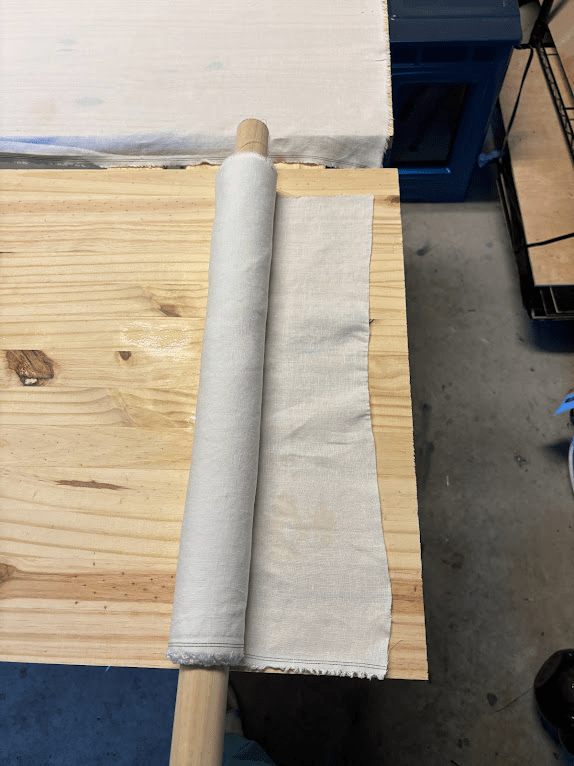
Iron the fabric and roll it tightly and evenly on to a wooden dowel, or any sturdy tube. In the beginning, I used two paper towel rolls taped together reinforced with another layer of paper taped around them. Eventually I bought a few 1 1/2″ dowels from the hardware store. An old broom or tool handle also works. I like to roll the fabric as I iron it to keep it really flat.

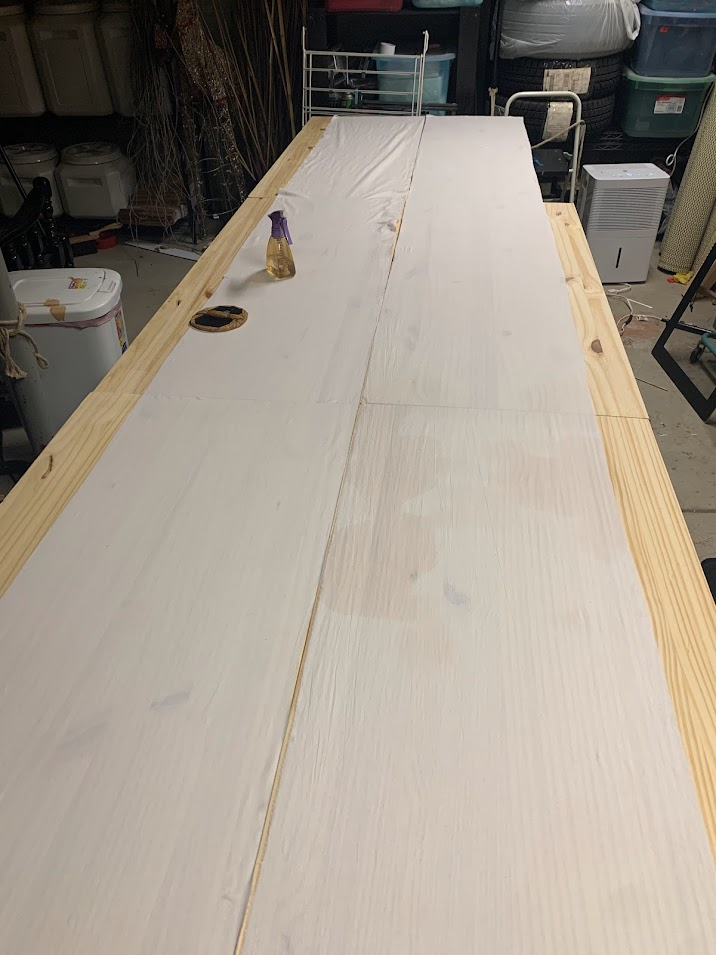
2. Pasteboards
When the resist paste is laid out, the fabric needs to be held in place perfectly still and square. It needs to stay that way until the paste is dried. The way this acheived is with a pasteboard, which is simple a long piece of wood with a thin layer of rice glue applied on top. The rice glue is allowed to dry, and then when re-wet it becomes the perfect amount of tacky but not sticky to hold the fabric in place without permanently bonding to it.
You can make your pasteboards out of plywood or wooden project boards. Long ago, they were made out of long planks, but this is prohibitively expensive and rather heavy.
For a while, I thought hardwood plywood was ideal, because it is light and does not shift and cup with humidity changes, while having a tight-grained top. One challenge with plywood, however, is that if there are any seams on the board they may come apart with constant exposure to moisture, and then you will have to repair them. Planing and resurfacing pasteboards is a normal task, but it’s more difficult with plywood because you have to use repair veneer or expoxy, which absorbs less paste than the base wood. I am investigating alternatives for wider boards.
If you live in North America, and decide to go with plywood instead of a project board or luxurious wide plank, maple or birch plywood with a thick top veneer is ideal. Do not choose luan, oak, or an open grained wood, as the goal is to have a very smooth surface on top that doesn’t easily tear apart. Luon in particular peeled apart onto my fabric.
Once you have the board cut to a good size (I like 20-24″ but traditionally it’s around 15-17″), go ahead and clean it off with a damp rag. Once it is clean, you will need to apply paste. There are two options for this: make your own rice paste, or buy it. Making your own paste is more economical, but if you’re in a hurry or just starting out, this rice paste works fine when diluted with a small amount of water.
Some Japanese pastemakers actually just make a simple rice glue they can use for pasteboards and then add the komon nuka/rice bran/calx mix to the cooked glue for the resist paste. I tried this method and it didn’t work as well for me as the all-in-one recipe in the following section, but I probably just need more practice. What is nice about making mix-in resist that starts with plain glue is it’s less cooking and less pot washing, and it also offers more control over final paste ratios at the end. However, it’s an advanced sort of procedure where you already need to know what good paste feels like to make it well, so I advise starting out with the all-in-one resist paste recipe in the next section, and just doing dishes twice until you build up confidence.
Pasteboard Glue Recipe
Ingredients
1 cup of mochiko
Hot water
This recipe will cover about 36 square feet with glue. For many surfaces, such as wood boards being used for the first time, double applications of glue are needed. Scale the recipe according to the size of your board/your needs.
Instructions
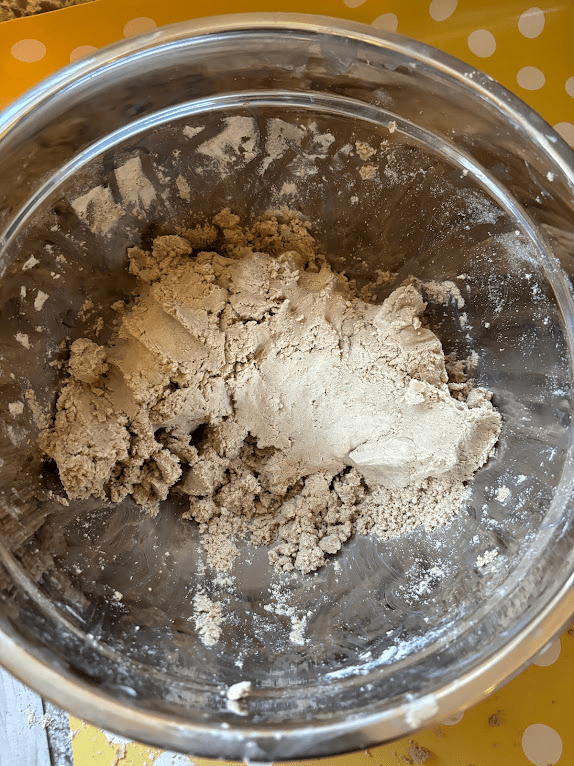
- Pour mochiko into a mixing bowl. Modern mochiko usually does not need to be sifted.
- Gradually add hot water, stirring and then kneading with your hands. Pause when the dough looks like it can be shaped. The Japanese say this is ‘earlobe consistency’. Personally, I don’t understand that even after pinching my earlobe a bunch. I stop as soon as I can shape the dough. It’s better to have a drier dough than a wet one, because the wet, soft dough will melt and make a mess when it’s boiled if it’s too wet. If you add too much water and get something runny, simply add more flour.
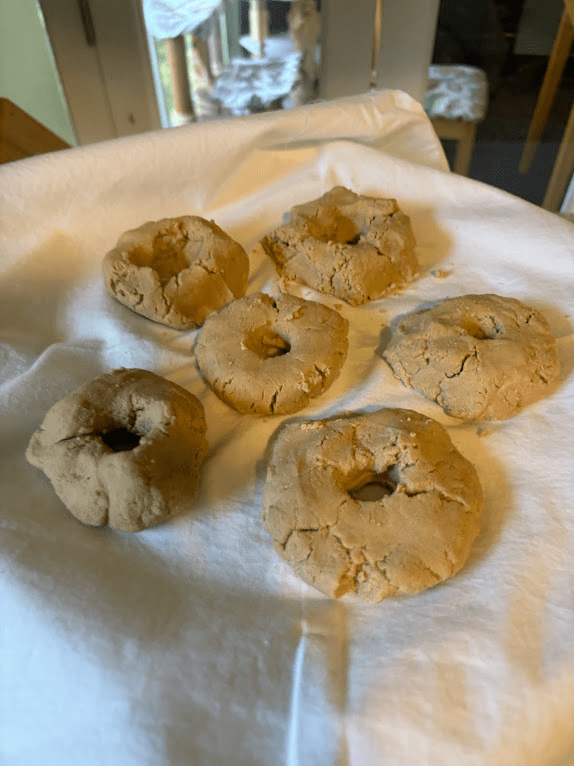
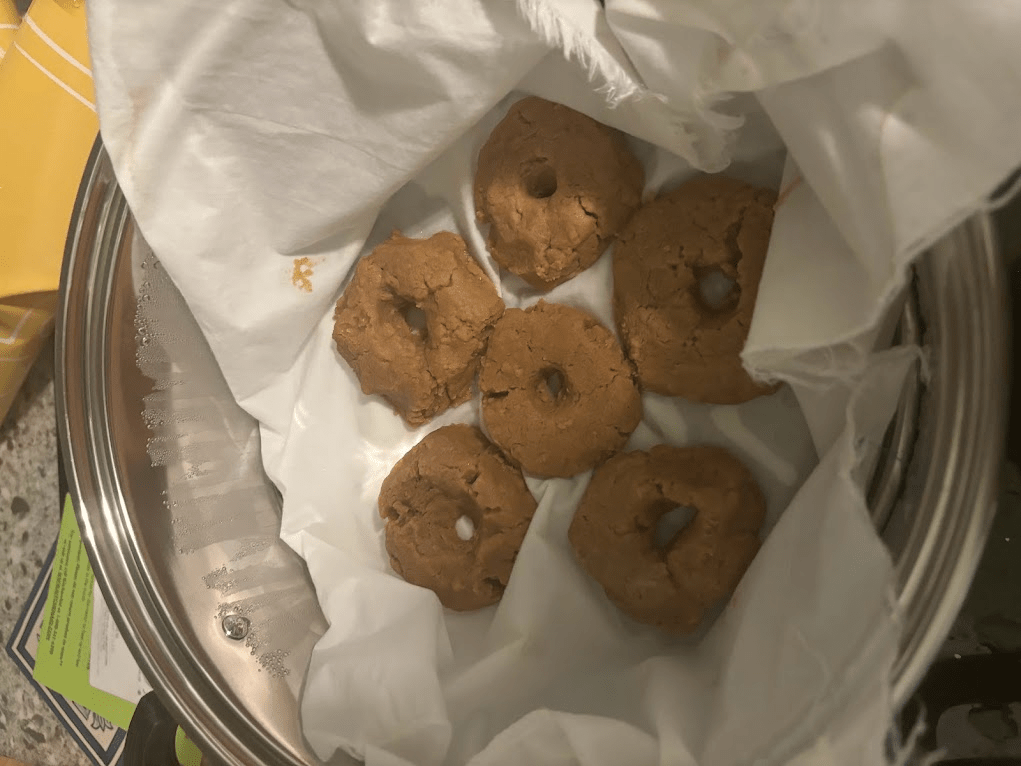
- Make triangle or mini donut shapes, and place them in in a steamer. Steam for about 40 minutes. The finished color should be semi-transparent. Steaming makes the glue stickier and works better than boiling.
- Once the steaming is complete, immediately transfer the dough to a suribachi or bread mixer (not a cake mixer, which will burn out the motor on this task if used repeatedly). Mix, adding hot water and continuing to stir and mash. Make a smooth mixture that can be spread, like peanut butter or thick icing.
- You can dilute the paste as needed if it’s not spreading well when you go to apply it.


Applying Paste to Pasteboards
Traditionally, paste is applied with a wooden or metal spatula, and then smoothed out with water using a special brush. For a long time, I used an inexpensive wool row brush to put a watery mixture of paste on directly, but eventually I found the easiest way for me to apply it was with a long plastic spatula. Use what works for you ergonomically and economically. The important thing is to get the paste applied evenly, thinly, and without globs. Below are videos of myself using a spatula and a professional dye studio smoothing out paste with the special brush.
Leave the pasteboard to dry fully. Spray it with water. If it isn’t tacky, which is common for first coats on wood, add a second coat and allow it to dry fully as well. If you don’t allow the paste to dry fully before laying out the fabric, it can penetrate through the fabric and act as its own resist paste.
Once the pasteboard is dry, spray it with a gentle mist of water and being laying out your roll of fabric. There are a few ways to do this – I like to gradually wet the board and then slowly press my fabric on it. If you’re experienced, you can unroll the whole thing and then stick it down. Below are videos of how I do it – barehanded and with a baren, and then a video of a professional.
Note in the second video, I point out a wrinkle in the fabric. This is no good, it will cause distortions in the paste. If this happens to you, rollback the fabric and try again.
It is also important to keep the fabric relatively straight and aligned square to the pasteboard. This is more difficult with long staple hemp or thin silks, but it must be done, otherwise, the pattern will be applied with wiggles and distortions.
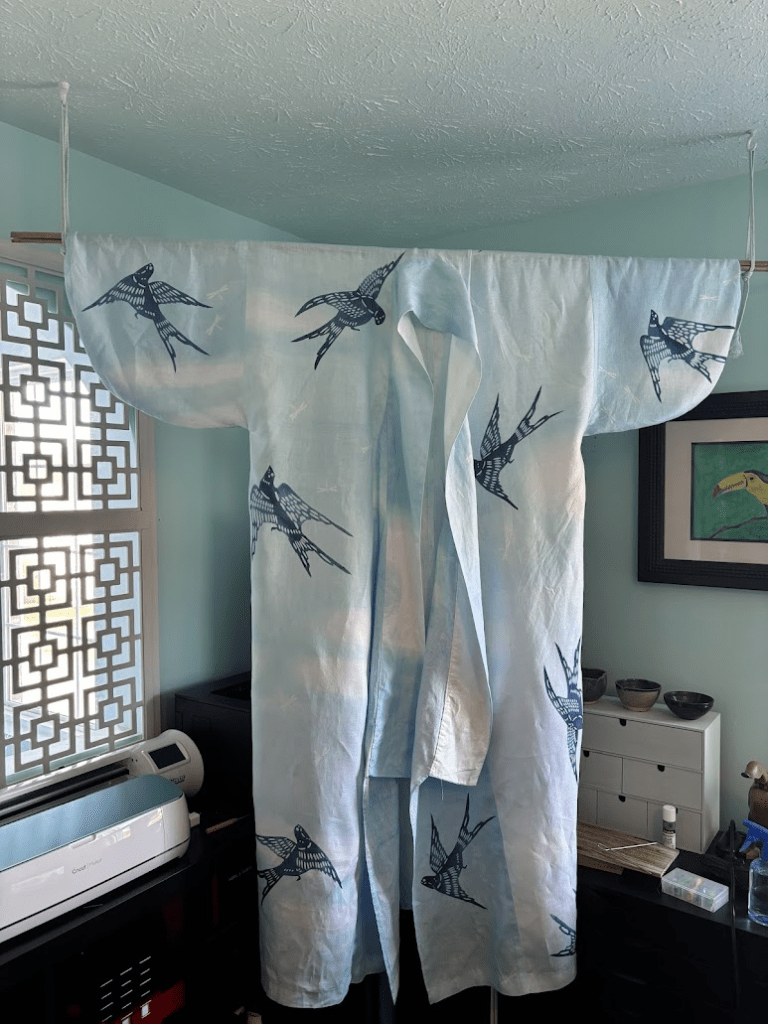
If you are making a garment with a joined long seam, like a kimono, you can line up the seams as you paste to help with composition and registration.
Pasteboards generally tolerate 2-3 uses before they have to be scrubbed and have their glue reapplied. I use a simple tawashi brush, a bit of water, and occasionally a tiny bit of castile soap. Scrub well, don’t leave soap on the boards, and when dry, reapply paste. If your fabric is bubbling or not staying down well when you try to lay it out, take it off and put on another layer of paste.
Pasteboards naturally get kind of filthy because they have glue on them, so try to store yours in as clean a way as possible. Don’t feel too guilty about the inevitable stray brush hair or speck of dirt that gets on them, just make sure to scrub it off when you clean the board.
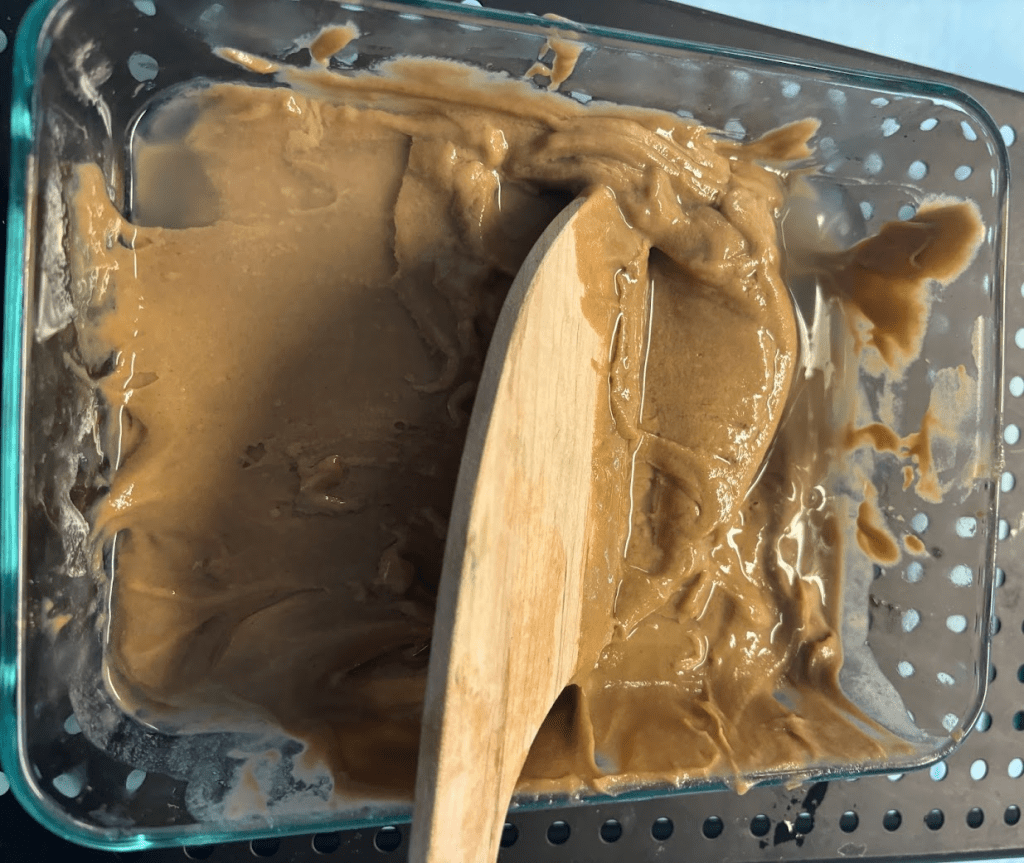
3. Paste Making
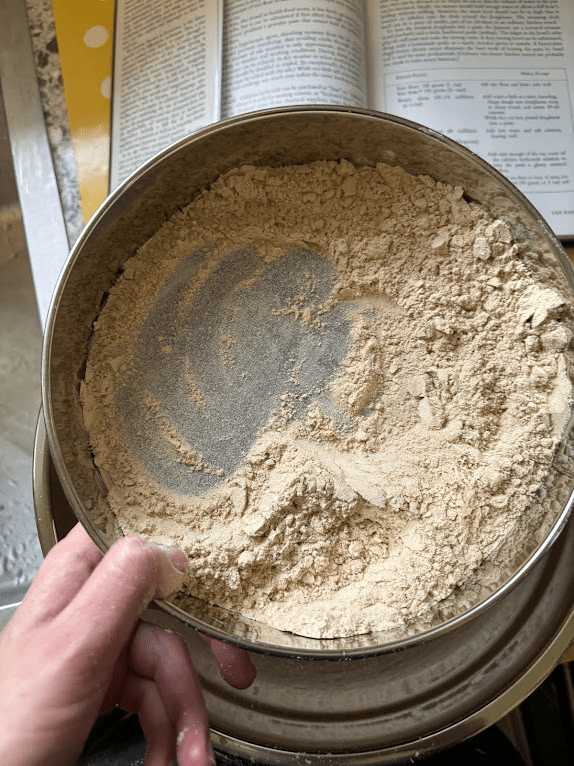
Paste is made from a mixture of rice bran, water, and glutinous rice flour. Each ingredient plays an important role.
Komon Nuka ・米糠 – Brings structure – as it is bran, its fiber is supportive. This what allows for such fine detail. Sharpens the edges of the pattern. Makes the glue easier to remove when washing with water and suppresses stickiness when applying glue with paper patterns.
Mochiko ・もち粉 – Brings stickiness and holds the fiber together. Softens the edges of the pattern.
Salt – This is used to help prevent crackling, as well as preserve the paste if you won’t use it that day. It can sometimes be omitted when conditions are very humid and the paste detail required is extremely fine.
Calcium Hydroxide / Pickling Lime – Stiffens the paste. Omit for some natural dyes, as it interferes with them.
Colorants – These are optional and added by some studios to help see where the pattern is. I have seen red and blue. I have personally used sappanwood extract and blue butterfly pea flower powder to color dye for indigo paste ups. I am not sure how the sappanwood would fare if a mordant was used, but it might stain permanently. I think it works with indigo because there is no mordant.
Resist Paste Recipe
This recipe uses American imperial measurements, but in truth, very few measurements are needed. The big thing to understand is the 4:6 ratio between Mochiko and Komon Nuka. Everything else – the water, the salt, the calx – are all added by feel, color and texture. You can tweak the ingredients as you get more experience, but to begin, this recipe is good for beginners and easy to execute.
Ingredients
1 cup Mochiko
1.5 cups Komon Nuka / Defatted Rice Bran
1.5 cups Water (you will not need all of it, just have some on hand in an easy to pour container)
0-2 tsp of salt
2 tbsp Calcium Hydroxide
Instructions
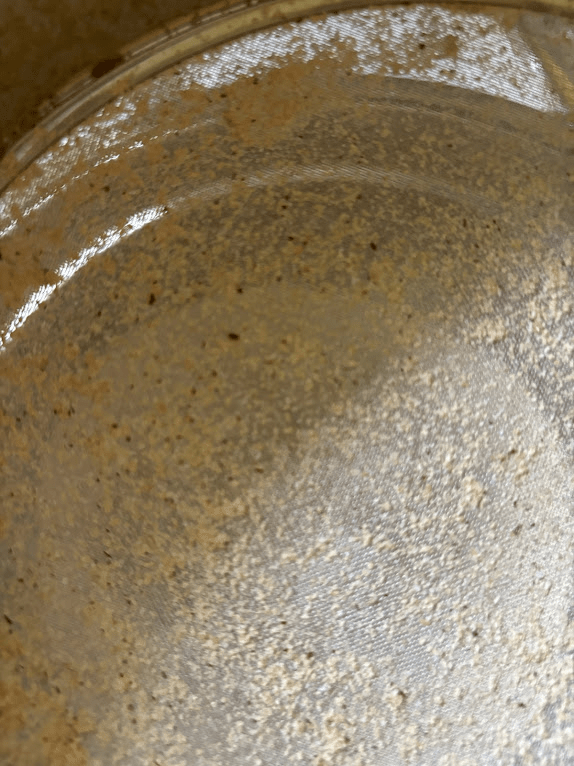
- Sift the komon nuka. Modern mochiko typically does not need sifting.
- Mix the komon nuka and mochiko well in a large bowl.
- Add water a little at a time, kneading. Traditionally, Japanese paste makers stop when the dough ‘reaches the consistency of an earlobe’. I really don’t understand that, and I stop adding water when I feel like I can shape the dough. Usually I make a few failed biscuits, keep adding water, and then make a successful one and stop adding water.
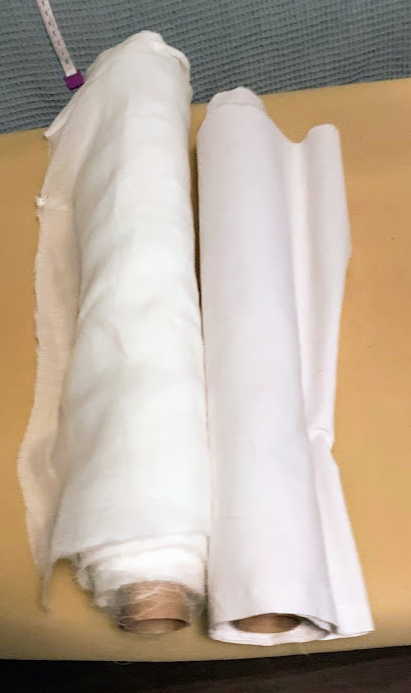
- Shape dough into doughnuts. Not American donuts, little mini donuts. The easiest way to do this is to make a round patty, and then stick your finger in the center until you bore through. The ‘roll a long noodle and loop it on itself’ approach does not work with this dough, it is not sticky or wet enough, it will just make a crumbled mess.
- Set the doughnuts in a kitchen towel or piece of cotton muslin (preferable white or unbleached), spacing them so they do not touch, and steam 50-60 minutes.
- While the doughnuts are steaming, decide how much salt to use, and dissolve it in as little hot water as possible. This will be about 1/4 to 1/2 a cup depending on the amount. You need salt when the humidity is low, or when you’re doing designs with large, contiguous blocks of paste, like those with white backgrounds. You need no to little salt in a hot and humid summer, and a large amount of salt in the winter. Salt keeps the paste from cracking by increasing the hydroscropity of the paste. Too much, and the paste will become very loose and run. Too little, and the paste will crack in the dry air. I recommend using less than a teaspoon of paste when it’s 80-90% humidity, or none, or up to 2 tsp in the winter. If you live in a very dry climate, increase the amount beyond that.
- Also while the donuts are steaming, dissolve the calx in hot water and let it settle. Calx is very dusty and fine particled, you may wish to wear a mask when measuring it out.
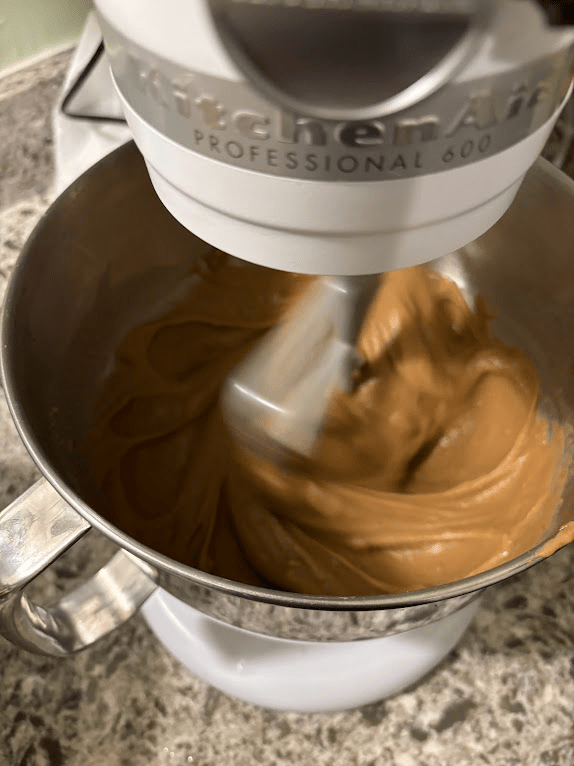
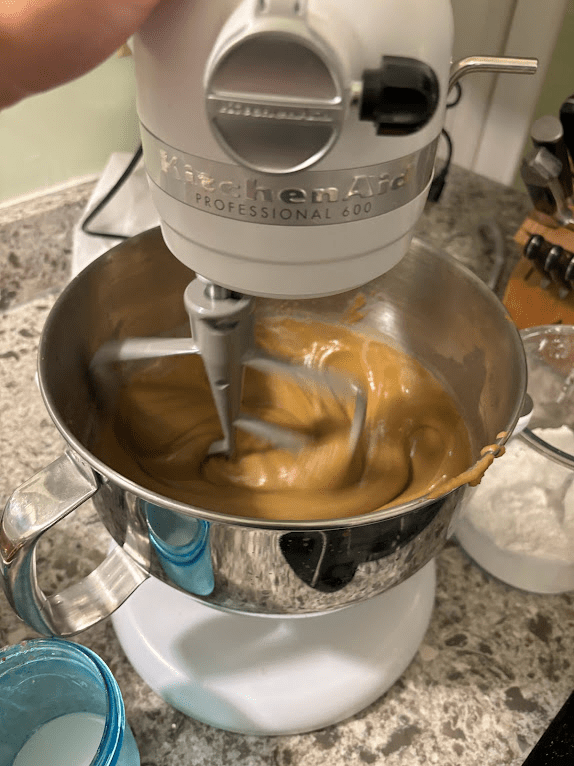
- When the donuts are done, immediately pound them into a paste. This is traditionally done with a large suribachi, but you can also use a bread mixer. Do not use a cake mixer, the dough is too tough for the motor.
- Once the paste is fully mixed, you can add the salt gradually and continue beating. If it’s too tough to stir by hand, add a little hot water. You will want to beat for at least five minutes, until the paste becomes sticky and drips long strands of dough from the mortar.
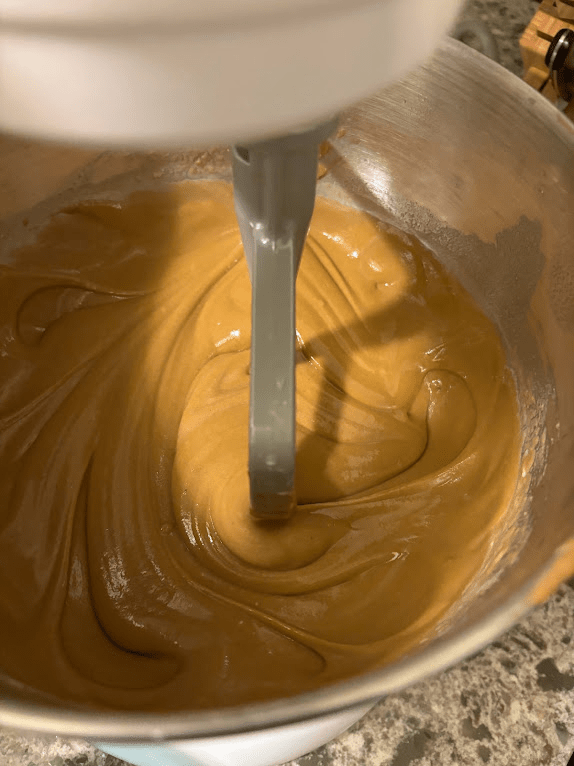
- Add top water from the lime solution until the dough turns a golden dijion yellow. I usually set a piece of paste aside out of the mixing bowl so I can compare the color change. You don’t want a bright yellow, but more the color of like, undyed french mustard.
- If not using immediately, store the paste in a lidded container and pour a thin layer of fresh water over the top. My paste usually keeps for about 10 days, maximally, in a cold fridge. If the paste smells sour or off, discard it and make fresh.
- You can dilute the paste as needed to make it easy to spread, but do so incrementally and carefully.
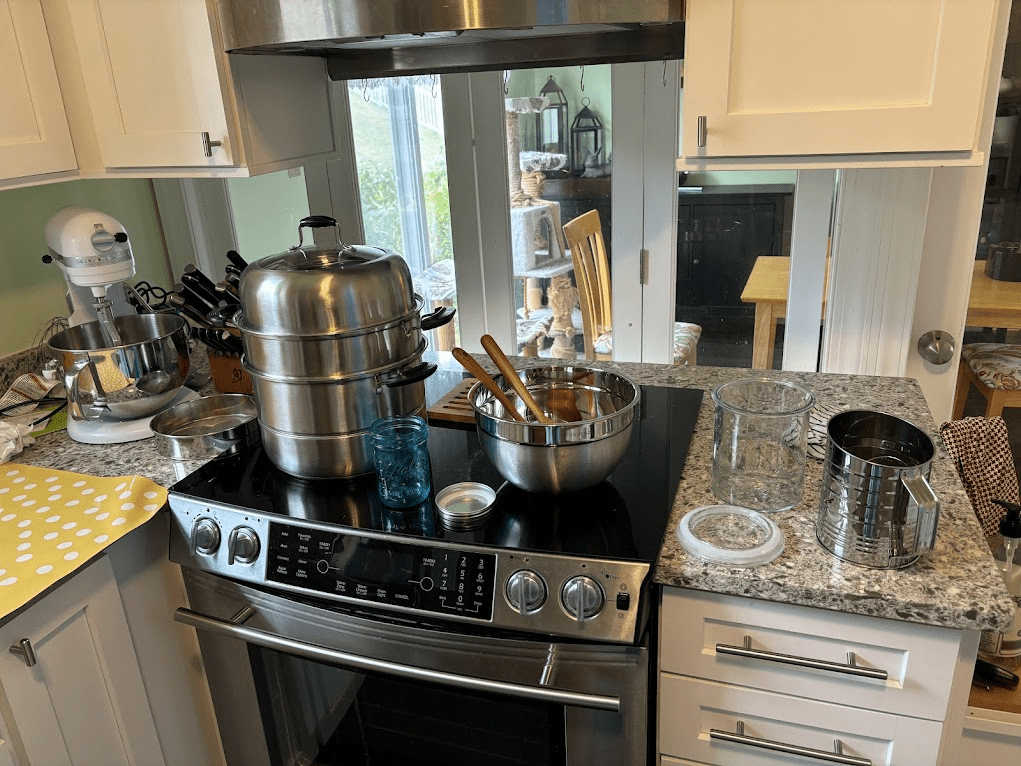
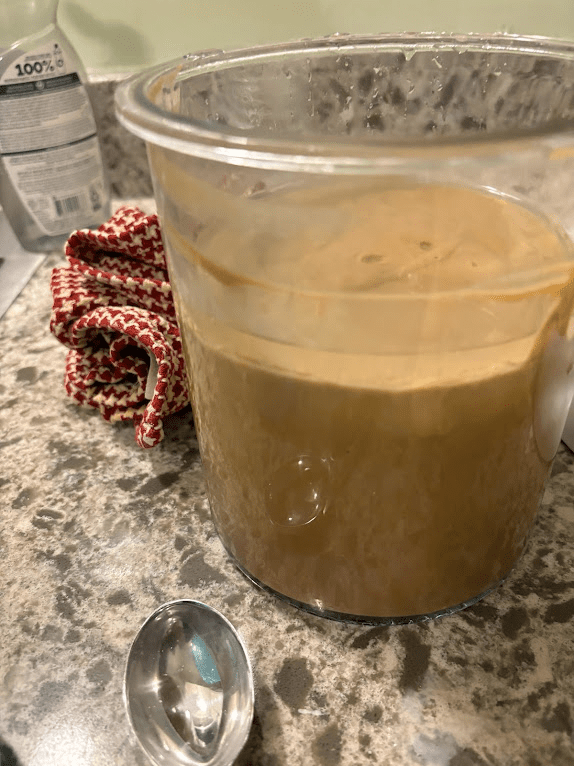
*Safety Note: Do not use your regular food equipment for making resist paste. The paste ingredients are not sanitized for human consumption, so please purchase separate tools. The mixer pictured, while being in my kitchen that I cook in, is only ever used for paste, as are all the tools pictured.


Paste Application

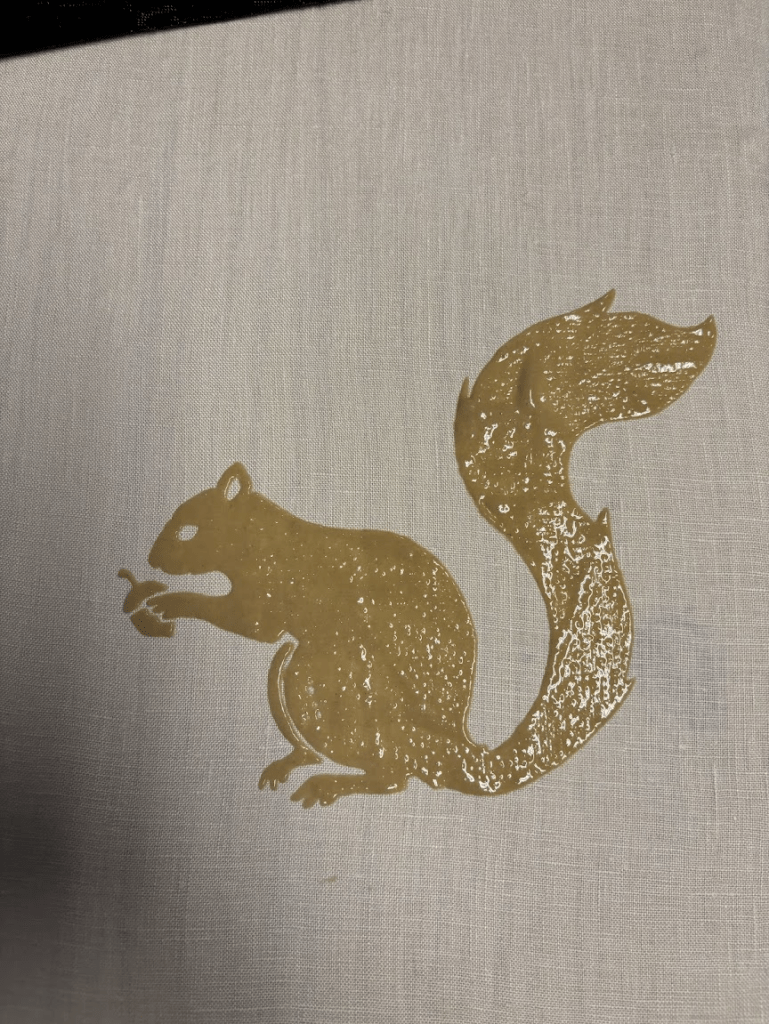
Laying paste is probably the most difficult part of the process, and it seems to take the longest to master. When you’re starting out, it’s good to pick simple, less delicate patterns with forgiving smooth edges, like flowers or animal shapes, and not too many fine details. As your paste and paste laying skills improve, more precise and intricate patterns will seem more approachable.
To lay the paste, you will need some sort of spatula to apply it. There are quite a few options. My favorite tool is a handled spreader, called a debabera. However, I sometimes use a rectangular one, and I also use a plastic pastry knife.


To begin, you will want to soak your stencils if they are made of kakishibu paper. It’s important to do this in a way that keeps the stencils flat or straightens them if they have curled (this is common when drying).
Many professional dyers use two pieces of lacquered plywood or wood to press the stencils after spraying them down with water. They simply put the stencil in between the two waterproofed layers, optionally putting a weight on top if the boards themselves aren’t heavy.
If you don’t have this setup, pretty much any configuration of two sheets of plastic will do. Before I made my soaking press out of thick acrylic and plywood, I often used two plastic mortar pans stacked together with a weight on top. If the stencil was small, I used two enamel art pans.
If you are going to use the stencils for a very long time and don’t want them to dry out, some dyers use saltwater to help.
Once the stencils are in their press, wait at least an hour before pulling them out. Overnight is common among stencil dyers, so it’s good to get in the habit of soaking your stencils the day before you make your paste.
Once the stencils have soaked long enough, you will want to warm up your paste if you stored it in the fridge. If your paste is fresh made and warm, you can disregard this step. Otherwise, put your container in a bowl of hot water, and get some hot water ready to dilute it. If it’s a warm and sunny day, put it outside.

When you are ready to lay paste, put your paste in a container that is easy to scoop from, and dilute it until it is the consistency of thick icing or easily spreadable peanut butter. It’s best not to dilute all the paste at once in case you over-dilute. Add water conservatively. If the paste is too wet, it will seep under the stencil and blur fine details. If it’s too stiff, it won’t spread well or fill out fine details, and will tend to be broken up by the grid pattern, sometimes even coming back up with the gauze.

It’s nice to have something to keep the paste container off the fabric while you move down the line. I’m using an old monitor stand here, but any raised platform, or even a rolling cart, will work.
You will want to take your stencil out of the water and dab it off with clean newsprint paper or paper towels, or an old towel. The goal is to have a damp stencil, not a dripping wet one. If the stencil is too wet, it will wet the paste and the fabric and make the paste run and blur.
Laying the paste is the trickiest part, so give yourself some grace when getting started. If it’s your first time with a paste recipe or stencil, you can take some newsprint or acrylic sheeting and practice laying the paste with the stencil to make sure everything works. This will give you an opportunity to adjust your paste, and also to double check that your stencil performs as expected. Some stencils have tricky areas you need to be careful with, and this will help you learn where those are.
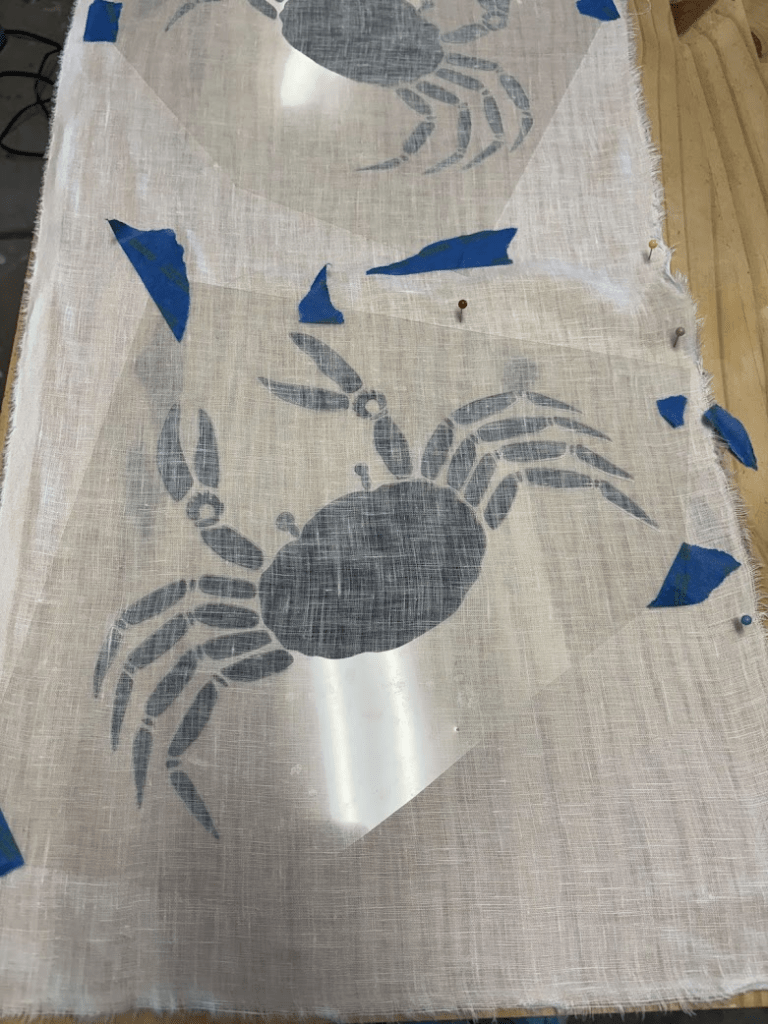
You will need to secure the stencil to the board somehow. Typically, this is done with needles on bamboo sticks that go in premade stencils holes on either side of the pasteboard. These holes can even be used for pattern registration. If you’re working with a smaller stencil that doesn’t span the bolt width, both painter’s tape and needles on one side work – you can often even reuse the tape. The tape has to be removed carefully, with one hand holding down the stencil, to avoid shaking the stencil and laid paste, but it offers fabulous versatility.
Some dyers are so talented they can hold the stencil perfectly still while pasting. That is not me. I need tape.


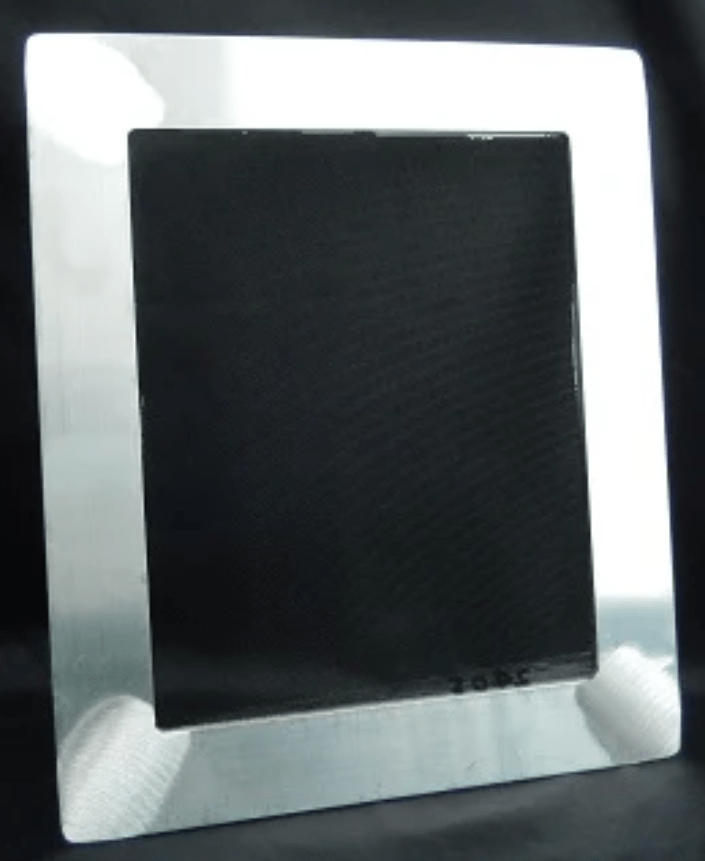
If you have a stencil that is not laying flat or coming up in certain places, this can be helped with practicing your paste laying technique, but it can also be helped with a ‘screen’ that is sold by some dye suppliers. The screen is an aluminum frame with a tightly stretched piece of stencil gauze over it. It is very delicate, but it works very well on wiggly white background stencils. Be sure to lift the frame and the stencil together off the paste – you may need a thin spatula to get under them to do that. Some of my worst errors come from the stencil falling off the screen as I peeled it off the fabric, and making a huge mess.
The motion for laying paste differs among dyers. What has worked well for me is to go over the stencil at least twice, with the grain of the gauze (horizontally). The first pass is essentially to push the paste onto the fabric and through the gauze, and the second pass is to even out the paste and fill in any gaps. You want a clean, even layer of paste, about a milimeter thick, with no gaps or pinholes.

If your paste is a little thicker, that’s pretty common for a beginner, but thicker paste tends to split and crack, and it doesn’t really offer any extra protection beyond the first milimeter, and starts to have bleed and distortion issues if you really pile on the paste. If you’re using the screen, the height of the screen and the stencil combined is quite sufficient for the paste, you don’t need to have it on above that.
Notice that you’re essentially moving the spatula in a back and forth motion at each corner, never stopping. Most stencils have a larger portion of uncut paper or mylar on one end (sometimes all of them), allowing you to make a ‘well’ of paste where you can push excess.
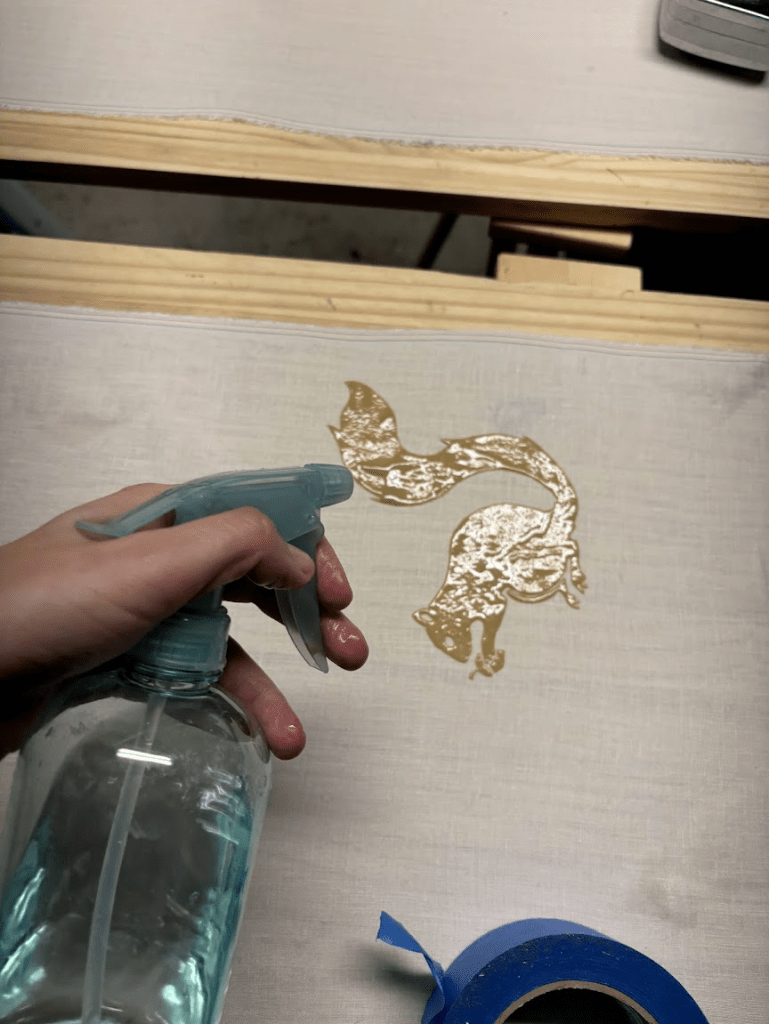
If you’re using a stencil that has gauze or a frame, spray the stencil with a very gentle mist of water when you’re done. This helps the gridlines disappear.
The below stencil dyer has a colorant their paste – this is common in some modern studios to make the paste more visible and errors easier to spot. They are using some pins to support their stencil while working on a repeating pattern. You can see how they put down the paste in the middle of the stencil instead of on top of the pattern. This is a behaviour forced by the repeat, as you cannot well paste at the top when it’s being suspended up by pins.
To begin, try to choose a pattern that either doesn’t repeat or repeats with large breaks so you don’t have to master working with a pattern that needs pins on your first attempt.
Inevitably, you might get a misprint where some paste goes astray. If it’s truly bad, you can peel the whole piece of fabric off the board and wash off the paste. If you aren’t using soymilk as your sizing and are instead using sodium alginate, there’s some hope of correction if it’s a small error. I use a tiny screwdriver to scrape off the offending stray paste and move it to where it wants to be. Act quickly, and don’t push the paste into the fabric – scoop it off or into a paste-filled section gently. Later, before you have applied sizing and the fabric is suspended on shinshi, you can repeat this and try to scrub out any remaining bits with a wet detail brush. Be sure to re-size over any areas you scrub.
The stencil will slowly become clogged with dry paste as you work, especially if you are alternating between multiple stencils. Try to notice this before it happens, and then rinse the stencil off and scrub it very gently with a tawashi brush before resuming. If it gets very bad, it will be obvious, because parts of the pattern will be blocked by the glue.
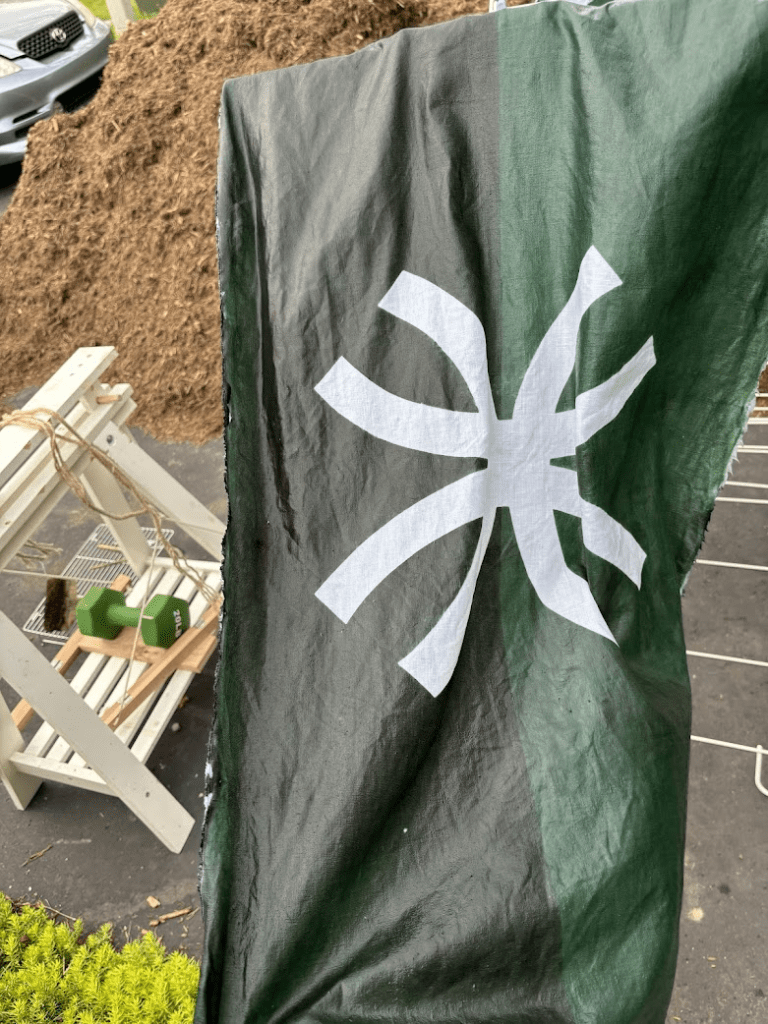
If you are just learning, there’s a good chance your pasteup won’t be perfect and you’ll need to live with small errors. The charm of katazome is that it looks handmade, and once the dye is down it often minimizes the appearance of mistakes. However, for the best results on your first few pasteups, try to pick disconnected, organic patterns without straight lines, perfectly round circles, or extremely fine detail. Most of the patterns shown in this tutorial are good examples – animals, birds, leaves, flowers. A flower or a bat with some errors just looks like a flower or a bat with character. A perfectly arranged set of triangles contains very noticeable mistakes if there are any distortions or paste slippages.
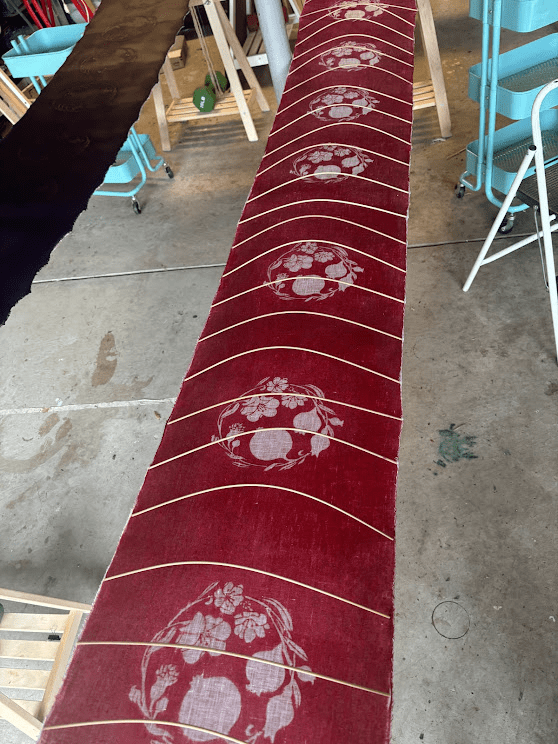
If you are dyeing indigo, you can choose to paste only one side or both sides of the fabric. Pasting one side will give a softer resist that is partially penetrated on the other side. Pasting both sides will make a clear white.
For indigo’s double sided paste, mix in either sappanwood powder (very fine) or blue butterfly pea flower powder (my preference). This will color the paste on the first side, making it easier to line up the stencils with the existing paste on the reverse. Allow the colored paste to dry fully. Then, remove the fabric from the pasteboard, and put down the mirror image, aligning the stencils by looking through the fabric at the colored paste. You may need less paste applied more thinly on the reverse, as the fabric is already partially pasted up.


Once you are done laying paste, immediately and thoroughly clean all your equipment. Any paste left on surfaces will harden and become miserable to clean off. Your stencils should also be cleaned off immediately and left to dry on a flat surface. I like to use an old wire shelf rack to dry my stencils, because it’s flat but also open on the bottom.
Paste that wasn’t used can be stored in the fridge with a thin layer of water on top to keep it from hardening. A lidded container helps as well. The longest paste has ever kept for me is 10 days. If the paste smells off or fermented, throw it away and make more.
4. Mounting

Once the paste is dried, the fabric is removed from the pasteboard and suspended from shinshi and harite. Shinshi are long thin bamboo rods with needles on either end. Harite are wooden clamps with needle “teeth” that hold the fabric along the length of the weft. Shinshi can be made on your own if you have a good source of very thick, old bamboo (like 2-3″ in diameter), but they take some practice. Ready made shinshi are cheap compared to alternatives like spring steel or carbon fiber. I recommend buying a small set of shinshi to start to understand what they are like. Personally, I am bad at splitting bamboo well and am happy to support Japanese craftsman.
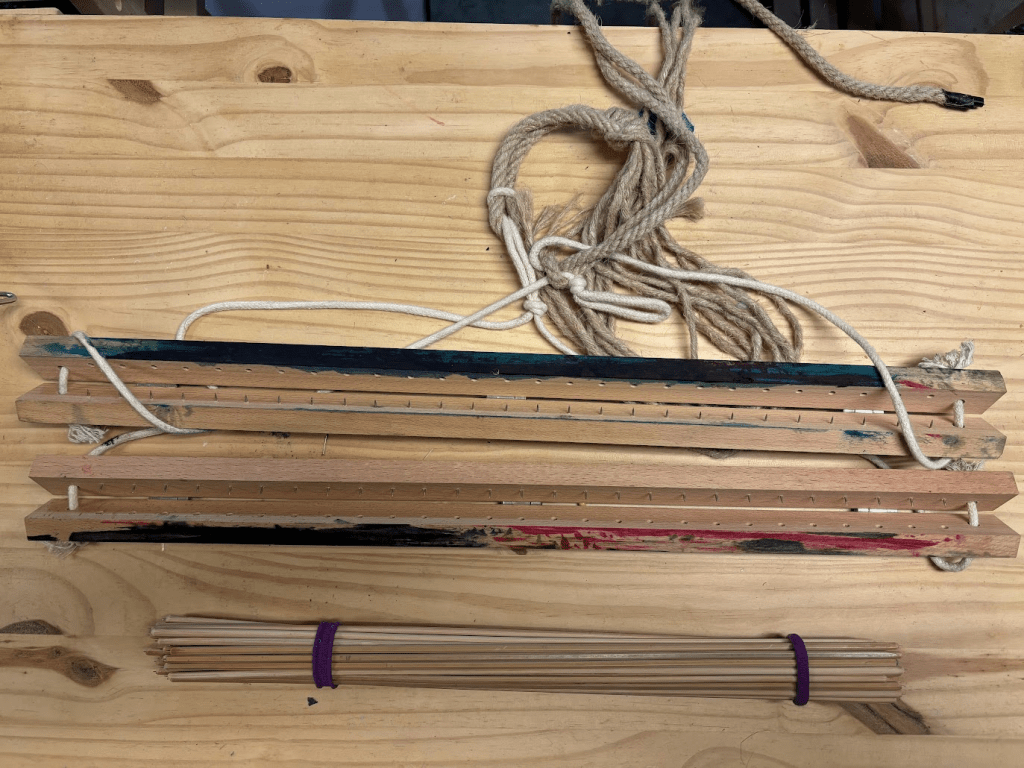
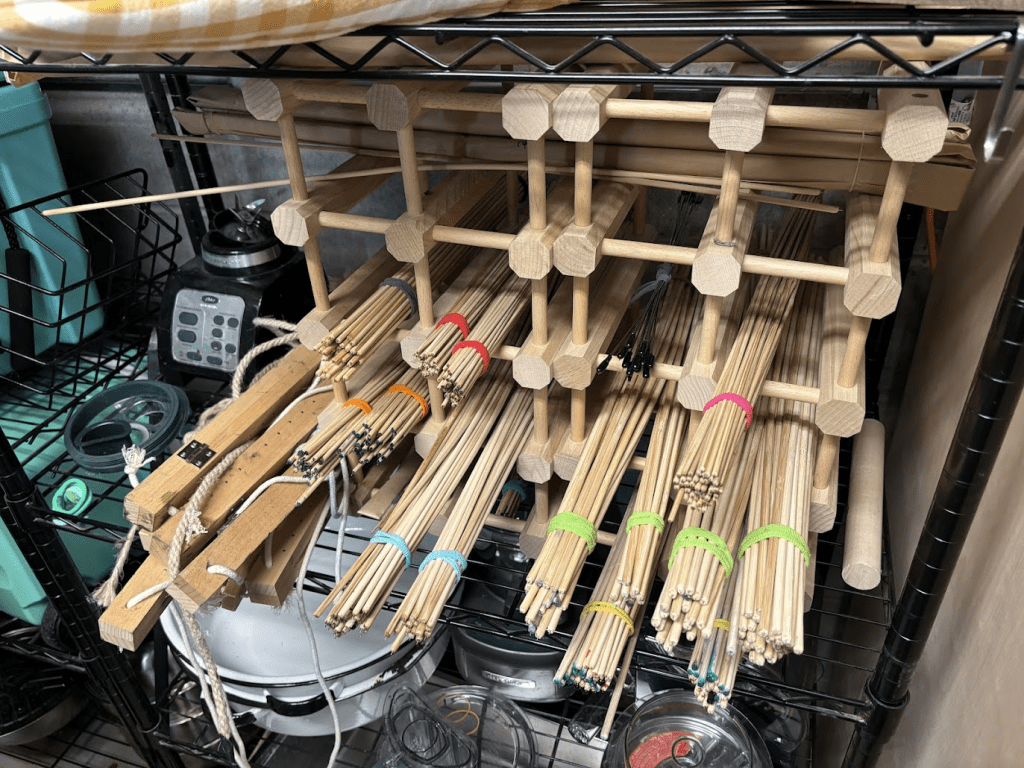
Before using the shinshi, soak them in hot water for 30 minutes to loosen them up and make them less likely to break. If you’re dyeing a project that will not be sewn after (like a tenugui or tapestry) you may want to put vinyl screw caps on the end of your shinshi to keep them from staining the fabric with last project’s leftover dye. Otherwise, any backstaining will likely be minimal and hid in the seam allowance. I find the caps difficult to remove personally, but I have seem some studios in Kyoto using this strategy, and it is effective.
The purpose of shinshi and harite is to suspend the fabric in such a way that dye doesn’t well up underneath and bleed (like it would on the pasteboard) while keeping it taut and straight for dyeing. As the fabric gets wet, the fabric will tend to sag, and so the harite can simply be tied tighter with shorter rope to keep tension. If the shinshi are sizes approprialty, they will also continue to apply tension as the wet fabric stretches a bit more in the weft direction.
Generally, shinshi should be about 10% longer than their fabric. The diameter depends on the stiffness of the fabric, and if you are not sure what is right for a given fabric, I recommend emailing Aikuma’s customer service and asking them for a recommendation. Harite need to be least the width of the fabric, though if you have a harite that is comically long compared to the width of your fiber you may need to stabilize the ends to a fixed position or size down, as it will want to flip and twist.
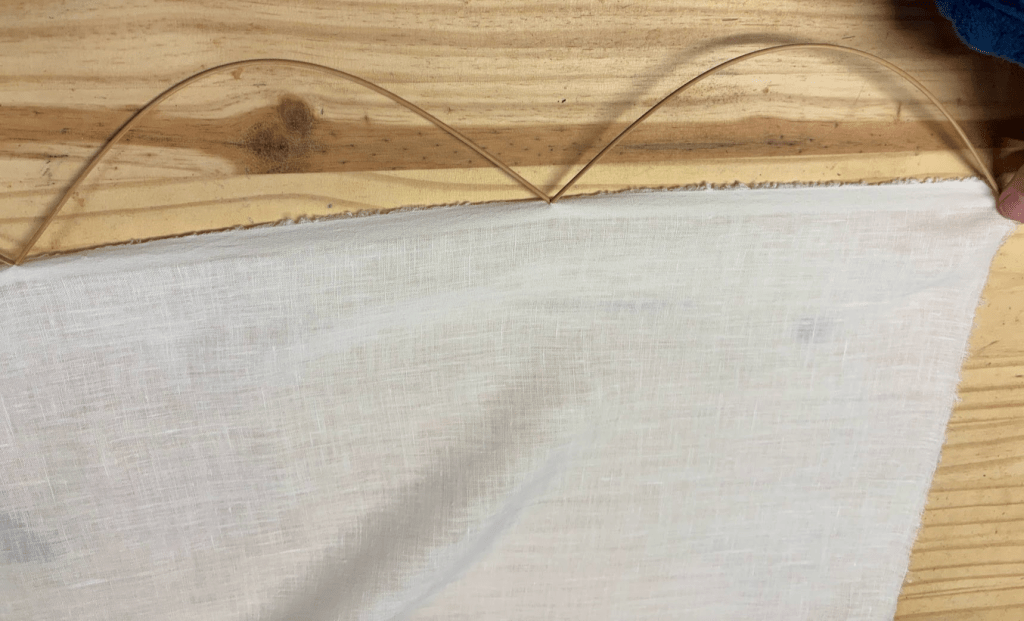
To mount the fabric, gently remove the fabric from the pasteboard. Next, clamp on the harite to each end of the bolt. Tie the ends of the string around each end of the harite, or use an elastic hair tie or scrunchie. Tie each harite to a post, beam, or other secure hook, and tighten the knot so that the fabric is taught. It is often helpful to have another person to help move the fabric and hold on to one end while you tie the other.
Once the harite are tied and the fabric bolt is taut, flip it over, and place the shinshi about every ten centimeters along the fabric. Make sure they are straight with the weft of the fabric, and bend them gently – they are easy to break.
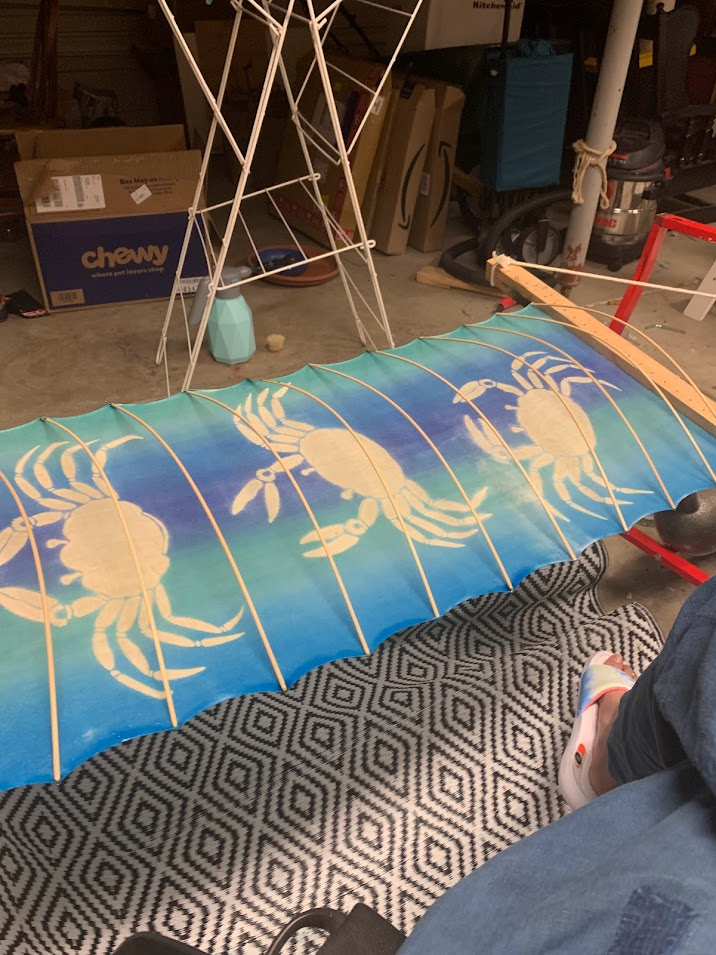
In the case of indigo dyeing or other vat dyes, the shinshi are applied along one side of the fabric and the sizing step that follows can be omitted.
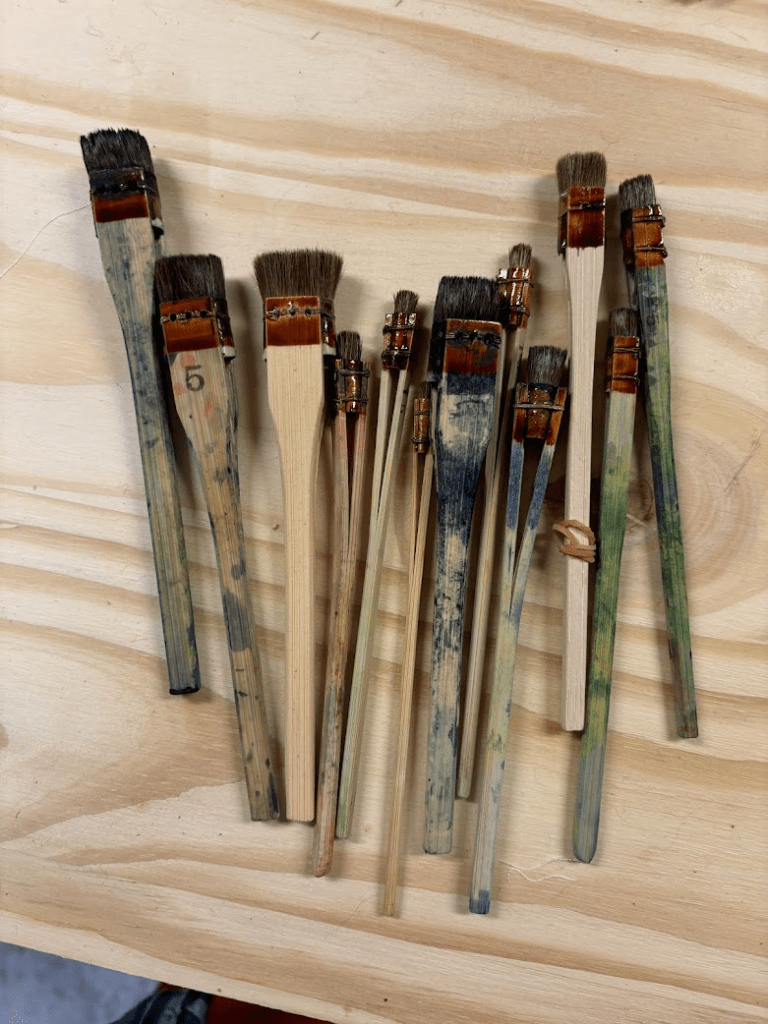
Brushes
It should be noted that the traditional brushes used to apply sizing and large sections of dye, called hikizome, are unique and there is really not good substitute for them. The best short-term substitute is a wool hake brush or a particularly soft bristled pastry or paint brush, but you will need to be careful not to overapply sizing as they are more absorbent. They are also harder to hold comfortably in the right posture for a long time, and they are sometimes not as soft, so they do not glide over the paste quite right and they tend to disturb it more.
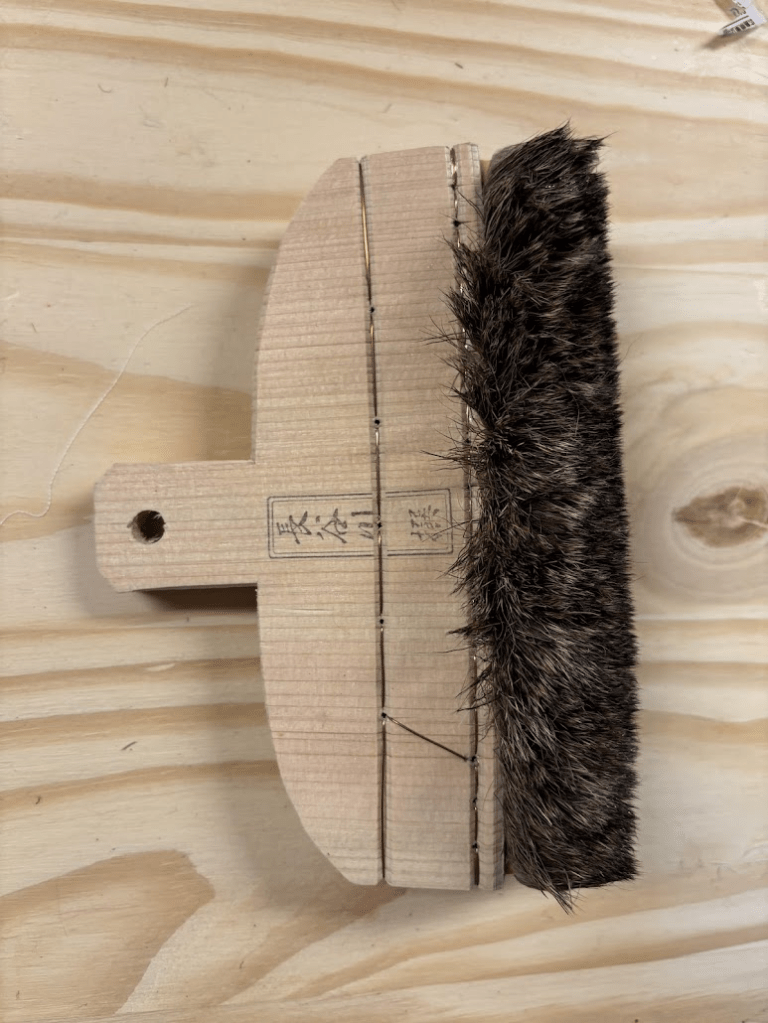

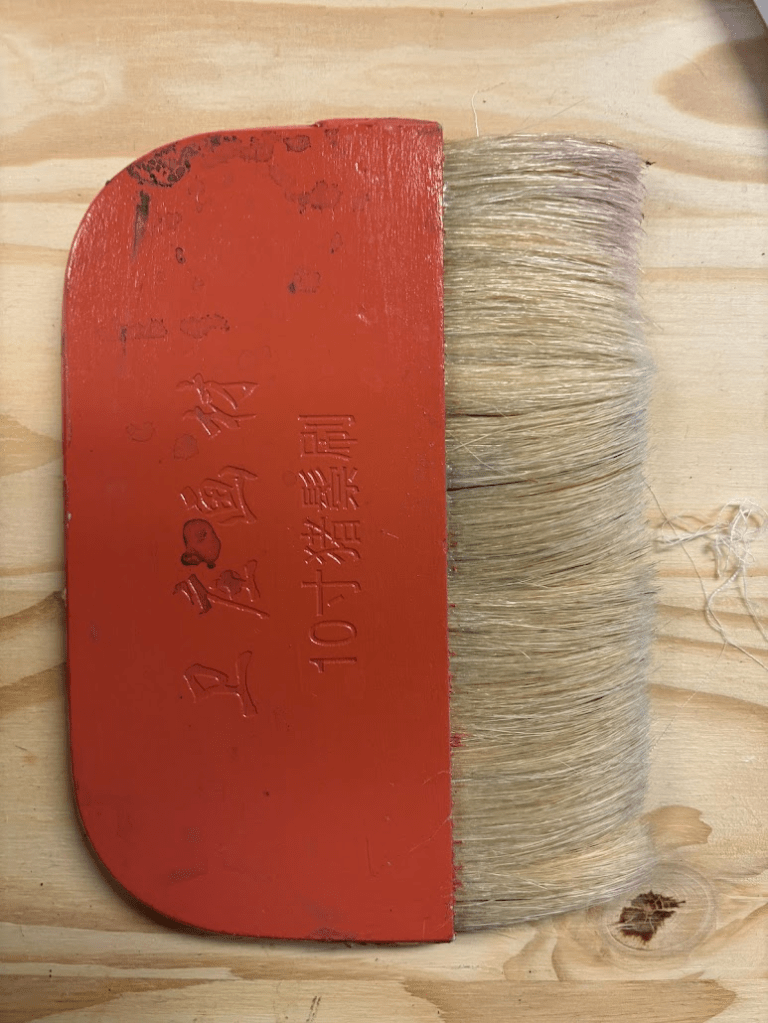
One of the features of the hikizome brushes is they are designed to be immersed in water for 30 minutes before being used. This causes their wood handle to swell and prevents it from shedding hair. They also need to need to soak for 30 minutes after to remove dye or sizing, and then dry thoroughly as they are prone to mold. I use put them on top of a running dehumidifier’s airstream or directly in front of a fan. Some Japanese dyeshops use preservatives to store their brushes. I put them in sealed plastic bins in a climate-controlled basement with lavender sachets. Japan is a very humid place in the summer, so you made need extra precautions depending on your climate.
You will need a separate brush for different type of sizing as it doesn’t totally wash out, and the same is true of any mordants or dye color families. You will end up with an alum brush, a soymilk brush, a red brush, a blue brush, and a yellow brush… and so on. It gets expensive, so buy a cheap pack of wool row brushes to start, and then upgrade as you can budget. In the pictures below, I am using cheap wool row brushes to apply sizing.
The quality of the brush matters more at the dye stage than the sizing or mordanting stage, so put your investments into dye brushes first.
Sizing
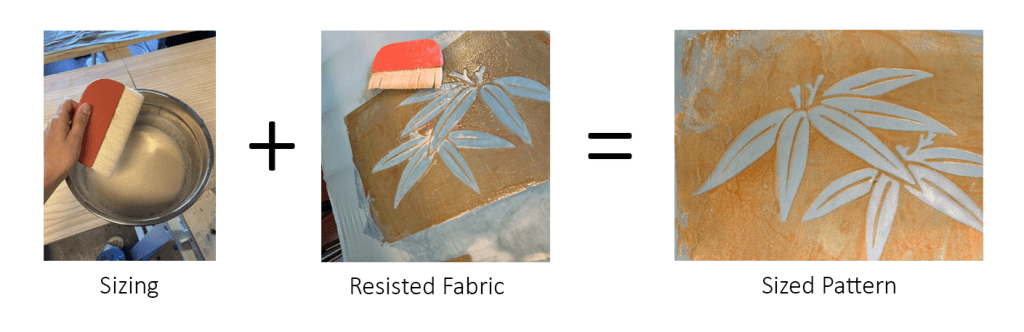
Sizing is applied to the fabric to help the dye absorb evenly. It also has the nice effect of stiffening the fabric a little bit, making it easier to apply dye. Soymilk sizing hardens the paste and makes it extra tough, while sodium alginate sizing gels it and allows you to scrape off mistakes (somewhat).
Sizing is typically made with soymilk for natural dyes (including indigo), or sodium alginate for procion dyes. Soymilk may cause streaking for procion dyes. Sodium alginate can be used for natural dyes as well, but it lacks the protein content of soymilk, so there are both benefits and drawbacks to this approach.
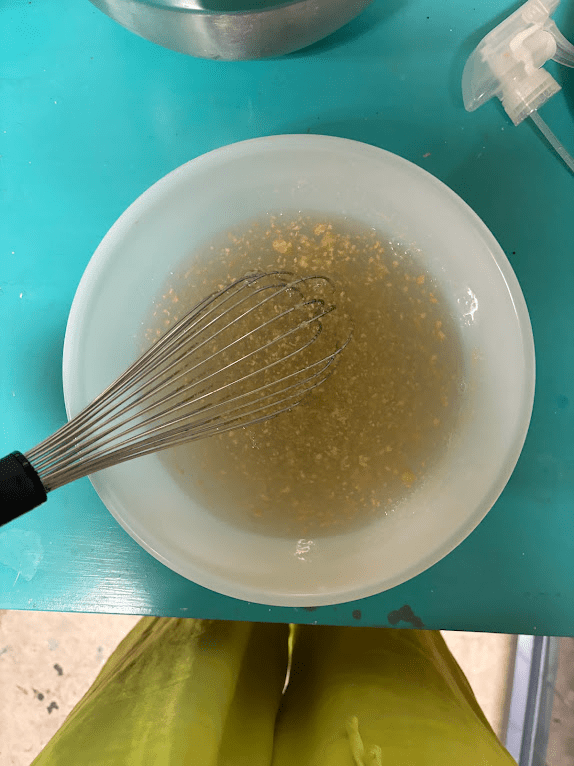
I usually make a solution of 1% sodium alginate – that is, 10 grams of sodium alginate to 1000 ml (1 liter) of water. It is best dissolved in hot water and left to settle for a few hours to truly dissolve, though you may be able to get it to mix all the way with a whisk and a strong arm. Sodium alginate sizing usually only needs to be applied once. Every sodium alginate supplier is a little different so you may find you need a bit more or less. I purchase my sodium alginate from Dharma Trading, and I buy the one marked for cotton (High Viscosity).
For soymilk sizing, I buy soymilk powder and I mix it at a 5% ratio in hot water. Some people like to make their own soymilk, I like the convenience of the mix and find it performs acceptably. I buy soymilk powder that is only soy protein, and not ones with any additives.
Sizing is applied with a certain motion to make it even, as shown in the video below. The video uses red dye to make the motion more obvious, but the mechanism is the same. Try to use the edge of the bowl to scrape excess dye off the brush. If you are nervous, you can use a paper towel to check how much dye you have on the brush before starting. It should be enough to spread a clean brush line of sizing, but not so much you are slathering it everywhere. It takes some time to get a feel for it.
Depending on the brush you use, it might be easier to move the blade of the brush down the fabric’s weft, so that the brush makes a thin, straight line of dye that’s then spread out. The chinese row brushes don’t really like this style of movement, so I adapted it and used the wide flat of the brush instead. The hikizome brushes specially designed for dye tolerate both movement patterns, hower, they seem to be optimized to draw a thin line down the weft, and then spread out the dye. Watch the professional below to see another movement pattern that works well with the big hikizome brush.
5. Dyeing
Next, once the sizing is completely dried, dye is applied.
There are many options for dyes, and each has their own mordanting and application process. I’m going to cover procion dyes (a fiber reactive synthetic dye) and indigo in this post in detail. Both of these dyes are affordable and relatively non-toxic; they are good options for beginners getting started.
I am not covering any other natural dyes beyond indigo. Other natural dyes require the most sophisticated and varied process, and I will need to give them individual treatment. If you are curious about katazome dyeing with natural dyes, there is a book in Japanese by the famous Seiji Yamazaki with detailed recipes, and then Nakano’s book has a small set of instructions for some dyes. If you want to get started with natural dyes first, try using a substantive dye like gardenia, walnut, amur cork, avocado pit or barberry instead of one that requires a mordant like madder or murasaki. This will allow you to explore the process with fewer steps, and fewer applications of liquid on your paste. Natural dyes can take up to ten applications to get a deep color, so it’s important to make a very strong paste, which takes experience and practice. In contrast, indigo only takes a few dips, and procion can get away with only two coats if you apply it evenly.
Indigo
If dyeing in indigo, sizing is not needed, though some dyers choose to apply soymilk beforehand for richer color and better fastness. Personally, I don’t like how soymilk changes the hand of the fabric and I like the dye directly on the substrate as much as possible, but this is a preference, and the soymilk treatment is very popular. There are advantages and disadvantages to both approaches, and I encourage you to try samples of both. There is a strong case to be made concerning how much soy strengthens the paste, and I hope to cover that in a future post. John Marshall discusses the advantages of soy for indigo dyeing in depth in his book Singing the Blues.
To dye the fabric, mount on the edges shinshi horizontally. Alternate the side of the fabric each end of the shinshi is placed on. Dip the bolt in cold water for a maximum of ten seconds before the first dip in the fat. Then the bolt is simply dipped in the vat very gently with minimal agitation, as many times as needed to achieve the desired color. The paste does start to break down rather quickly, especially if you don’t use soy. When you’re just starting out, try to make your vat strong enough to get the color you want in 2-4 dips. A single dip is rather uneven. The dips are not long, maybe 30 seconds to a minute at most.
Western dyers may be tempted to dip for longer. Don’t. I know that modern workshops and books like The Art and Science of Natural Dyes encourage long dips, but I get perfectly even dyes with dips no longer than a minute at most, and if you use their recommended 20 minutes for katazome you will have literally no paste left and your pattern will be destroyed. Scouring well, and even spacing on the shinshi with plenty of room/opening the folds, will ensure your dip is even.
How to set up an indigo vat is beyond the scope of this page. I recommend the Art & Science of Natural Dyes for natural indigo instructions, or John Marshall’s indigo book, Singing the Blues. For pre reduced indigo, I like to buy supplies from Pro Chemical and Dye because they stock Thioxx, a gentler and less odorous reducer than hydrosulfate. Because of the odors from the reducer, I always run my synthetic vats outside or in the garage doorway.
Try to make your vat as deep as your fabric’s width. This may require you to purchase a rope handled tub or a tough tote depending on the shape you need. If you’re using a natural plant indigo, you will need extra space at the bottom for the sediment, usually 1/3 more or up to 1/2. You can use a mesh screen at the bottom to keep sukumo from floating up.


In the video above, I eventually had to get out my hand to dip the last few cm into the bucket (I was filming with my other hand), but you can see the gentleness with which the fabric is handled. You can fan folds gently apart to expose all the fabric equally, but this isn’t necessary if you can space everything properly like in the big vat below. The first method is the traditional method designed for round indigo vats, the second is more fool proof and accessible for beginners.
Fiber Reactive (Procion MX) Dyes
Fiber reactive dyes are some of the gentlest synthetic dyes that exist, and they are easy and accessible to beginners. As a reminder, they do not work on polyester or any plastic fibers. They were originally developed to dye protein fibers, but produced disappointing results, so while they do work on wool, silk, and alpaca, the colors will shift and bleed, and a heat set is often needed. Consult the manufacturer’s instructions for protein dyeing. I strongly recommend sticking with plant fibers for your first few designs, and using acid dyes for proteins after you have built experience.
Excellent research and overviews of these dyes can be found on Paula Burch’s website. Good suppliers of Procion MX in the US are Dharma (west coast) and Pro Chemical and Dye (east coast).
You will need to mix the dyes with something called chemical water. The ingredients of chemical water all serve different roles:
- Sodium alginate – also used for sizing, thickens the dye so it doesn’t seep under the paste (procion dyes are the most aggressive and tend to seep the most, some natural dyes don’t need thickeners at all).
- Urea – helps the dye dissolve, especially reds, which tend not to like to dissolve.
- Soda ash – acts as an alkalizer which starts the fiber reactive dye process when the dye is added.
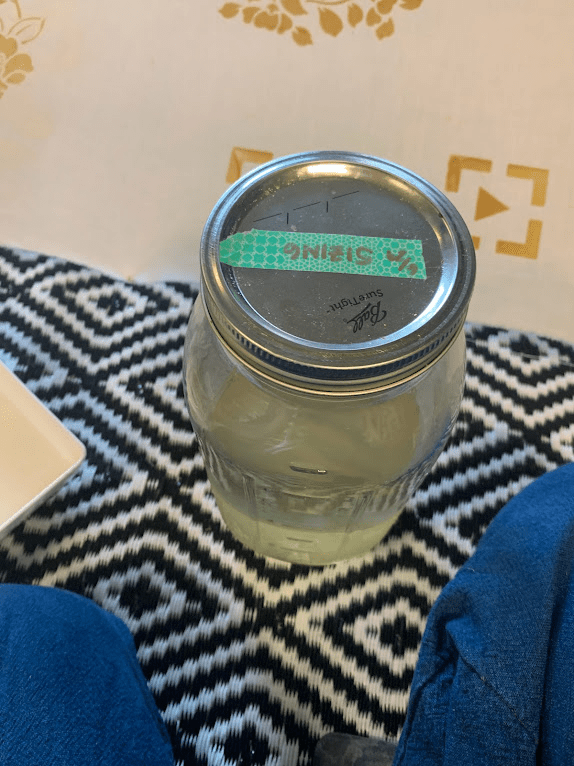
You can make a large batch of chemical water and store it in the fridge. I store mine in a special mini fridge for dye solutions in my studio. If you want to store it in your food fridge, clearly label it as not food, and wipe off and clean the outside thoroughly of any drips so no food containers are contaminated.
Pre-Alkalized Chemical Water
Can be stored in the refrigerator (clearly mark it).
13 grams of High Viscosity Sodium Alginate
100 grams of Urea
1 liter of Hot Water
1 tsp Soda Ash
- Test the ph of the water with a ph strip. Procion mx dyes perform best at a PH of 10-11.1. A gram/half teaspoon at a time, add soda ash, dissolve, and retest. Stop when you get to the ideal ph for your dye. If don’t have ph strips, just add a teaspoon of soda ash. The process will still work well enough.
- Dissolve the urea in the hot water.
- Add the alginate a little bit at a time. Mix thoroughly with a whisk, and allow to rest for a few hours so the alginate will dissolve fully.
I find this formulation more convenient than the published ones because all I have to do is add dye after mixing it, so I don’t end up diluting the mix twice to dissolve the soda ash and the dye.
When you have laid your fabric out on the pasteboard and are ready to begin, you can mix the dye with the chemical water. If you are coming from an immersion dyeing background, you are going to be used to using a weight of fiber calculation to figure out how much dye to use. With direct application, it is more about the concentration of the liquid itself than the WOF ratio, because it is a surface area problem rather than a WOF problem, and you will not be penetrating fully through the fabric.
In general, a 5% dye solution in chemical water tends to yield good results for me that match swatches or go a little darker. I use dharma’s dye yield estimator and the (**) next to the dye to judge how much color I want to add. If I’m dyeing black or bright red or turqoise, I may adjust the dye amount to 10% and do four coats of color instead of my usual two to three. If I want a delicate color instead of a deep one, I will use less dye. 1-6% are valid solutions.
The following recipe will give reliable results for most colors, but you may benefit from adding more dye for weaker dyes.
Procion MX Dye Solution
Ingredients
This recipe gives a dye solution at a strength of about 4-5%, depending on how much hot water you need to dissolve the dye. Some dyes simply require a bit more water, reds and blacks especially.
15 grams of Procion MX Dye
Hot water
1 cup of pre-alkalized chemical water
Instructions
- Using as little hot water as possible, (I can usually manage 1/3 to 1/4 a cup), dissolve the dye as fully as possible. Swirl and whisk.
- Strain the dissolved dye through a fine mesh, pouring the solution into a bowl that your dye brush can fit in.
- Add chemical water and whisk thoroughly.
This dye solution does not keep, and it begins to fade after about an hour. For large projects, mix no more than you can use in one hour, and set a timer. After an hour, you can use the dye to dip fabrics in for immersion projects, but it will be faded, so use it strategically. You can also just discard it (in accordance with your local water treatment plant’s rules). Do *not* discard it into the groundwater.
The amount of liquid you are going to need will vary, and at a certain point you can’t make the recipe any smaller without a scale that measures into decigrams. One cup of dye solutions covers about 1-1.5 square yards of handkerchief weight linen for me. I typically dye about 3 square yards at a time and usually need to make 2-3 cups of dye for one pass. Running out in the middle of a bolt is bad because it will make your dye uneven, so I recommend making a little extra the first few times and measuring how much you use.
Background Dyeing
Use the following movement pattern, just like the sizing, to do your one-color dyeing. As a friendly reminder, I am holding the brush in a little bit different way because of its size; take a look out how it is done with a large brush in the professional video below mine.
Move down the fabric, this way, rewetting your brush as needed. When you reach the end, go back over the fabric with your brush from the end to the beginning, evening out as much as you can, but not adding more dye unless it your brush and the fabric are totally dry.
You will need to repeat this process two to four times to get an even color. Start at the opposite end from where you began the previous time.
Detail Dyeing
If you have small sections of color that need to be applied, these are not applied with a large brush and a sweeping motion. The most common brush for filling in sections of detail is called a surikomi brush, and it’s used in a round, rubbing motion. Surikomi brushes are fairly reasonably priced, but if you need something cheap, simple white wool calligraphy brushes with the tops lopped off will suffice.
With detail colors, the approach to multiple layers depends on how you want to blend the dyes. If you simply want discrete areas of color, you can layer them multiple times like the single color background dyes. If you want softly blended areas of color like the video above, you have to do them all at once and mix the dye with enough intensity that you only need one layer. The other option is to put down the darker color first, giving it soft edges with a wet surikomi brush or maruhake brush, and then after that has dried, fill in overtop with a lighter color.
This is the inverse of what works in conventional painting – where you paint the light colors first, then slowly darkening. However, if you try that approach with fiber reactive dyes, you will find that the top dark layer doesn’t stick very much if at all. Fiber reactive dyes bind to the fabric directly, so the color that – shows the most is the first layer of dye. Subsequent dyes may blend on top, but they will often not reach their advertised color.

There are some other brush shapes used for lining and filling – often for filling concave spaces such as the space around flowers, clouds, etc. These are the sashihake (差し刷毛) These do not use the grinding, rubbing motion that the surihake use, but instead have their own motions that are more like traditional painting brushwork. You can watch in the professional video below.

There are many more dye techniques you can explore, such as using cover up paste, embellishing with tsutsugaki, and different layering techniques. I recommend starting simple with easy patterns and working your way into more complex processes.
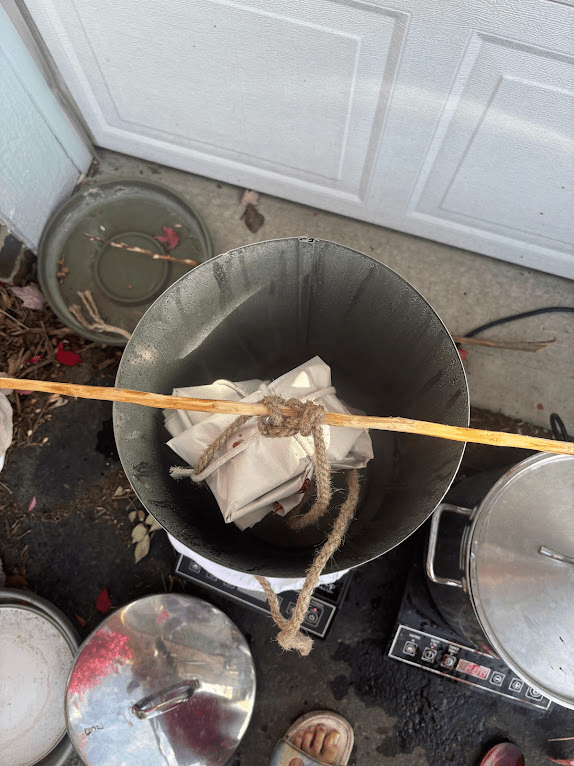
Steaming
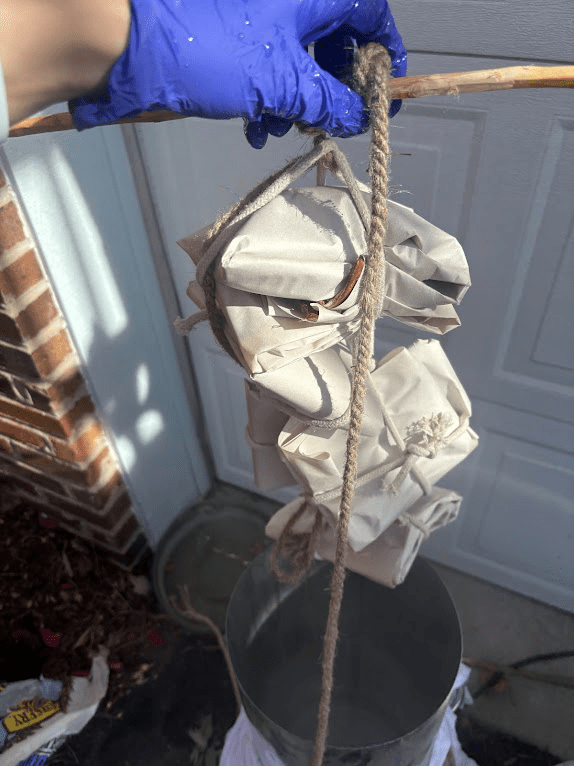
Some dyes will require a steam bath to set. Procion dyes don’t need this, but acid dyes and most natural dyes other than indigo and kakishibu do. Most dyeing studios have a chamber for steaming. You can roll up fabric over a lobster pot and put it in a steel column.
Lay the fabric with an old sheet or paper, roll loosely and tie. Suspend from a dowel with string.
Follow the manufacturer’s recommendations for the dyes, but as a general rule: 50 to 60 minutes for acid or vegetable dyes.
Remove parcel from steamer and unwrap quickly so that condensation does not form~!

6. Washing

Once the fabric is dry and the dye is fully set, the paste is washed out. Traditionally, fabric was put in the river, which gently washed the paste away. Modernly, long shallow sinks or underground manmade rivers are used by dyehouses. If you don’t have a utility sink, I recommend purchasing a few mortar pans from the home improvement store and pouring the wastewater into a toliet or a large drain. I don’t personally recommend using your bathtub because dye may stain the surrounding grout, and the paste may clog the tub drain. I don’t recommend using your kitchen sink because it is used for food.
Washing the fabric requires a gentle touch. The fabric cannot be put directly under the faucet, nor can excessive force be used to clean off the paste. Additionally, free dye that floats in the wash water can backstain the fabric, so the water must be changed constantly to avoid contamination.
Wash the fabric in three steps: first, soak the fabric in cold water to let excess dye bleed out. Hot water should never be used first with procion dyes, as any leftover soda ash will encourage the dye to be too closely associated with the fabric and slowly wash out over many washes. I know that the synthraprol instructions say to use hot water, but simply washing a second time in warm water at the end when everything has already been washed out is sufficient for procion dyes.
Change the water as needed, don’t allow too much free dye to build up. If you’re using mortar tubs, move the fabric to another tub when the dye gets thick, and dispose of the wastewater.
Secondly, once the dye bleed has slowed, rinse off the paste. If you’re using a sink without a disposal, try to dilute and break up clumps of paste so you don’t clog your pipes. Stretch the fabric along the bias to peel the paste off. The remaining stubborn clumps can be brushed off, lightly, with a side to side motion, using a brush. My favorite brush to use is a cheap tawashi brush.
Finally, you can rinse again in cold water thoroughly, and then switch to hot water for two subsequent washes with detergent. I like synthraprol, the cheap alternative many dyers use is dawn dish soap. Really, the detergent doesn’t matter much so long as it’s relatively gentle. The most important thing is one thorough cold rinse first, and then two hot washes. Paula Burch has a good explanation of washing your fabric.
Keep in mind that for natural dyes, you may need to wash differently, as some of them are ph dependent. Indigo is tough as hell, but fades with abrasion, so gentle cycles are best for it. If you’ve seen jeans fading on the knees, that’s how indigo responds to constant rubbing. Indigo also benefits from hot water and vinegar treatment after the paste is cleaned off; this is to neutralize the alkaline environment of the vat.
It is also important to soak your shinshi for a few hours in hot water after you are finished unmounting your fabric. Soaking helps remove dye, and it also helps the bamboo restraighten. Dry your shinshi fully after soaking so they do not mold. The harite do not need to be soaked; ideally, you don’t get any dye on them at all, but it happens to the best of us. If you did accidentally brush them with the dye brush, they can be wiped down and left to dry as long as you don’t get the metal teeth wet.
7. Dry & Sew
Typically the fabric is hung dry – I have long bamboo poles I hang projects from on my porch. The commercial dryer is really not good for fabric, and more delicate fabrics and dyes will not survive. Indigo is pretty tough, but the abrasion from the dryer will dull it.

Long bolts tend to twist and get abrasion damage in the wash, so I sew them up completely before putting them in the washing machine.
Supplies
The amount of money you’ll need to spend depends on the size of project you’re going to do. I recommend starting out dyeing small, handkerchief sized squares of fabric to see if the craft is something you’re going to enjoy. If you find it rewarding, you can scale up your ambitions and budget, and if it isn’t, you haven’t spent too much.
You need to be willing to order things from Japan. This isn’t an optional approach, all of the supplies are mostly sold overseas, and what you can get here in North America and Europe is so expensive it mostly prices people out of the hobby. One of the Japanese vendors, Aikuma, has an English website, and ships internationally. They are fairly priced, and they have good customer service. This is a huge improvement over the old system with vendors like Tanaka Nao, which required a Japanese proxy purchase and overseas forwarding. Start with Aikuma.
- Katazome Specific: Aikuma Japanese Dyes, Tanaka Nao
- Dyes: Dharma Trading, Aikuma Japanese Dyes (Indigo), Pro Chemical & Dye
- Fabric: Let me hook you up!
Leave a Reply