
Recreating Momoyama Era Stencil Resist Dyeing
Introduction
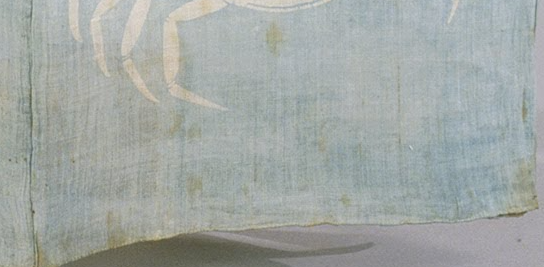
Chayazome is a unique form of Momoyama Era (1568-1600) stencil resist technology where both sides of the fabric are resisted with rice paste and then dipped into an indigo vat. The result is a clear white pattern against a blue background, with a fabric that looks the same from both sides.
Two years ago I attempted to recreate a yukatabira (unlined summer bathing robe) owned by Tokugawa Ieyasu. At the time, I was unaware that the garment used this special technique and only dyed one side with chemical dyes and standard katazome techniques. A few months later, I found more documentation explaining how the garment was dyed on a museum webpage, and that was my first introduction to the term Chayazome. I spent the next few years conducting small scale tests on banners and handkerchiefs, working out the technology from youtube videos and a single solitary book by one of the last chayazome dyers. After about four rounds of tests and failures, I got close enough to success that I felt ready to attempt the full yukatabira again.
Process
My goal with this project was to make a garment similar to the original, resized to fit my own body. I decided early on that I wasn’t going to make an exact replica, because I suspected that much of the design layout was done at the moment to the artist’s liking. I wanted to mimic the process as much as the material artifact itself; I considered the replication of the process equal to the material result. I also knew that parts of the process were going to be impossible to replicate, and I had a limited amount of time for the entire dye process (1 month), so I made practical concessions that are discussed in detail.
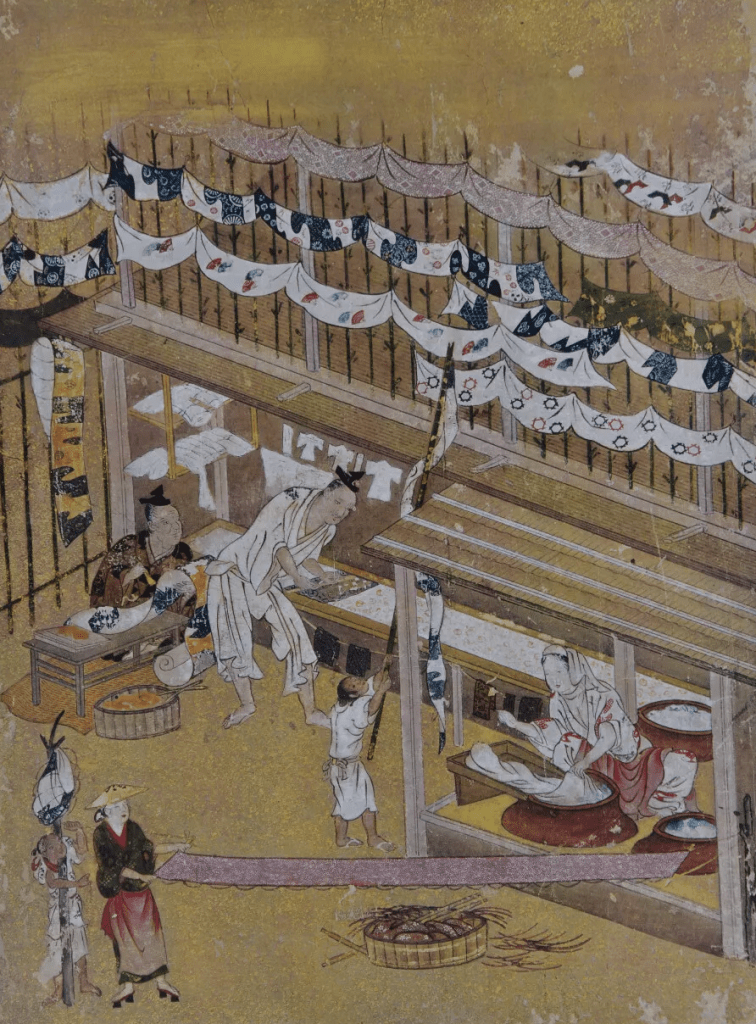
Like many of Japan’s traditional crafts, katazome techniques are not typically written down. While there had been a recent push in the last century to document the methods of prominent craftsmen, this was not a thing that was done in the medieval era. The small amount of documentation that does exist comes from a medieval painting of stencil dyers, [職人尽絵屏風], and the extant stencil dyed garments themselves. Since paste resist and sizing are designed to wash out, it’s difficult to determine the recipes used from extants. As a substitute, I have used the recipes and techniques used by modern Japanese dyers carrying on traditional methods.
Katazome itself is a long process with many steps, so to simplify the documentation, I made a table summarizing each step, my best guess at the medieval version of this step, and then what I did. This table doesn’t cover the trial samples I made before making the yukatabira, which are discussed after the table, along with why I used a given process, the evidence for the medieval process, and any changes I would make in the future. Finally, I discuss results in the last section, so for a brief read, you may want to skip ahead to that heading after the table.


| Step | Medieval Technique | Technique Used | Reason for Change |
|---|---|---|---|
| 1. Prepare Bolt | Purchase ramie tanmono (bolt) from cloth merchant | Rip hemp fabric along pulled thread, roll onto wooden dowels | Expense and availability |
| 2. Scouring | Snow Bleaching, Lye | Scour with Synthrapol | Safety |
| 3. Sizing | Brush on or dip in funori or soy milk | Dip in funori | – |
| 4. Design Stencil | Sumi and rice paper brush drawing | Trace museum photos on ipad | Making a replica instead of an original drawing |
| 5. Stencil Making | Smoked persimmon paper hand cut with a small sharp knife | Mylar cut with Siser machine | Ergonomics to accommodate disability, Cost of persimmon paper |
| 6. Layout | Aobana or paper and ink | Trace museum layout in Adobe Illustrator, print out | Making a replica instead of an original drawing |
| 7. Pasteboard Preparation | Wood boards and homemade rice glue, spatula or brush | Plywood boards and homemade rice glue, brush | Availability of 16” wide wood boards, size of room |
| 8. Paste Making | Rice paste resist, Suribachi | Rice paste resist, Kitchenaid artisan | Ergonomics to accommodate disability |
| 9. Paste Laying | Bamboo spatula | Wood spatula | More practice needed |
| 10. Sizing II | None or soymilk | None | Weather |
| 11. Dye | Sukumo indigo in a fermentation vat Shinshi | Powder plant indigo in a fructose vat, followed by synthetic indigo in a thiox vat Shinshi | Space and budget |
| 12. Washing | Nearby river | Sink and soft brush | Environmental Concerns, lack of river |
| 13. Drying | Shinshi or Pole | Laundry rack, then electric iron | Weather |
| 14. Tailoring | Professional tailor | Professional tailor (pending) | – |
Summary
This is a long project, so I have provided a brief summary. If you are curious about a part that seems ahistorical, please read on to the relevant section to understand why I did something a certain way.
I did this project in two phases: first, I did a test phase to determine what concentration and type of indigo vat would work best, and then I dyed the bolt itself. The test phase also served as a sanity check that the overall process would work on a large, expensive piece of fabric.
In the test phase, I ran three vats: a fructose powdered indigo vat, a synthetic thiox vat, and a very small 2 liter fructose sukumo vat. I learned that the sediment in the sukumo vat was going to make it challenging to use for this project because I didn’t have a vat deep enough to accommodate it and the sediment. I also learned that soy sizing helps with the depth of color, but also can speckle if it’s not applied with a brush. Finally, because my test stencil broke during testing, I learned I needed to make a stronger stencil.
To begin the bolt portion of the project, I selected a lightweight hemp fabric made at wide width and cut it down into narrow pieces suitable for katazome dyeing. If I had more time, better skill, and a larger budget, I would have ordered one of the 10 bolts of fine ramie that are still produced in Echigo each year, because that is a likely candidate for where the original cloth could have been sourced.
Then, I dipped the bolt pieces in a boiled funori solution. I dried them on poles and ironed them, then rolled them onto thick dowels.
Parallel to preparing the fabric and testing vats, I digitally traced and robotically cut the stencils with a die cutter, and then applied a tetron gauze with house paint. I let them cure for a week.
Next, I prepared the pasteboards by scrubbing them and applying a homemade glue made with steamed mochiko and water. After they were dry, I carefully rolled out the bolt on them as straight as possible.
I made my resist paste in the traditional 4:6 ratio of mochiko:komon nuka, and then adding salt and calx. I used blue butterfly pea powder as a substitute for expensive sappanwood colorant, as the testing phase determined they performed identically. I initially attempted to apply the paste with a medieval style bamboo spatula, but I realized I needed a better suited paste bowl and more practice to do it well. I switched to my more modern wood spatula, and to mylar versions of my shibugami stencils, to be able to complete the resist application before the paste spoiled.
Once the paste had dried on both sides, I cleaned off as many errors as I could with a small brush, and then prepared the vats. I made a plant indigo vat with powder and fructose, and a synthetic thioxx vat. When I dipped in the plant indigo vat, I found that sediment at the bottom stained and splotched because my vat wasn’t deep enough, so I switched to the thioxx vat. I also had difficulty with the shinshi popping off because I didn’t know how to use them properly – I later found the right way in a book that had just arrived. This caused the paste to fail early, so I only completed two dips.
Once the fabric had dried, I washed it off in my dye sink (it’s traditional to wash it in the river). Then, I let the bolt soak in steaming tap water with vinegar to neutralize the alkalinity of the vat, and washed it with synthrapol. Finally, I dried it on a clothes rack in the sun, and ironed it onto a bolt.
1 – Fabric Selection and Preparation
The original garment was made of ramie[20], and it was likely one of the high end varieties like Echigo Joufu [2], as the original museum text notes that the fabric was allowed to rest for a year. Echigo Joufu would have been particularly suitable for Chayazome because it is bleached white by snow, and very finely woven and thin. This would make it both striking in presentation, and easy to see the resist on the other side while applying paste.
The weight of the original garment’s ramie is not listed anywhere, nor are the thread counts, nor are there any up close shots good enough to determine much about the fabric other than it was plain woven and relatively transparent, but not as transparent as some other fabrics.
Given the lack of information available, next best practice was to look at other similar garments which did have more fabric data. Kamiya (1965) wrote a paper which discusses the weight and dimensions from similar katabira owned by the Uesugi family [3], and I worked backwards from those dimensions to calculate the bolt dimensions and divided the surface area by the total weight to get the gsm. These calculations may be slightly off because some of the Kenshin garments have the unusual quirk of actually cutting away a small strip of fabric at the collar, whereas most medieval Japanese garments fold in any excess fabric. However, the amount of fabric cut is negligible and still gives a decent estimate.
Calculated weights are in the table below.
| Garment | 袖幅 Sleeve Width | 後身幅 Body Width | Body Length | Sleeve Length | Collar Width | Bolt Length | Bolt Width | Weight (Grams) | Square Meters | GSM |
|---|---|---|---|---|---|---|---|---|---|---|
| (1)伝上杉森信所用黄地小花模樣小紋桂子 | 32 | 34 | 141 | 50 | 13.7 | 1040 | 35.5 | 400 | 3.692 | 108.34 |
| (2)同 上浅葱椎子 | 31.5 | 35 | 150 | 48 | 14.5 | 1076 | 39 | 367 | 4.1964 | 87.46 |
| (3)同 上同上 | 35 | 34.5 | 141.5 | 47.5 | 14 | 1023 | 38.5 | 355 | 3.93855 | 90.13 |
| (4)同 上同 上 [編] | 30 | 33 | 144.5 | 48 | 14 | 1043 | 37 | 293 | 3.8591 | 75.92 |
| Median | 31.75 | 34.25 | 143 | 48 | 14 | 1041.5 | 37.75 | 361 | 3.898825 | 88.80 |
| Seam Allowance | 2 |
In medieval Japan, fabric was made in narrower widths than modern fabrics [1], and the entire katazome process is designed around these narrow widths. For my personal use to tailor the garment correctly, I needed a finished width of 38-39 cm, which means I needed a bolt width from 40 to 42 cm. Unlike modern western tailoring, where bulk reduction and slim fit is often the goal, Japanese garments use wide seam allowances to allow retailoring and to help weight the garment for proper draping.
This meant I needed ramie fabric that was about 75-110 gsm, in a bleached white color, with a width of 40 to 42, which is a “queen” or “king” size bolt. The fabric also had to be skin friendly, as yukatabira are meant to be worn directly against the skin after bathing and other similar activities.
Modern Echigo joufu is sold, although production is very limited, the bolt widths are too narrow, and the price is “call to enquire”. This was out of budget for the project, and the next-closest suitable cloth I could find from Japan was roughly $500, which was also a fair price, but too high for a first attempt that was likely to have mistakes.
I had a month to complete the project, and I couldn’t find a good, skin friendly ramie in the weight and color needed that would arrive in time for me to dye it. Because hemp was also used in period [katabira textile paper], I decided to use a modern width hemp from India, in a true, prepared-for-dyeing white, with a weight of 100 gsm at 80 lea. It was soft and skin friendly, and I knew it would dye well because I had used it before. It also had the proper translucency.
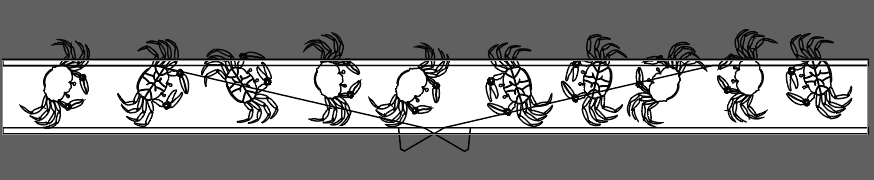
Because the hemp was wide, it needed to be cut down into the right width. I also knew, before I began, that I didn’t have access to a container big enough to dip the full 13 meters properly. I decided to cut the fabric into the component pieces of the yukatabira while I was cutting it down to width so that I could dye it evenly. I based my garment layout on measurements of the original, and anything I couldn’t reliably measure, I used Kamiya’s analysis [3]to fill in any gaps that I couldn’t discern from the photos.


Figure 2: Measurements used; taken at 1/10 scale due to limitations of the canvas in the graphics program. Please multiply by 10 (read as cm) for actual garment measurements.
I pulled the thread and carefully cut the hemp, because ripping tends to distort the edges and then it becomes difficult to lay the fabric out evenly on the pasteboard. This whole process of cutting everything took about 3 hours, which made me question if I would have been better off purchasing narrow loom linen from Japan for only about $60 more. Because of further difficulties with the ripped edges, which I discuss later, I will probably be working with narrow linen for this type of dyeing in the future.

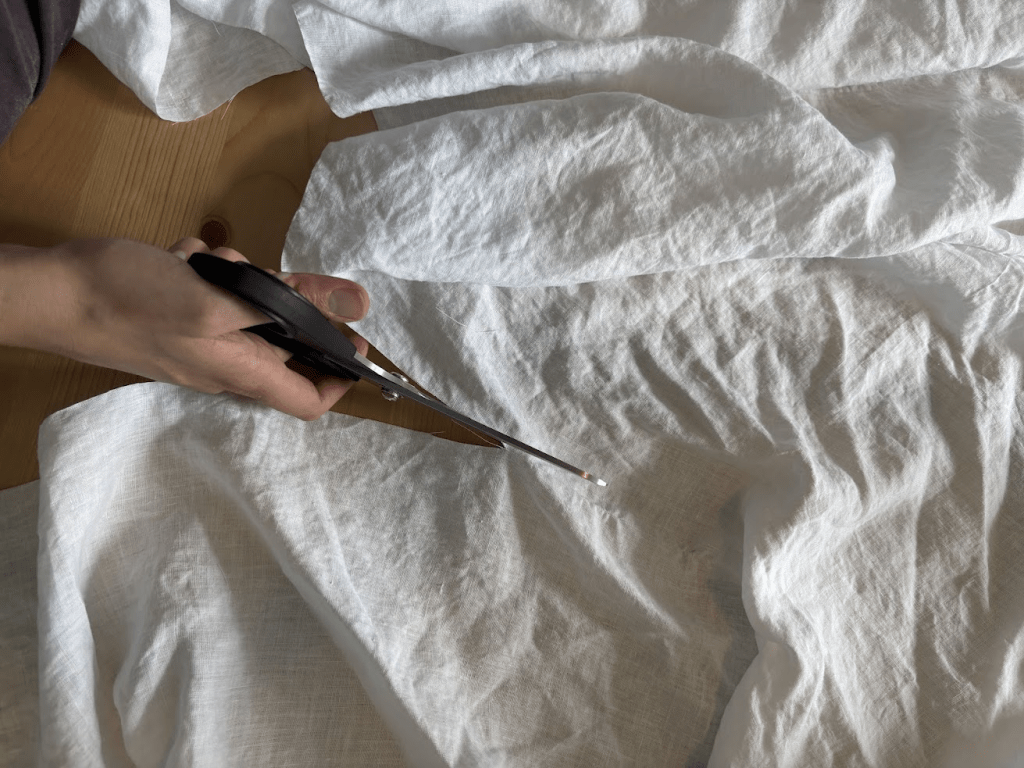
Figure 3: Pulling thread and cutting to make narrow cloth
2 – Scouring
I scoured the cloth with Synthrapol, a modern dyer’s detergent. In the medieval period, I am not certain if snow-bleached cloth would even need to be scoured, or if heavy scouring was work the dyer was expected to do. If it did, this process could have been accomplished with lye, which is something I prefer not to work with unless I have to because of how caustic it is. I actually did this step before cutting the fabric, so that the edges wouldn’t fray.
3 – Sizing
In my early katazome trials I didn’t starch the fabric. As a result, it was difficult to line up the stencils on the back side of already pasted fabric, because the fabric would wiggle in a different way and distort the pattern. My traditional katazome process book mentioned starch was applied at the beginning, but did not specify which starch. I had a few options – soy milk and funori (a seaweed) were both available in the medieval period. Funori is referenced in the Shōsōin documents and then many other ancient and medieval primary sources[13], and is used traditionally by many craftspeople as sizing.
I did some trials in the fall of 2024 comparing funori, soy, konjac (the Okinawan ingredient) and sodium alginate (modern, refined seaweed) as sizing for the process. I found they all performed similarly, but soy kept the color the darkest, while funori had the nicest hand. Because I care more about texture than I do about color, I chose funori. I reasoned I could always add more color to compensate for any loss, but hand wasn’t fixable once changed.
As I was preparing the last of the paste application, a newly released katazome book I had ordered arrived, confirming that funori is in common use for sizing in modern katazome.
I used a 5g/1000ml ration when preparing the funori solution. Funori has to be heated to break down, and then it gels and forms a very viscous liquid. I didn’t realize until after completing the process that it really should be strained, so I got to pick the little bits of undissolved plant and ocean matter off my cloth. There wasn’t much, but Takayuki[12] confirms that straining makes the process easier.
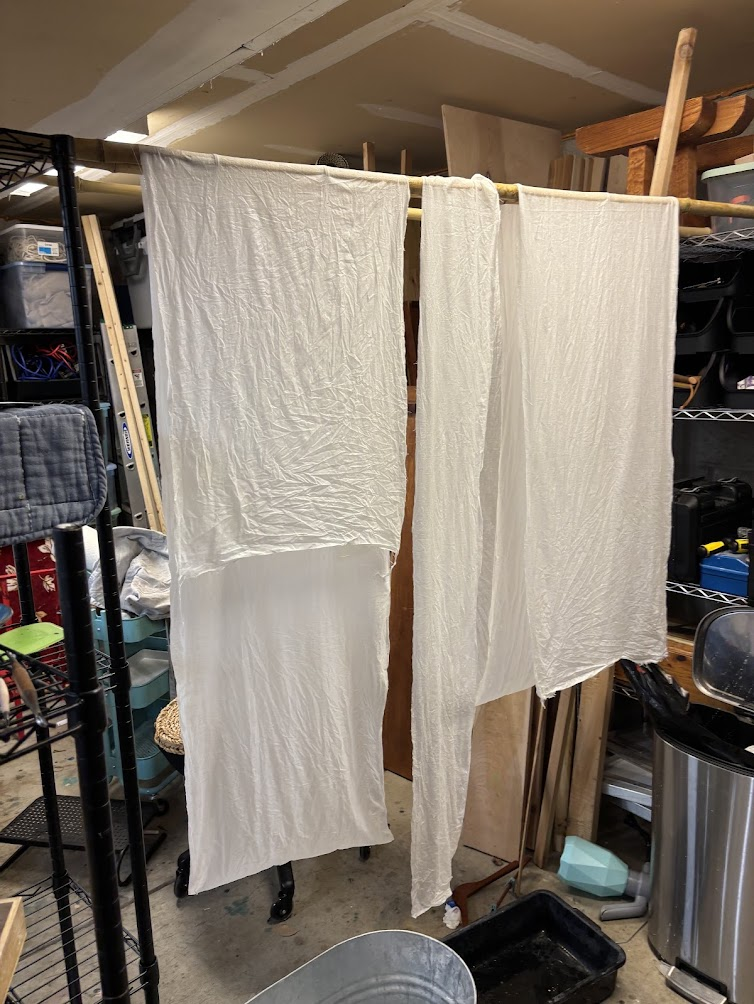
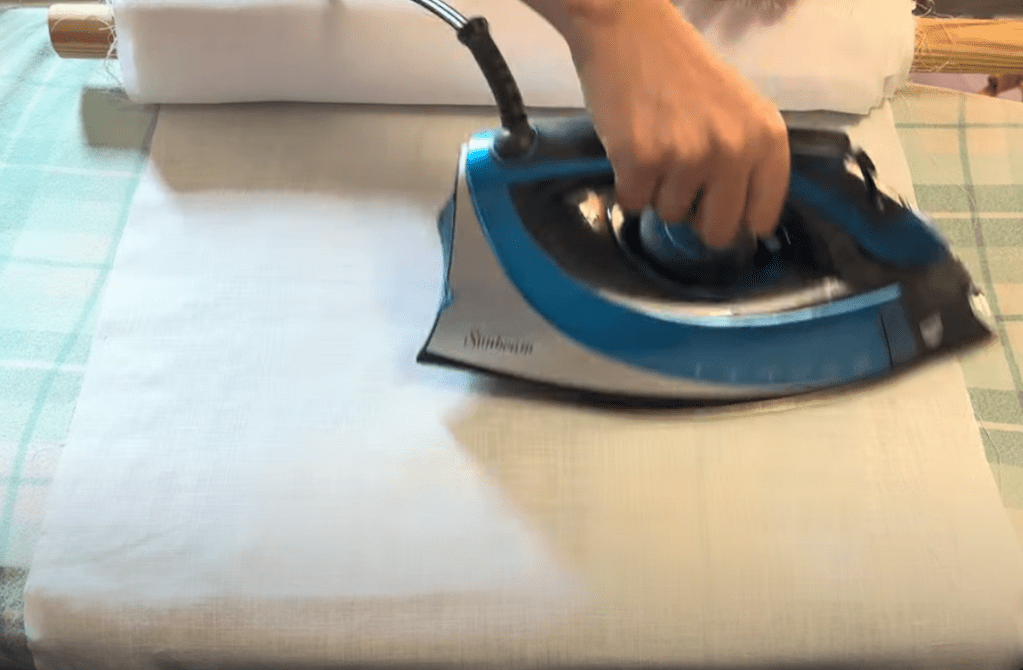
Traditionally, funori would be applied with a brush to the fabric stretched out on shinshi, and that is the way I typically do it. However, at this time of year there was record, unrelenting rainfall, and the project was too large for my garage. Without a deadline, I would have done what all Japanese medieval dyers do – wait for a sunny day. However, I had no time to lose, so I dipped the fabric, wrung out the excess, and then hung it to dry from poles in my garage with pans to catch the excess. If the fabric had dried on stretchers it would have been wrinkle free, but because I had to squeeze it and hang it loosely, it dried very wrinkled. A long four hour session with the steam iron on high fixed this, highlighting the importance of the weather (or a very big studio) in Japanese traditional dyeing.
Figure 4: 5g/1000ml Funori Solution


4 – Design Stencil
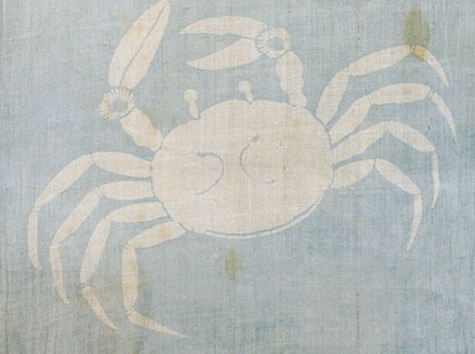
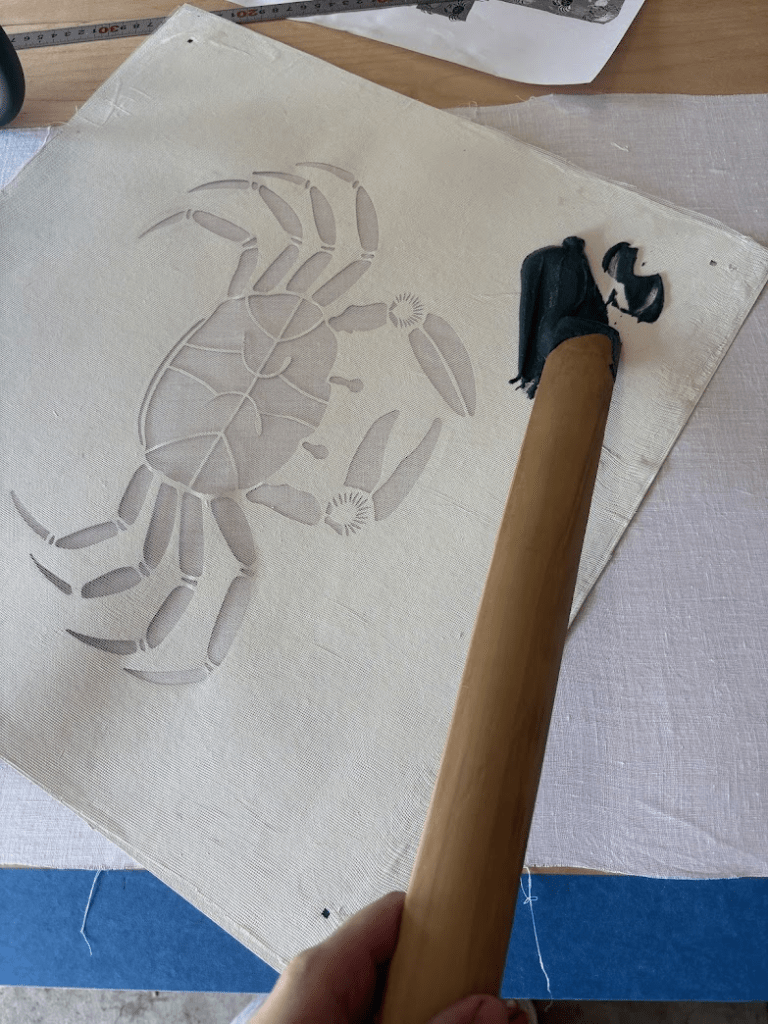
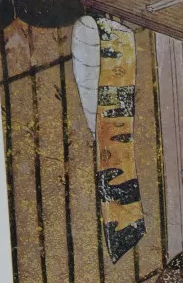
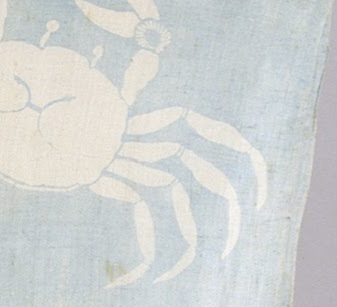
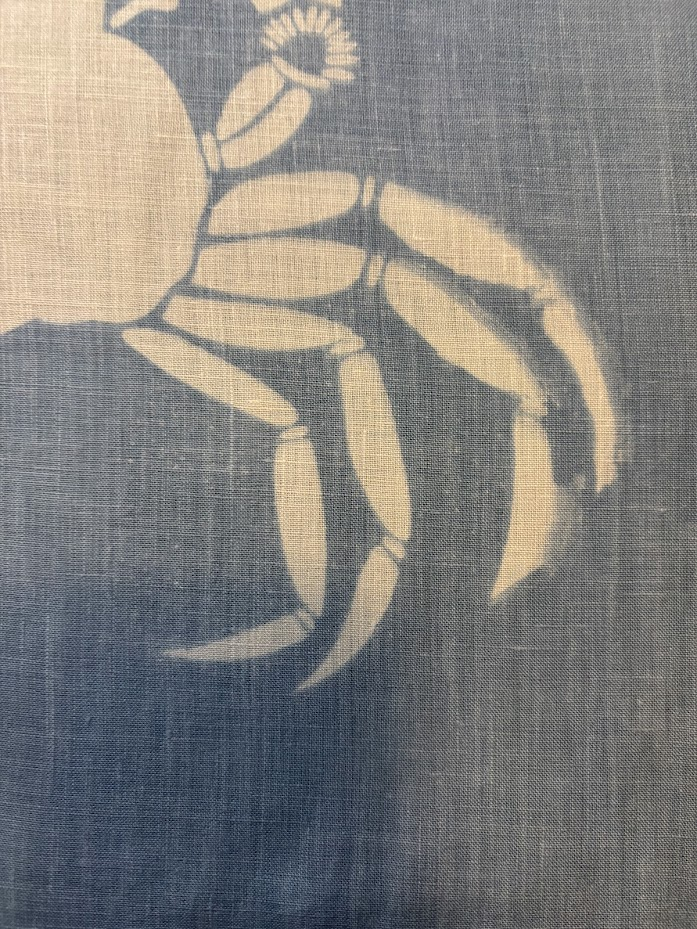
The design for the stencil would have been drawn beforehand on paper with ink and a brush, if modern traditional practices are accurate for the medieval era. Because I was working on a reconstruction instead of an original work, I traced the extant’s pattern outline in Adobe Illustrator. I discerned that there were two different crab stencils in total, and I picked the best examples of each to copy. Because the original design was very distorted from age, I had to accept that some shape distortion would carry over.
Figure 5: Tracing Stencil from original design


One piece of data was missing to fully design the stencil, and that was figuring out the technology used to suspend the islands (unsupported/disconnected) stencil pieces, namely the two curves in the center of the crab. The oldest surviving stencil we have is from the 1690s, so it’s unknown what technologies Momoyama Era stencils would have used. There are five ways that this has been done historically:
- supports (struts) to connect the islands, which are then smeared over [24]
- Ito-ire, or thread laying, which involves peeling the paper into its two separate original sheets, laying thread across the open areas to connect the islands, and then removing any temporary support structures. The paper is then glued back together with kakishibu [5]
- multiple stencils, which are used sequentially over the same area, and when the paste from two of them is combined, islands are formed. [4]
- A form of pierced stitching, which I haven’t seen documented anywhere but which exists in my private collection of katazome stencils that were made from somewhere before the prewar period.
- Gauze applied with lacquer, which, like ito ire, then allows supports to be cut away. This is from the 20th century and is definitely modern. [6]
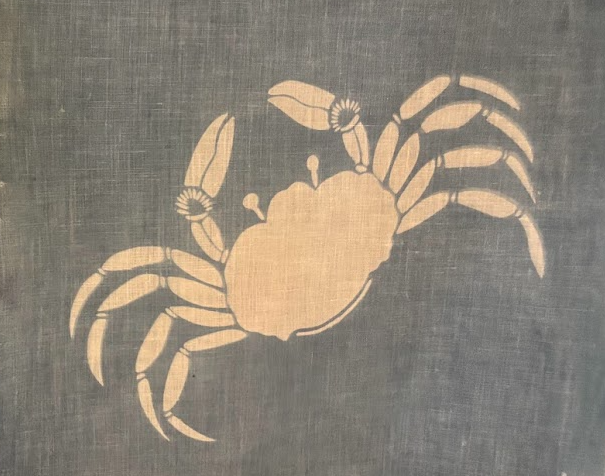
Ito ire was not an option, because it is its own profession requiring years of training. The pierced stitching would not work for an island this disconnected. Two part stencil dyeing we have evidence of from complexly dyed pieces such as the Uesugi under armour[18]. However, I decided to go with struts after carefully examining the options, because I found quite a few that had not been smeared in the original extant.

So I designed my two stencils based on the unsmeared gaps left behind:
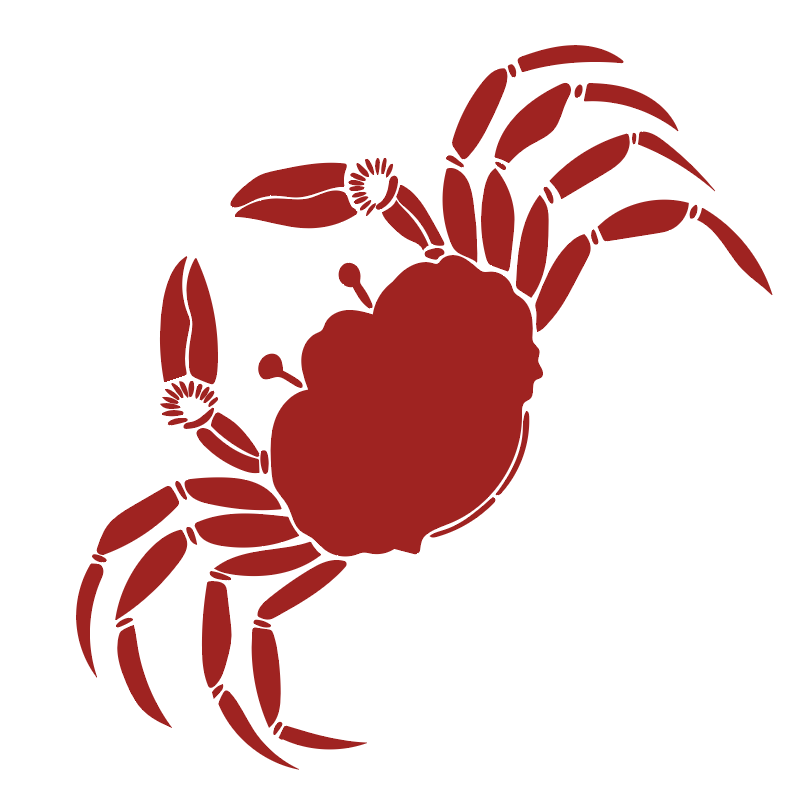
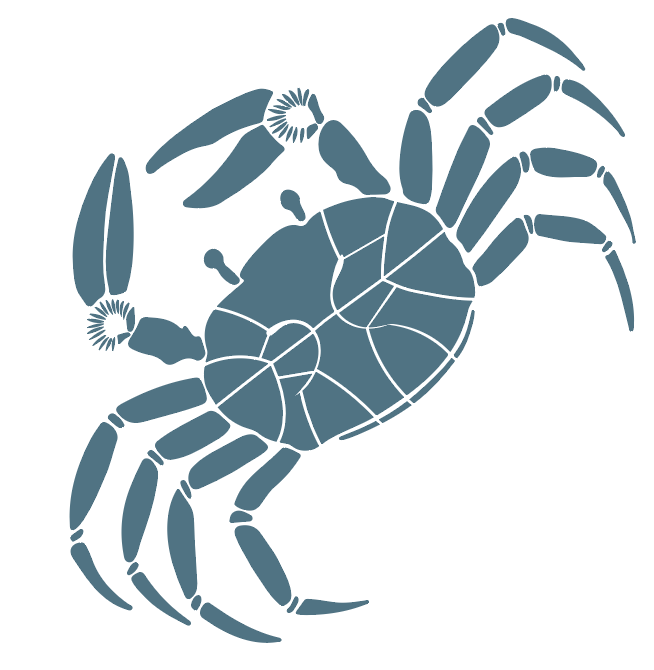
Figure 7: Final Stencil Design
5 – Making Stencils
I knew from experience that stencils this delicate would be likely to break and tear. Research by examining medieval katazome garments and depictions of stencil dyers hypothesizes that stencil paper in the medieval period must have been different from modern shibugami[9], as it was able to be folded and unfolded for cutting and washing. The delicate design of these crab stencils supports that hypothesis; when I used an unreinforced chemical paper stencil in the test phase, it broke after ten applications of paste. I had over 80 applications that would be needed in the final garment, and shibugami costs about $30 a sheet, so I needed my stencils to last.


Figure 8: Kita-In Screen showing folding stencil paper[7]
I ended up cutting two versions of the stencils: one set made with traditional shibugami paper and tetron gauze (silk gauze is currently in short supply) reinforcement, and one set out of mylar. I realized fairly quickly into my paste application that I couldn’t keep up with the gauze stencils, because the nature of the design required me to wash the paste after literally every application so I could check the positioning on the next one. I spent four hours on my feet doing a fifth of the design without being able to stop because I didn’t want the stencils or the paste to dry out. I decided to simplify the process by cutting 20 mylar stencils, so I could place down the crabs in succession, throw the dirty stencils into a rinsing tub, and then clean everything in the sink at the end.
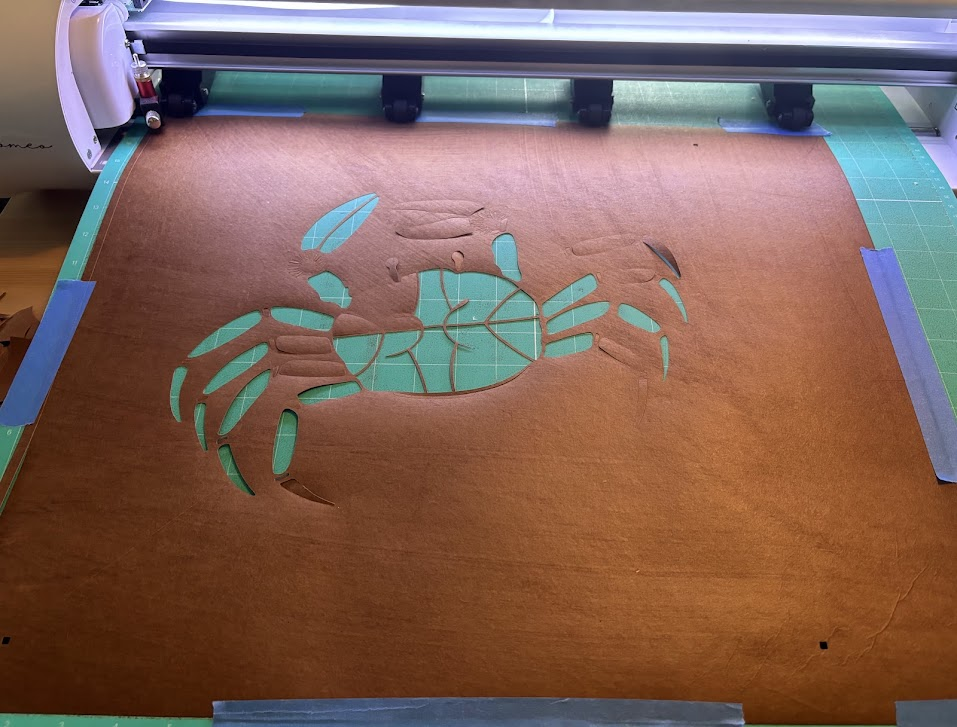
I cut all my stencils on a Siser Romeo die cutter, because I have neuropathy in my hands and I can’t actually cut the stencils myself. I did not feel hesitation in doing this, because when I discussed with Yasuda Yuta of Aikuma Dye works, he said that this was actually done by other Japanese dyers as well, and that respecting the culture was the most important thing.
Figure 9: Stencils being cut with Siser Romeo
There isn’t any available information on whether or not stencil cutting would have even been done by the same person that laid the paste. Most of the activities of katazome dyeing are depicted on the Kita-In screen [7] but stencil cutting is not. In Edo and later periods, stencil cutting was its own profession as stencils became more detailed and elaborate [8], I can’t say whether or not my “contracting out” of the stencil cutting to someone else (or in my case something else) was a medieval practice or not, due to lack of information, but it is possible.
Once I had the stencils cut, I applied several coats of house paint and polyurethane (a substitute for dangerous urushii/lacquer) to the shibugami stencils to secure the gauze, and let them cure for a week before dyeing with them. I cut two sets of the shibugami stencils, because the gauze is always used facing up. I used chemical (synthetic) shibugami stencils from a previous project for my trial phases. Most dyers use black paint because it makes the paste easier to see, but the black pigment smells awful to me so I use white. Since the paste is blue and brown, it shows up fine to me. The only color I don’t recommend painting stencils is mustard, the actual color of the paste.
Figure 10: Cutting and Gauzing Shibugami Stencils


Figure 11: two stencils matching and lined up for opposite side dyeing
6 – Layout
Most of the garment doesn’t have any patterns that line up across seams, so it could have been laid out on the fly during paste application. However, the collar lines up with the okumi (front panel) across the seams – this is very unusual in modern katazome, and feels more like the way medieval shibori layouts were done. Regardless, unlike shibori, katazome relies on the garment being uncut, so the method for getting the patterns to line up could not be the shibori method of cut, baste, and draw design with aobana (a fugitive dye).
I realized that for the okumi and collar, I could calculate the length of the collar and at which points it met the okumi by simply measuring an existing garment of the same dimensions. Then, those points could be laid out where those points would be on the new garment, and the design could be drawn. Because the okumi and the collar meet on a diagonal, the design could then be cut in half and each half used to either draw or directly align the stencils on the bolt itself. This method would have also been accessible to medieval dyers, and would not have required the bolt to be cut.
A medieval artisan would have been able to spontaneously place most of the crabs, and then draw what was needed for alignment on a long piece of paper with a brush and ink. I needed to trace from the original, so I used Adobe Illustrator and then printed out the layout sections I needed for alignment. I also printed out the original layout and used it for reference during the paste application.

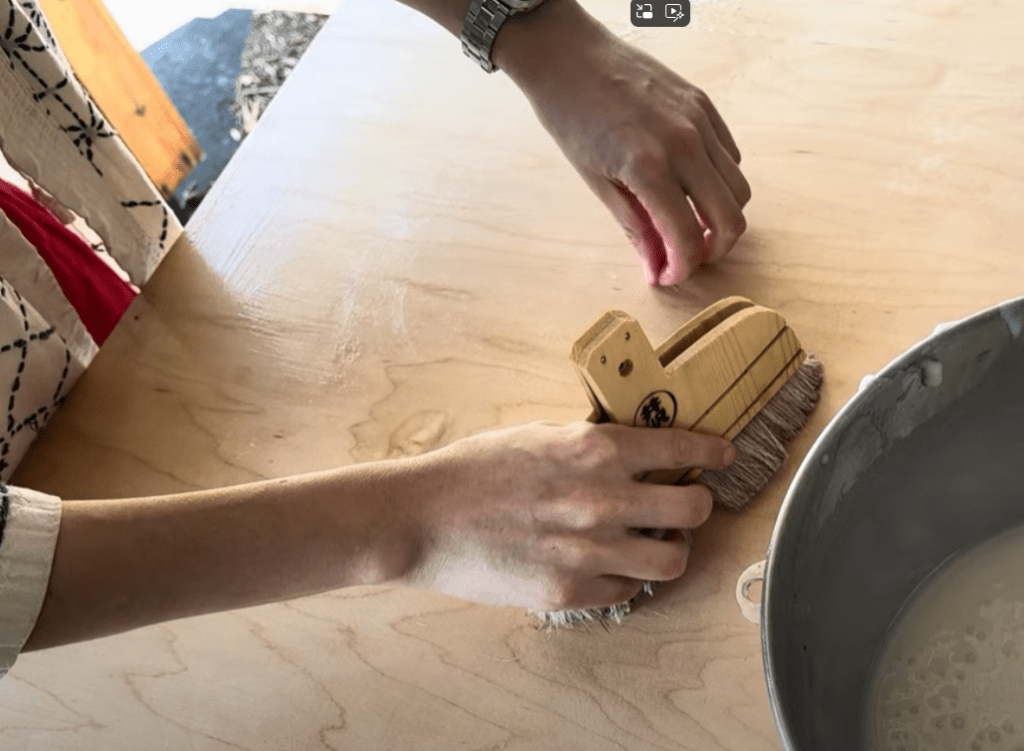
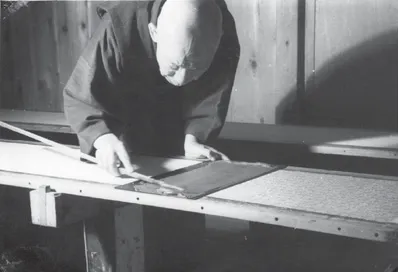
The Kita-In screen has a depiction of a pasteboard, and the design has not changed much over the centuries. Before the invention of modern plywood, solid wood boards were used. Now, some dyers still use traditional wood, but many have switched to plywood. I’ve used both types of boards and found there is little difference, but for this project only plywood was available in the dimension I needed, so that is what I used.

Because 12 meter long boards are difficult to move and maintain, half length bolts are traditionally used [10]. It’s typical to resist half the bolt, then after the resist has dried, to roll up the fabric and resist the other half. Because my studio is not as long as a professional dye studio, I typically cut the bolt into four or five pieces (body panels, sleeves, okumi collar) so that I can paste everything on 3-4 meter long boards.
Modern pasteboards are prepared by cleaning thoroughly with water and a scrubbing object like a coir brush or towel, and by scraping (I use a veneer scraper). In the medieval period, the scraper would probably be made of bamboo or wood instead of plastic, and the cleaning brush would have to have been made of a native plant if one was used.
Once the board is cleaned and dried, a homemade glue made of glutinous rice flour and water is made. The recipe can be found in the appendix.
I decided to try the oldest type of application mentioned in my traditional katazome book, which is to put the glue on a board with a wood spatula. Previously, I used a special brush to apply paste, but this book described using a wood spatula to put the paste down, and then a brush to even it out once it had dried. I thought this was probably the closest to medieval methods.
This was a total disaster. Glue thick enough to go on the spatula went on the board too thickly, creating an uneven and weird surface that would cause problems in the next step. After it dried, I spent a few hours scraping the boards clean again, and then I reapplied the glue, thinner, with my traditional brush.
Figure 15: Applying the glue, and then what I scraped off as excess five hours later


8 – Pastemaking
The next step is making the paste itself. Since the paste is washed away, it’s hard to tell without special chemical analysis what type of resist was used for a given garment. Every paste has some telltale signs, like how precise it is, if it crackles, and how it bleeds, but some pastes are remarkably similar. Descriptions of this robe on museum websites [20] state that this robe is in fact chayazome, which implies rice paste, but I couldn’t find any chemical analysis to prove that this was the case.
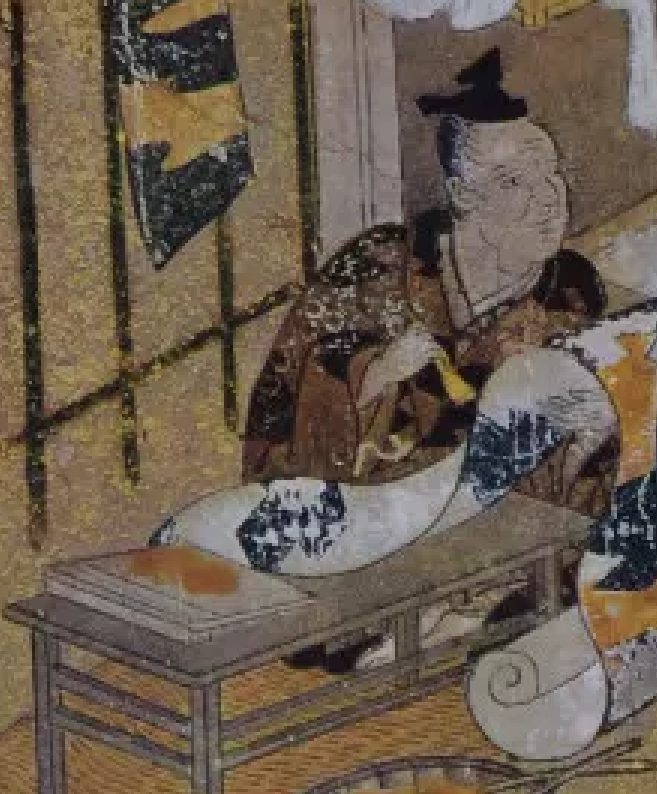
Looking at the Kita-in screen again, one thing to note is the color of the paste that is being applied:
Figure 17: paste depicted in Kita-in screen[7]
This is a fairly distinct and unique color for resist paste; it is exactly the golden-brown color of katazome rice paste made of bran and glutinous rice flour. While I can’t confirm definitively that Tokugawa’s robe used the same paste as I did, I can confirm that the paste of the time was a remarkably similar color with remarkably similar application techniques. I felt confident proceeding with the traditional recipes used by modern craftsmen.
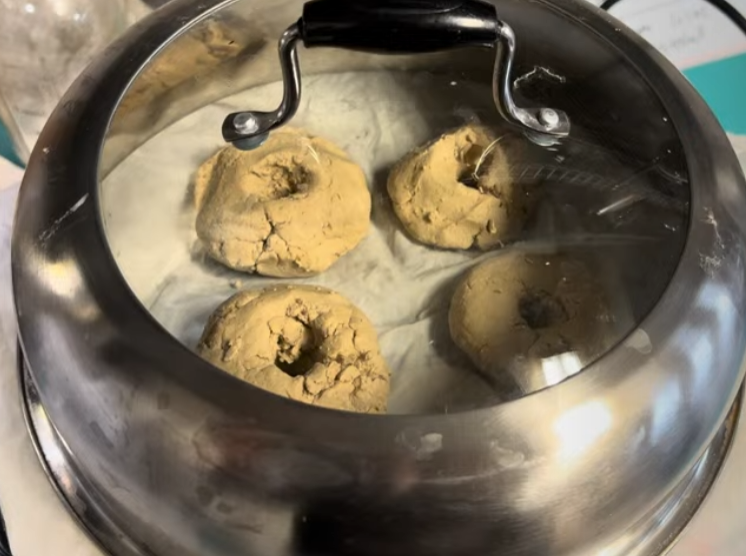
I used the recipe for rice paste in the appendix. It is a ratio based recipe that involves making rice donuts, steaming them, beating them, and then adding salt and slaked lime water. Ratios vary among Japanese dyers; many indigo dyers tend to use 1:1 ratios of glutinous rice flour to defatted rice bran, whereas many red-dyers ( dyers who work with mordanted dyes that are applied with a brush instead of a vat) tend to use a 4:6 ratio. Because I have a background in red-dyeing, I used a ratio of 4:6, but I hope to explore the different ratios in a follow up experiment.
It’s important to note that historical ratios would have been different, which is discussed by Seiju Yamazaki in his katazome book [18]. The ratio used to be 3:7, but modern glutinous rice flour is different than historical rice flour, and more of it is needed. This has consequences for the quality of the paste, because bran allows the paste to be sharp and firm and define details. A soft paste blurs more. Yamazaki laments that the drop in rice flour quality means that modern stencil dyers cannot make pastes that take on as fine a detail as in the past. Personally, I have gotten stencil paste as precise as a milimeter, but I have many stencils in my antique collection with sub-milimeter detail that would be difficult to capture, so I share his concerns. However, there are no other options but to move forward with the paste I could make. I hope to explore other rice flour options, such as using shiratama flour, in a future experiment.
I made my paste with an induction stove instead of a fire for safety and practicality, and I used an electric bread beater instead of a traditional suribachi. This was simply for ergonomics and my own health; I have made paste with a suribachi before and I can produce an acceptable result, but it’s tough work that’s hard on my body with no change in paste quality. Modern dye shops often use a cement mixer in a paint bucket to mix the gallons of paste they need each day, so I didn’t feel culturally disrespectful since my practical spirit is shared by my Japanese counterparts. This paste job required more paste than usual as well. I used about ten cups of flour and bran for the whole project, which is about four times my average for a red-dyed katabira.
Figure 18: making rice paste


I also had the luxury of a refrigerator, which I used. This allowed me to make all the paste at once, rather than making paste fresh every single day, saving me an hour each day. The downside of this approach is that you cannot calibrate the salt, which increases hygroscopicity and prevents the paste from cracking in low humidity, to the weather of the day, but since it was raining near constantly, I added about half the salt I normally would, and no cracking occurred.
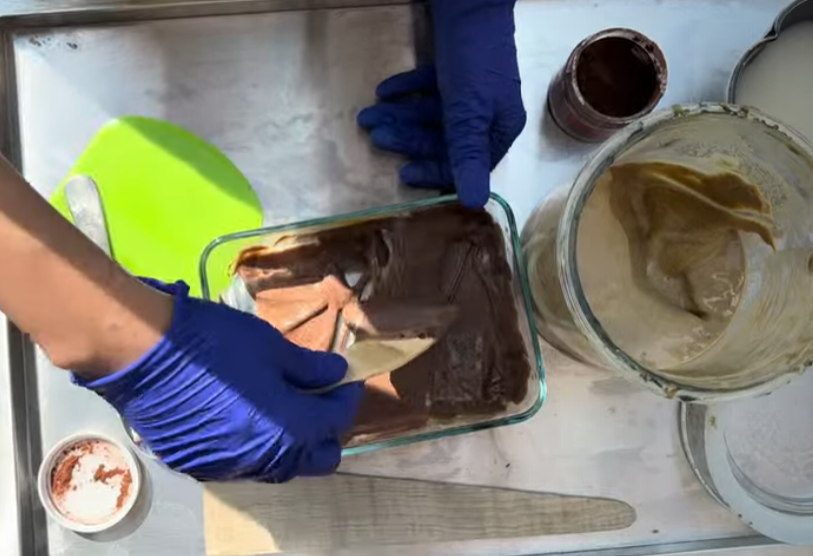
The final step in the paste making process is to color the paste that will be laid on the face of the fabric. This is so that the paste is visible on the flip side and that the inverse stencil can be easily lined up. Traditionally, sappanwood was used to color the paste, and then later shiko (a type of synthetic red pigment) was adopted. In my first attempt with sappanwood, I found it was not fine enough, so I had to grind it in an old coffee grinder and sift it to get it small enough to work with the paste. This made a huge mess in the garage, but it worked, and the sappanwood washed out completely after dyeing. Not wanting to repeat the grinding, I bought sappanwood extract, which is very finely ground. This also worked, but it’s important to note that this process only works when there’s no mordant being applied. If the fabric has been treated with tannin and mordant, the sappanwood in the paste is likely to dye the fabric.
The sappanwood extract was also expensive, and chopping down trees for fugitive dyes doesn’t seem like environmental best practice. I decided to try blue butterfly pea powder as a substitute, as it’s a beverage coloring notorious for not being able to be used for fabric (much to the consternation of beginning plant dyers). This worked wonderfully, the powder was already very fine, and it was affordable, organic, and fair trade. There was no performance difference between it and the sappanwood, so I encourage the use of blue butterfly pea powder.
Figure 19: Sappanwood and blue butterfly pea powder colored pastes

9 – Paste Application
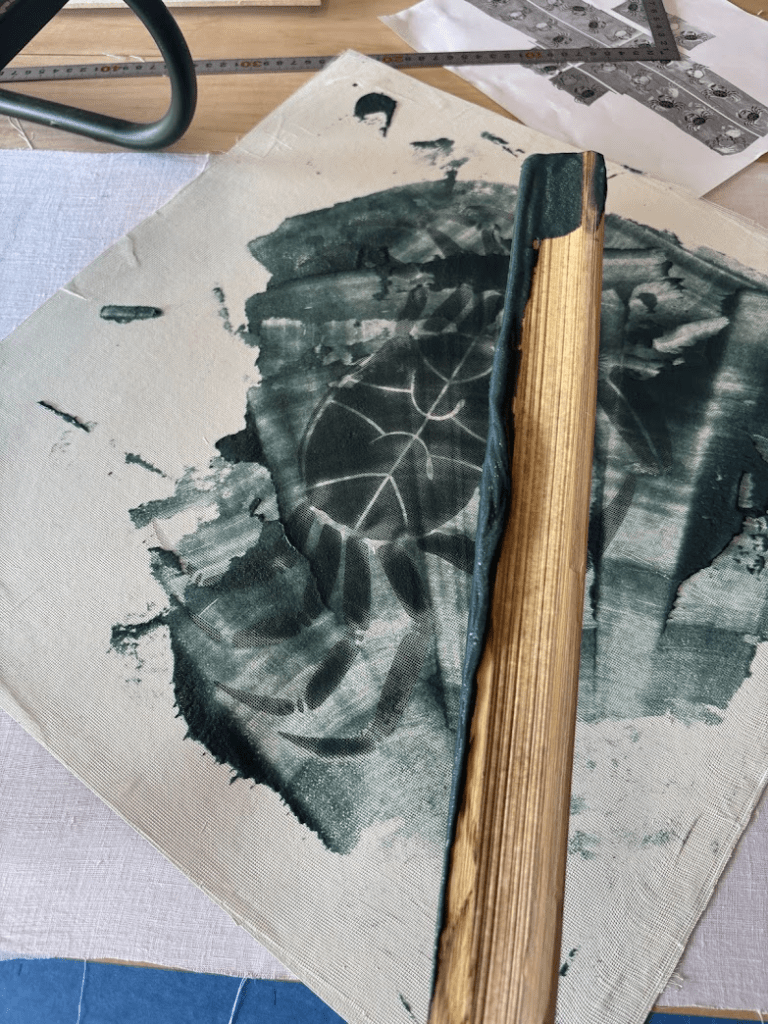
Once again, looking at the screen, and the method of paste application: there’s a stencil, a big tub of paste on the ground, and a very long spatula.
Figure: Kita-In Screen depictions of paste application[7]
This is very different from the modern spatula shapes, and modern pastelayers also try to keep their paste off the ground, at least the small amount they’re immediately using. The stencil looks similar, although it is interesting that it has no “margin” and its design appears to be continuous. Modern stencils have margins and wells to line up and store paste. I’m not sure if this is an artistic liberty or an actual observed feature that was painted, but the crabs don’t repeat so this detail doesn’t apply to this specific garment.
As for the spatula, I made a bamboo one that was similar and tried to use it. It went very poorly, as it was difficult to get the paste to lie evenly on the spatula so it could transfer to the stencil evenly. I think I need a much larger vessel than the Pyrex container I’ve been using for paste to make the spatula work effectively, one that would be a shape that allowed the paste to be scooped more evenly. I got one crab pasted up successfully with the historical stencil, and then decided to practice more at a later time for the sake of the deadline. I switched to a more modern, “deba” style spatula made of wood, and applied the paste with that.
Figure 20: Applying paste with bamboo spatula

When I did more research because of my struggles, I found in a paper [9] another depiction of what the bamboo spatula is supposed to look like. I honestly don’t know how they came up with the shape at the end, because it’s a tiny blurry line in the screen and doesn’t look quite that long or like it’s held quite that way, but I’ll experiment with this shape next time. As a side note, the very experienced stencil dyer who tested this spatula found it hard to use, too.
Figure 21: An experienced dyer applying paste with another reconstruction of a bamboo spatula. Taken from [9]

One of the problems I encountered was that applying the paste on the opposite side, or anywhere where precise placement was incredibly tedious. I had to wash the paste off the stencil every single application, so that I could wiggle the stencil to the right place without smearing paste on the fabric. This resulted in the paste up taking quadruple the normal time, and I was exhausted by the end of the first two body panels. I decided I needed a different approach to get the garment completed, and so I cut out eight mylar stencils of each design. Mylar is much faster to clean than delicate shibugami, and it is cheap enough that I could cut out a lot more stencils. I could batch apply, batch clean, and take breaks more easily with this approach, and it cut the paste time in half.

Because the first attempt with the bamboo spatula and shibugami was a bit error fraught and had mistakes from fatigue, I washed out the body panels and re-ironed them. I thought there was enough funori left because I washed it lightly in cool water, but I found it wasn’t because it was difficult to align the stencils on the opposite side. At that point, I was committed because of the timeline, so I did the best I could, sometimes applying the stencils at different alignments in two parts. However, some crabs were impossible to align perfectly and I knew it would show in the final result.
I used blue painter’s tape to keep from applying paste directly to the pasteboard when working on the collar and okumi. This would not have been an issue with the original paste up, because the original artist would not have cut the bolt. However, a well placed piece of paper or fabric could have been used in period, in the same way if necessary, and the fabric could have been washed out afterwards.
I used my printed out layout to perfectly align the collar and okumi designs, and the see through mylar made it feel like cheating, however, I verified that the same task could be accomplished with the shibugami stencils – it simply takes longer. Completing this paste up, I concluded this task must have been done with multiple people, or a single artisan of extraordinary skill and experience. Paste doesn’t last forever – leave it on the fabric long enough, and it will crack or mold or both. I try to have my paste up and sizing done in 3-4 days, and I pushed myself to the limit of that timeline for this project. Having someone to wash the stencils, color the paste, and fuss with the layout while I worked would have been immensely helpful.
Figure 22: Aligning and applying paste to the collar and okumi


Connecting the struts manually with my fingers produced some errors similar to what the original had, and it was very time consuming. If I use these stencils again, I think I will try the two-step approach with multiple stencil applications to erase the struts – it is also something available in the medieval period, and it seems like it might actually be more efficient.
Figure 23: Connecting struts with brush and fabric


With the mylar stencils, the rest of the paste application proceeded smoothly. I scrubbed out and corrected minor errors with some small brushes at the end. I’m not sure if this is historical behaviour or not, but there is a man depicted with a brush in the Kita-in Screen and applying what looks like paste. He is holding the partially dyed bolt in one hand and a brush in another, so I wonder what he is doing. It’s possible he’s correcting the dye work that’s already been done, but the brush is very large for that, and it seems like something yellow brown is being applied to the fabric. I can’t tell if he’s correcting paste application, or applying a background color.
Because it was so humid, I was able to hang the half of the bolts that I had completed on bamboo while I worked on the other half, rather than wrapping in plastic like most modern dyers do. This looks pretty similar to how (possibly) pasted fabric is hung in the screen, except I didn’t need to use shinshi.
Figure 25: My pasted bolt (left), and the kita-in screen depiction of the bolt hanging (right)[7]

10 – Sizing II
Most dyers are surprised to discover katazome has two sizing steps – one at the beginning and one in the middle. This step usually uses soy when indigo is involved; fresh soymilk is made and applied with a brush to the pasted fabric. This has the effect of strengthening the paste and stiffening the fabric a little bit more.
I tested the effect of adding soy after paste by quick dipping in a 5% instant soy protein solution on my trial run. With small swatches, the brush can be omitted and dipping can be done instead. Powdered soy protein is a way of making instant soy milk, instead of having to make it from scratch, which is its own lengthy and messy process. It also makes it easier to control the thickness and concentration of the soymilk. I let the swatch dry in the sun, and then moved on to the indigo vat.
As I expected, the soy swatches were darker, but there was some speckling. This is probably because I didn’t let the instant milk settle overnight, and it probably wasn’t warm enough when I mixed it. Also, using a brush to apply the milk with the fabric suspended on shinshi helps apply the milk more evenly and eliminates speckling. Because I didn’t have the ability to use a brush (there was no space in my garage, it’s usually done outside but I couldn’t due the rain and inclement weather), I opted to skip this step – it is not always done. [12]
Figure 26: From the left: Natural Indigo Soy vs None, Synthetic Indigo Soy Vs None

11 – Dyeing
The dyer would likely have used sukumo indigo fermentation vats to dye the original yukatabira. Sukumo became available in the muromachi period, and before that, fresh indigo was fermented [26]. Sukumo indigo is a type of composted and fermented indigo unique to Japan, and it’s renowned for producing a clear and beautiful blue.
In the Kita-in screen, the classical in-ground fermentation vats still in use in apan today are depicted next to a female artisan, who is probably the paste-layer’s wife.
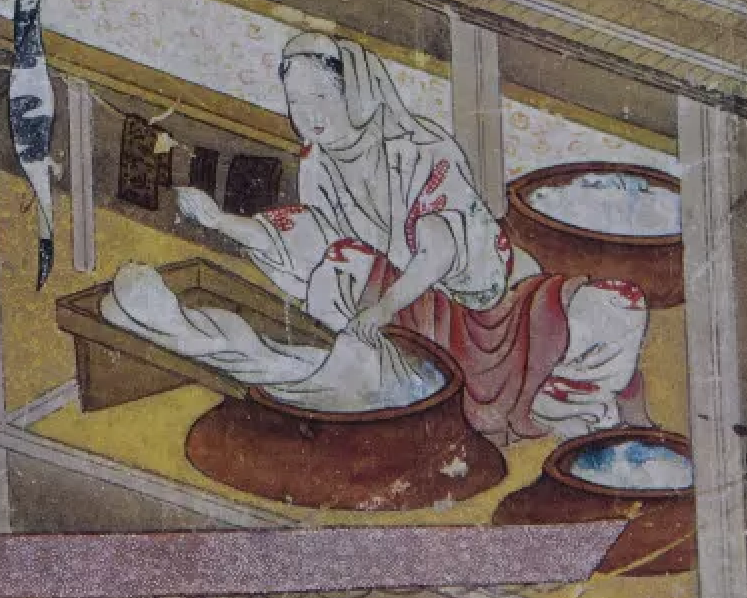
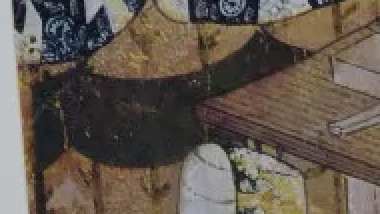
Figure 27: Washing fabric(?) and a background dyed bolt from Kita-In Screen[7]
I actually can’t discern what she is doing in this illustration, because modern dyers use shinshi when they are dipping in indigo vats. This keeps the paste from touching and deteriorating. That kind of long, tilted pan is usually used modernly to wash paste off in sinks, but the fabric depicted is white and has no dye on it, and washing traditionally occurs in the river. It’s possible that she is applying a blue background dye that will later be pasted over, for a design like the one hanging on the wall to the left. But, regardless, the illustration teaches us a few things about the role of women in the dye shop, the shape and size of the indigo vats, and the tools used for background dyeing.
I was smart enough to order sukumo when the 2024 harvest became available, but I didn’t realize when I ordered it just how big of a container is needed to dye cleanly. Sukumo contains a lot of raw plant matter, so the vats used are deep and huge to allow the sediment to settle at the bottom and not transfer to the fabric. I made a small test fructose sukumo vat, and the sediment occupied easily 30-50% of the volume. To make the matter even more complicated, traditional fermentation with wood ash and shell ash requires consistent warm heat (80 degrees Fahrenheit or higher) and 10 to 40 days for full fermentation to occur. My project was due in a month, I had no vessel large enough, and I had no mechanism to heat a 50 gallon container to 80 degrees or higher consistently for 40 days. The traditional way this was solved was to wait for high summer before heating methods were invented, and I was in a cool damp spring.
I ordered some plant indigo powder from India instead, as much as I could afford ($100 worth), which came out to about 1 pound. I also made sure I had backup synthetic indigo in case something went wrong. I tested a mini fructose sukumo vat, a fructose powder indigo vat, and a synthetic indigo thiox vat in the first round of samples. I found that after thorough cleaning, there wasn’t much color difference between the three in terms of quality of color – eg, the hue and saturation. The fructose vat was lighter and had a slighter warmer hue, the difference was slight at best. I would have really liked to compare a swatch of sukumo fermentation dyed indigo, which is rumored to be “brilliant blue”, but that probably means that it is closer in tone to the more brilliant blue of the synthetic thiox vat.

The day I went to go dye, there was a severe weather alert, and thunderstorms throughout the day, so I had to set up in my garage. I decided to make two vats, the powder indigo vat and the thiox synthetic vat. I knew from earlier tests that a thiox sukumo vat would have too much sediment at the bottom and I didn’t have a vessel large enough, so I decided to save my sukumo for when I could get a bigger vat and not waste it. I set up a large area to stage the drying fabric as well, similar to the way depicted in the screen, but a little more space conserving.

The powder indigo vat was made using the standard 1-2-3 fructose vat instructions from Botanical Colors [25] , and I used 450 grams of indigo, sourced from the Yarn Tree. It’s important to note that this is a different species of indigo than Japanese Indigo, but the same chemical is present in both.


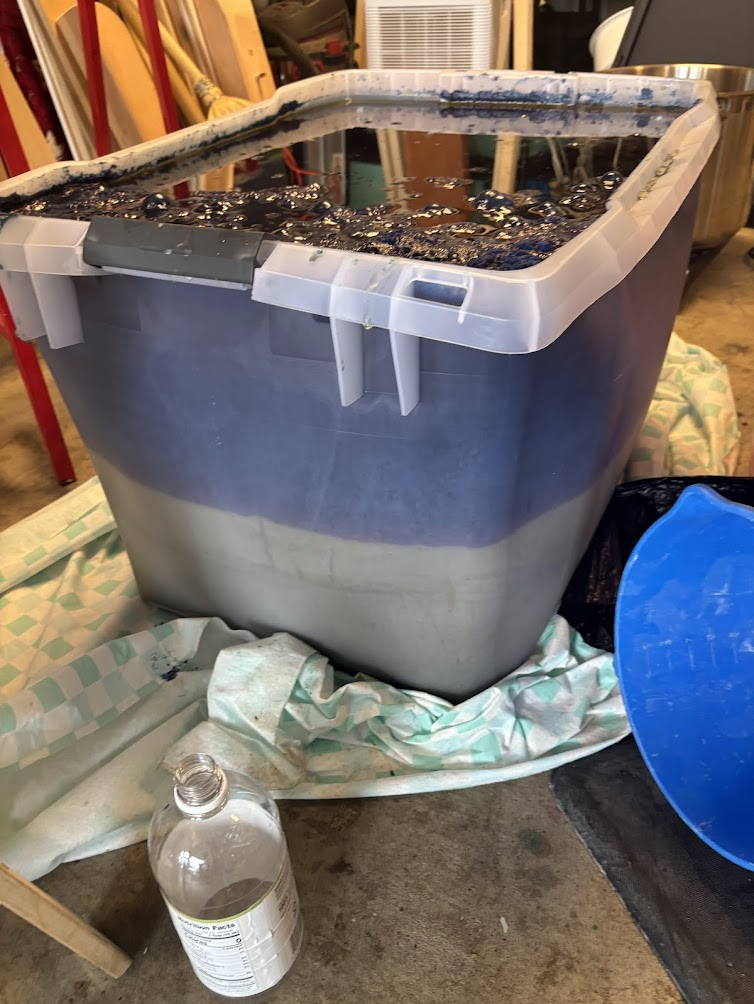
Figure 30: Boiling water and making a fructose vat
The thiox indigo vat was made using the standard formula, which is double the amount of thiox per indigo, and then a fixed amount of soda ash for the number of liters present (10 grams per liter). Soda ash functions as a way to control the pH, whereas thiox reduces the indigo, so one depends on the volume of the container, while the other depends on the amount of indigo added, though you may see a 1-2-4 ratio for darker vats. I started out with a relatively small amount of indigo for 120 liter vat (40 grams), and I added more when my test swatches showed the color was too light. Unfortunately I neglected to write down the measurement, as I was a little bit flustered – I put the thiox vat outside due to the fumes, but it was thundering all day so I was trying to move very quickly. It was likely about 10 more grams along with 20 grams of thiox.
While I didn’t encounter an issue with the sediment level in the initial paint bucket vat I made with the plant indigo, it definitely was too high to dip cleanly. I decided to try it anyway with plain fabric, which came out fine, and of course when I went ahead and dipped the katazome piece, it came out with sediment on it. This means that to continue using my current vat, which is a repurposed plastic tub from Target, I can only use thiox for reduction, as the sediment from the lime or ash will make the vat too shallow.
I suspended the fabric on poles cut with slits on them, something I’d seen on a professional katazome dyer’s youtube [16]. It appears there are two approaches to dipping katazome bolts: the first one is to arrange the fabric in a serpentine fashion on a pole with slits, suspended from shinshi, and the second is to hold the serpentine configuration by hand and fan out each section. The second, more compact approach was probably what was used in period, as it requires a smaller, less specialized vat to do. The vats depicted in the Kita-in screen are too small and not rectangular enough for the first approach with the pole.
Figure 31: Commercial dyer (left) [16] and me (right)

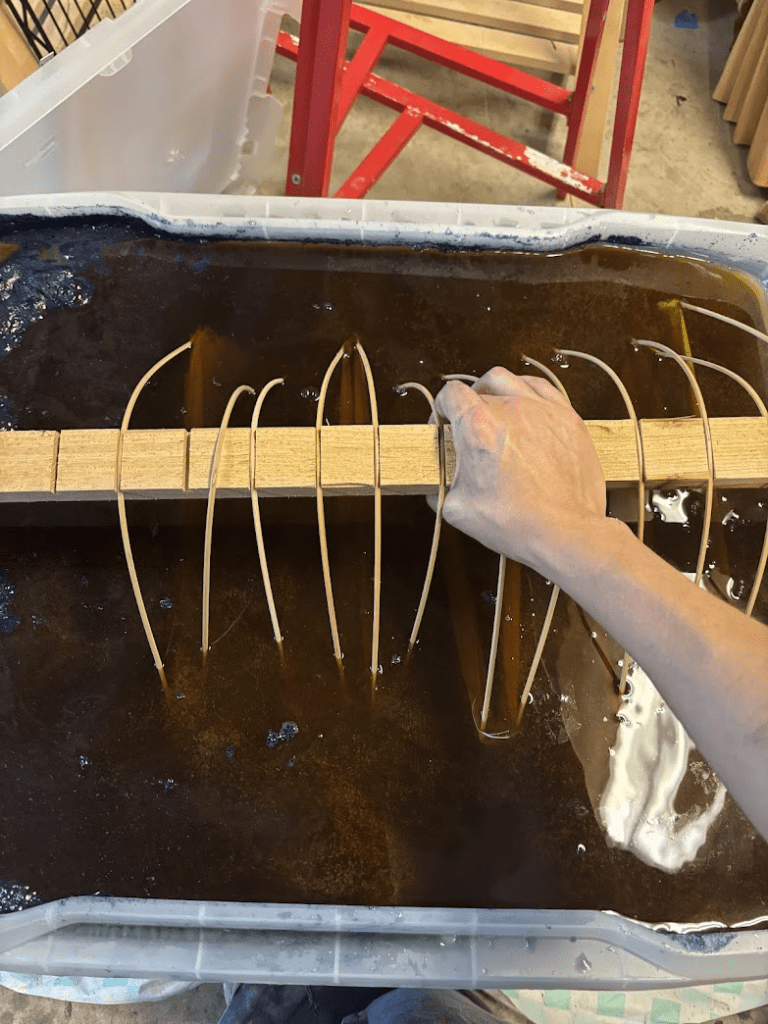
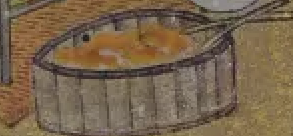
Figure 32: Traditional dyer with circular vat (left) [15] and Kita-in screen vat (right) [7]

I tried both methods, and I found that the paste really didn’t like the second approach, and weakened and smeared. There might be some finesse trick I’m missing with my fingers or timing, so I’ll have to practice more and see.
My traditional katazome book explained that the fabric should be dipped for thirty to forty seconds, four times, and then let to rest for a bit. Another book called for four minutes, and that seemed bizarre to me, because the paste would probably fail long before that. In my previous tests, forty seconds was about the maximum that my paste would survive, so I tried that.
I had several issues. Beyond the sediment issue, I had to boil the water for the fructose vat. Even though I let the vat cool for a few hours, it was still quite warm when I went to dip, and the warm water weakened the paste more than normal. The second issue was my shinshi kept popping off. I later found in one of my books that there’s a little catch to arranging the fabric on the shinshi, which is you have to alternate which side of the fabric you pierce so they keep each other in tension. I didn’t know this at the time, so they kept flying everywhere, plunging my bolt into the vat and causing the weakened paste to spread and smear.
After I finished the dye up, I tested the alternating shinshi hanging method independently, and it did work. I felt foolish for overlooking the detail; most of my earlier tests were smaller, so the weight of the wet fabric was less and I got away with my error.
Figure 33: bolt drying after shinshi popped off

I replaced the shinshi, hung everything up to dry as much as it could in 90% humidity, went and checked my thioxx vat, and waited for a bit until the thunder sounded more distant. Then I dipped again, forty seconds per panel, and assessed. The paste was failing from all the weird mishaps; it couldn’t take a third dip, and so I had to stop. The color looked deep enough, if a little lighter than I wanted, so I hung everything up, neutralized the vats with vinegar after depleting them as much as possible with other pieces of fabric, and poured them down the drain with a bucket.
12 – Washing
There are three wash steps for indigo katazome: first, soak the fabric and remove the paste, changing the water as needed . Then, soak the fabric in hot acidic water, to neutralize the alkaline environment from the indigo. Finally, wash with a dyer’s detergent of your choice (I used dharma’s) and then rinse thoroughly.
Traditionally, fabric was washed by being left to soak in the river, because the gentle current would remove the paste without disturbing the dye. While this is a smart labor saving technique, I don’t have a river nearby I could do this in, and there are environmental concerns with this technique (though other dyes are much worse, and indigo is comparatively pretty gentle).
Figure 34: Washing the bolt


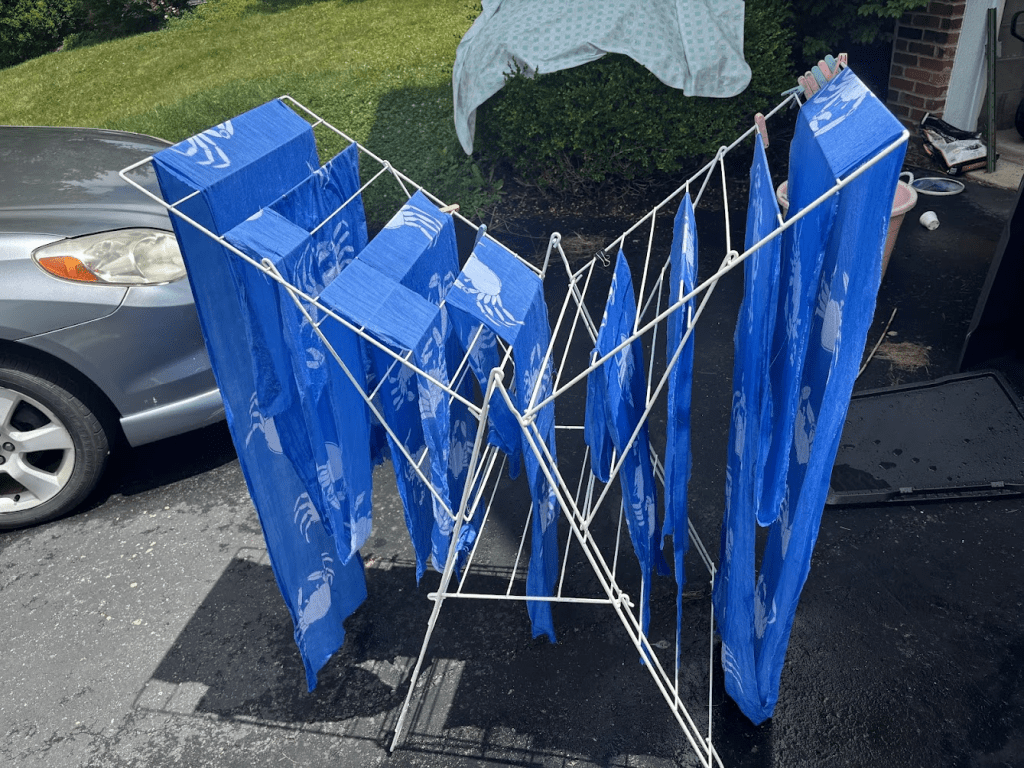
13 – Drying
Katazome fabric can be dried hanging on poles (this is more common in red dyeing shops where the fabric has to be steamed to set the dye, which helps to release wrinkles). I’ve also seen it dried suspended from shinshi and harite, which would also remove wrinkles with tension. In the Kita-in screen, it looks like the fabric is dried by hanging from rows of bamboo poles:

I had the equipment to dry on shinshi and harite, but I didn’t have the dry weather, so I decided to dry outside/inside as the sun permitted on a regular laundry rack, which easily fit in my garage when the rain started.
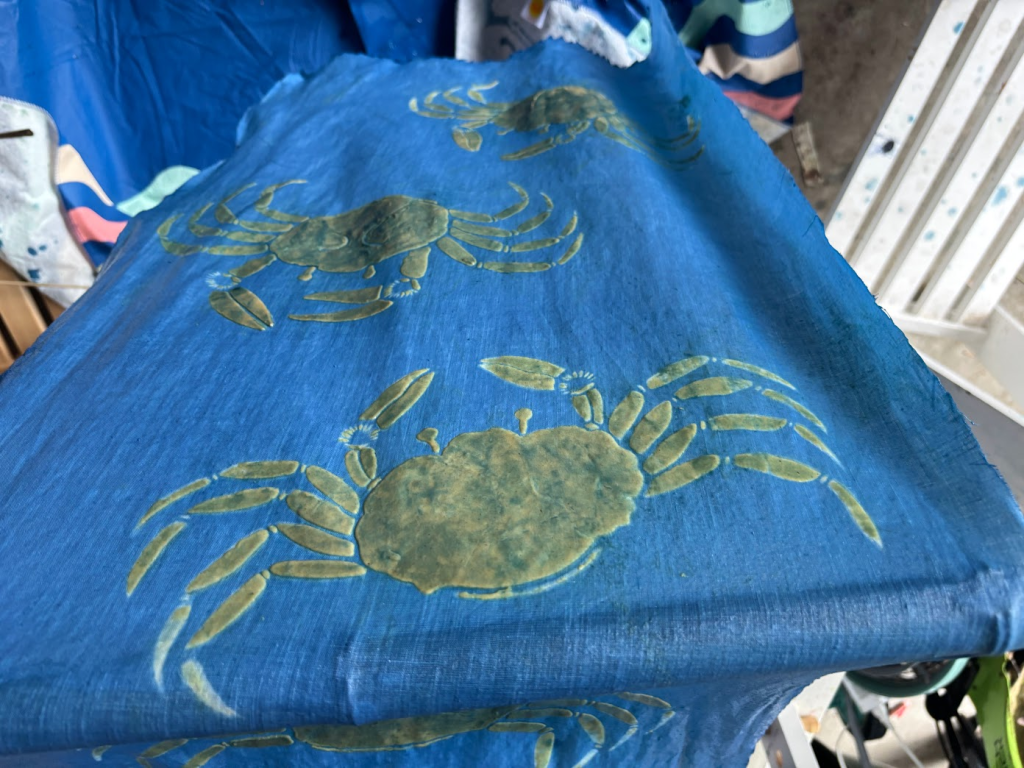
Results
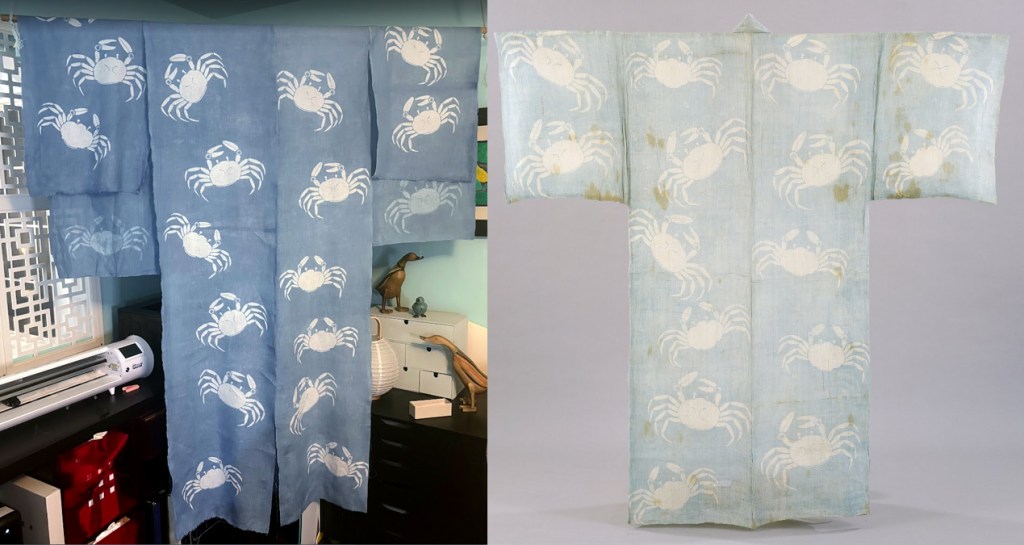
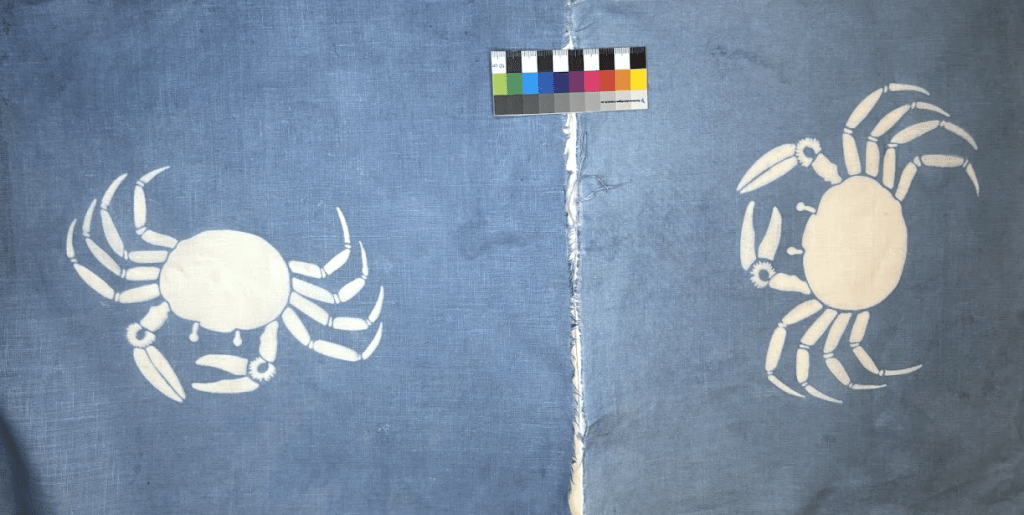
Overall, I had a good outcome with an error rate that was better than or equal to the medieval garment in some areas, and worse than in other areas. My arrangement isn’t identical, but it’s similar, and I’m pleased with that – I suspected the original dyer only used guides for the collar part, so I placed things approximately the way they might have but with the same freedom.
I’ll discuss each error with side by side comparisons.
My biggest problems were with the alignment of the stencils. Even though I had starched the fabric and laid it as flat and as evenly as possible, some crabs couldn’t be aligned. I think there were three things I could have done differently to improve the alignment. Firstly, I think I could have starched the fabric a little more – maybe upping the funori amount by a few grams/liter. Secondly, I think I could have laid the fabric on the paste board differently. Finally, I think using fabric with actual selvedge on both sides would have helped the fabric shift less when it was laid on the pasteboard.
Figure 38: Alignment errors and bleed errors mine (right) vs original (left)
After I struggled, I went through my books again and found a magazine showing a clamp that held the fabric to one edge of the board so you could pull it taught and lay it down easily. This clamp was primitive and simple to make, but it solved the tension and wobbling that comes with trying to evenly unroll a bolt of fabric onto a pasteboard.

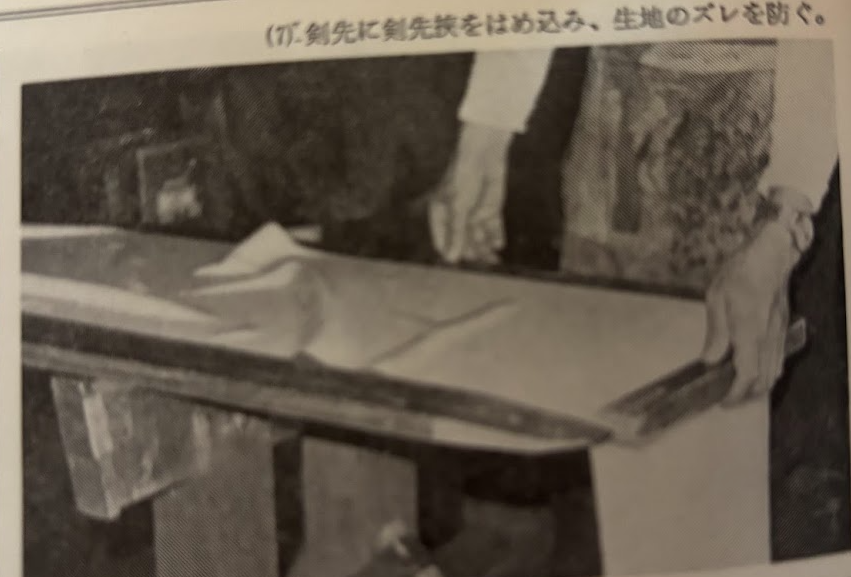
Figure 39: Using a clamp on the pasteboard[17]
The second big source of errors was from the depth of the vat. Sediment accumulation at the bottom of the natural indigo fructose vat made it so my vat was too shallow, and stained some parts darker. This isn’t something I can fix right now if I want to use sukumo or a fructose vat unless I order a custom fabricated vat that’s deep enough. Until I order a bigger vat, I will need to use thiox for reduction, as this doesn’t accumulate sediment at the bottom.
There are some speckles on the original, but it’s so faded they could be attributable to anything. I’d venture a guess that the original dyers had a proper size vat and the experience to use it well, although light indigo dyeing is renowned for being tough to stencil dye.
I also discovered, after dyeing and checking more sources, that a more even dye occurs if the fabric is dipped in cold water briefly for 10 seconds before dyeing. I’ve had even indigo dyes without the water, but this is interesting and worth testing.
Figure 40: pigment speckling on original (left) and mine (right)

The third source of errors was from the shinshi popping off mid-dye. This led to some weird but very hard to notice errors from the faint transfer of bits of paste when the fabric folded it in on itself in the dye vat. I now know the correct way to use the shinshi for indigo dyeing, which should help, but I also think I need to use fabric with selvedge on the shinshi side or serge that edge to help the shinshi stay on. With raw fabric like delicate hemp, it’s so loose and shifty the shinshi can more easily pop off.
Figure 41: smudging issues on original (top) and mine (bottom)


Finally, my last set of errors are small imperfections where I had to smear the paste to get rid of strut lines. In the future, I will probably attempt a two-part stencil approach instead, or just avoid that type of detail. Most stencils don’t have islands that thin and isolated, and it’s obvious from the extant that the original dyers also struggled with the circular marks inside the crab, as many are half smeared or not visible at all. Later stencils approach this kind of challenge differently by altering the design to be more stable, so I think this might have just been an early exploration of the limits of the technology.
Figure 42: Smearing issues on original (right) and reconstruction (left)

Both bolts also have bits of smeared paste that spread, as well – this is probably because it’s not a repeating design and so it’s easy to drop or transfer paste when you’re working. Mine mostly happened while smearing struts, and I tried to clean mine off.
Figure 43: Stray Paste on original (left) and mine (right)


It’s interesting to me that a bolt with so many errors was considered acceptable in period, in fact, it was considered good enough for the Shōgun’s personal belongings. A bolt with this many errors would not be sold by a modern kimono tailor in Japan today. People of the Momoyama period certainly had exposure to flawless finely detailed clothing – they had many woven garments with exacting, precise brocades. But they also had shibori and tsujigahana, which are cherished specifically for their playful shapes and imperfections that are inherent to the process of compression resist dyeing. The Japanese aesthetic philosophies of the period included wabi (侘), which emphasizes embracing imperfection. Medieval Japanese people must have had a different feeling about beauty in katazome than modern kimono culture.
Conclusion
Dyeing an exact replica of someone else’s work is not something I do often as an artist. Now that I’ve done this robe, however, I understand why it’s important. Even though this robe is cute and playful, the execution itself is subtle and unforgiving. It’s harder, in my opinion, than the repeating pattern robes, because the allover pattern has fewer alignment constraints and the paste being across the width of the bolt self stabilizes the fabric to some degree. The whimsically arranged motif actually makes the paste up more challenging.
When I do my next bolt, I will change the following:
- Use fabric with a selvedge on both ends instead of ripped fabric
- Only use thiox for reduction until a larger vat can be purchased
- Wet the fabric before dipping (I would like to test this to verify it if actually helps)
- Apply soymilk as the second sizing step, and let it cure (I would like to verify if it actually helps)
- Arrange the shinshi correctly for dipping
- Use a two-part stencil or a better stencil design
- Wait for sunny days to dye and apply soy juice, or work on a smaller project if the weather is poor.
- Try to get an assistant for the tougher days, as the vat setup and neutralization is very physical
Still, despite all the errors, I think someone in the medieval era would have bought my bolt as is. Probably not the shōgun – the dye is a little too uneven. But the flaws that happened aren’t substantively worse than the originals, and the pattern is actually crisper in many places. Many of them can be hidden in the seam allowances and the collar folds. I think it could stand on its own as a medieval garment. I would certainly like to attempt it again using everything I learned.
Bibliography
- Nagasaki, I. (2023). A Study on “White Cotton Kosode with Design of Horizontal Stripes Owned by Masuda Genosho”( Private Collection) : The actual situation of cotton use by upper-class samurai class in the Azuchi-Momoyama period to early Edo period. Bulletin of the faculty of home economics Kyoritsu Women’s University, 69, 1-20.
- Rinne, M. M. (n.d.). Echigo Jōfu. Google Arts & Culture. https://artsandculture.google.com/story/echigo-j%C5%8Dfu-kyoto-women-s-university/SQXRnyvC2Y6DIQ?hl=en
- 神谷, 榮子, Kamiya, Eiko. (1965, February 27). Four Katabira Purporting to Have Been Used by Uesugi Kenshin: The Third Report on Costumes Said to Have been Used by Uesugi Kenshin and Uesugi Kagekatsu.
- 「二枚型」(返数型) | 染形紙の技法 | 播州三木染型紙WEB美術館. (2025). Retrieved June 20, 2025, from Miki-somekatagami.com website: https://www.miki-somekatagami.com/?page_id=773
- Sugihara, N., & Tōkyō Kokuritsu Kindai Bijutsukan. (1980). Katazome : Japanese stencil and print dyeing : tradition and today : the National Museum of Modern Art, Tokyo, June 20-August 3, 1980. The Museum.
- 「糸入れ」と「紗張り」 | 染形紙の技法 | 播州三木染型紙WEB美術館. (2025). Retrieved June 20, 2025, from Miki-somekatagami.com website: https://www.miki-somekatagami.com/?page_id=635
- 狩野吉信. (1615). 職人尽絵屏風「型置師」 [Painting on Folding Screen]. 川越大師 喜多院, Saitama, Japan.
- https://ja.wikipedia.org/wiki/%E4%BC%8A%E5%8B%A2%E5%BD%A2%E7%B4%99
- ミズカミカヨコ, & Mizukami, K. (03 2016). 喜多院所蔵 職人尽絵屏風「型置師」に描かれた染物・型付技法に関する一考察. Journal of Tokyo Zokei University, (17). Retrieved from https://cir.nii.ac.jp/crid/1050564287756230656
- 北村哲郎解說 ; 山辺知行, 北村哲郎編集委員 ; 野久保昌良撮影., 北村哲郎, 山辺知行, 野久保昌良., Kitamura Tetsurō kaisetsu ; Yamanobe Tomoyuki, K. T. h. i. ;. N. M. s., Kitamura, T., Yamanobe, T., & Nokubo, M. (2008). 長板中形. 源流社.
- 栗山工房 型染チャンネル. (2023, January 23). しきのり [作業風景] 和染紅型 栗山工房 #shorts *004. Retrieved June 30, 2025, from YouTube website: https://www.youtube.com/shorts/JJN56mI_MU4
- Ishii, T. (2025). Katazome.
- フノリ. (2005, November 17). Retrieved June 30, 2025, from Wikipedia.org website: https://ja.wikipedia.org/wiki/%E3%83%95%E3%83%8E%E3%83%AA
- Holland, A. (2019, September 25). Preparing an Indigo Dye Vat – George Weil. Retrieved June 30, 2025, from Georgeweil.com website: https://www.georgeweil.com/blog/preparing-an-indigo-dye-vat/
- 八王子 荒井呉服店. (2023, May 27). 長板中形の制作工程『藍染』. Retrieved June 30, 2025, from YouTube website: https://www.youtube.com/watch?v=3wYpeXEXV9g%5D
- 紺仁染織工房 半纏、片貝木綿、印物チャンネル. (2019b, October 23). 紺仁 工場見学「半纏藍染」. Retrieved from YouTube website:
- 染織と生活社 No. 14 (Ed.). (1976). 月刊染織α.
- 山崎, 青樹, & Yamazaki, S. (1997). 型染・引き染の基本. 美術出版社.
- デジタル大辞泉,ブリタニカ国際大百科事典 小項目事典. (2025). 茶屋染(チャヤゾメ)とは? 意味や使い方 – コトバンク. Retrieved June 30, 2025, from コトバンク website: https://kotobank.jp/word/%E8%8C%B6%E5%B1%8B%E6%9F%93-3183171#goog_rewarded
- “作品詳細 | 薄水色麻地蟹文浴衣 | イメージアーカイブ – DNPアートコミュニケーションズ.” イメージアーカイブ – DNPアートコミュニケーションズ, https://images.dnpartcom.jp/ia/workDetail?id=TAM000135. Accessed 29 June 2025.
- “薄水色麻地蟹文浴衣.” 名古屋・徳川美術館|The Tokugawa Art Museum, Tokugawa Art Museum, https://www.tokugawa-art-museum.jp/collections/%e8%96%84%e6%b0%b4%e8%89%b2%e9%ba%bb%e5%9c%b0%e8%9f%b9%e6%96%87%e6%b5%b4%e8%a1%a3%e3%80%80/?s=%E6%B5%B4%E8%A1%A3. Accessed 29 June 2025.
- 澤田和人. (03 2006). Basic Research on Katabira : Changes in Materials From the Muromachi Period Through to the Early Edo Period. 国立歴史民俗博物館研究報告 = Bulletin of the National Museum of Japanese History, 125, 69–99. doi:10.15024/00001368
- Tōkyō Kokuritsu Hakubutsukan. Nihon no Bijutsu #67, Kosode: Traditional Japanese Dress. Tōkyō-to: Shibundō, 1966-.
- Nakano, E., & Stephan, B. B. (1982). Japanese Stencil Dyeing. Weatherhill, Incorporated.
- How to Make a 1-2-3 Fructose Indigo Vat – Botanical Colors. (2020, November 19). Retrieved June 30, 2025, from Botanical Colors website: https://botanicalcolors.com/fructose-indigo-vat/?srsltid=AfmBOorA7aB2zNFZ3eMows3nsD78IUJYu5h48JllopFyGqUmsSdzxsYu
- 山崎青樹., 山崎青樹, 1923-2010, Yamazaki Seiju, & Yamazaki, S. (2001). 古代染色二千年の謎とその秘訣. 美術出版社.
Glossary
Katagami (型紙)
Washi paper coated with persimmon tannin and smoked, making it water resistant and suitable for use in katazome.
Shibugami (渋紙)
Same as katagami
Chayazome (茶屋染め)
A high end type of stencil dyeing that applied resist on both sides of the fabric, usually indigo on hemp or ramie. It is named after a samurai who became a wealthy kimono merchant – 茶屋四郎次郎(Chaya Shirōjirō) associated with the origin of the dyeing technique.
Okumi (衽)
The front overlap panels of a traditional japanese garment.
Migoro (身頃)
The main body panels of a traditional Japanese garment.
Eri (衿 / 襟)
The collar of a traditional Japanese garment.
Yukatabira (浴衣襦袢 or 湯帷子)
An early form of yukata, originally an unlined robe worn after bathing. The modern yukata evolved from this garment.
Thiox
Short for thiourea dioxide, a chemical reducing agent used in indigo dyeing vats.
Echigo Jofu (越後上布)
Handwoven ramie fabric from the Echigo region.
Tetron (テトロン)
Japanese polyester or polyester blend fiber made for durability
Shinshi (伸子)
Flexible bamboo dewels with sharp points at both ends, used to stretch fabric.
Harite (張り手)
Long clamps with thin nails used in conjunction with shinshi to hold and stretch fabric taut.
Suribachi (すり鉢 / 擂鉢)
A Japanese mortar with ridged interior. Often paired with a pestle called a surikogi.
Sukumo (蒅)
A traditional Japanese indigo dye material made by fermenting and composting indigo leaves (Polygonum tinctorium).
Appendix

Recipes
Pasteboard Glue Recipe
Ingredients
1 cup of mochiko
Hot water
This recipe will cover about 36 square feet with glue. For many surfaces, such as wood boards being used for the first time, double applications of glue are needed. Scale the recipe according to the size of your board/your needs.
Instructions
- Pour mochiko into a mixing bowl. Modern mochiko usually does not need to be sifted.
- Gradually add hot water, stirring and then kneading with your hands. Pause when the dough looks like it can be shaped. The Japanese say this is ‘earlobe consistency’. Personally, I don’t understand that even after pinching my earlobe a bunch. I stop as soon as I can shape the dough. It’s better to have a drier dough than a wet one, because the wet, soft dough will melt and make a mess when it’s boiled if it’s too wet. If you add too much water and get something runny, simply add more flour.
- Make triangle or mini donut shapes, and place them in in a steamer. Steam for about 40 minutes. The finished color should be semi-transparent. Steaming makes the glue stickier and works better than boiling.
- Once the steaming is complete, immediately transfer the dough to a suribachi or bread mixer (not a cake mixer, which will burn out the motor on this task if used repeatedly). Mix, adding hot water and continuing to stir and mash. Make a smooth mixture that can be spread, like peanut butter or thick icing.
- You can dilute the paste as needed if it’s not spreading well when you go to apply it.
Funori Sizing Recipe
Ingredients
5 g of Funori
1000 ml of Hot water
This sizing recipe was slightly too weak for the fabric, and I learned after the fact that I shouldn’t have boiled the funori but simmered it. Experiment and increase the ratio as needed.
Instructions
- Put funori into hot water
- Heat hot water and funori to a simmer, but do not bring to a boil
- When funori has dissolved fully, strain liquid through muslin or a fine mesh
- Allow to cool before using
Resist Paste Recipe
This recipe uses American imperial measurements, but in truth, very few measurements are needed. The big thing to understand is the 4:6 ratio between Mochiko and Komon Nuka. Everything else – the water, the salt, the calx – are all added by feel, color and texture. You can tweak the ingredients as you get more experience, but to begin, this recipe is good for beginners and easy to execute.
Ingredients
1 cup Mochiko
1.5 cups Komon Nuka / Defatted Rice Bran
1.5 cups Water (you will not need all of it, just have some on hand in an easy to pour container)
0-2 tsp of salt
2 tbsp Calcium Hydroxide
Instructions
- Sift the komon nuka. Modern mochiko typically does not need sifting.
- Mix the komon nuka and mochiko well in a large bowl.
- Add water a little at a time, kneading. Traditionally, Japanese paste makers stop when the dough ‘reaches the consistency of an earlobe’. I really don’t understand that, and I stop adding water when I feel like I can shape the dough. Usually I make a few failed biscuits, keep adding water, and then make a successful one and stop adding water.
- Shape dough into doughnuts. Not American donuts, little mini donuts. The easiest way to do this is to make a round patty, and then stick your finger in the center until you bore through. The ‘roll a long noodle and loop it on itself’ approach does not work with this dough, it is not sticky or wet enough, it will just make a crumbled mess.
- Set the doughnuts in a kitchen towel or piece of cotton muslin (preferable white or unbleached), spacing them so they do not touch, and steam 50-60 minutes.
- While the doughnuts are steaming, decide how much salt to use, and dissolve it in as little hot water as possible. This will be about 1/4 to 1/2 a cup depending on the amount. You need salt when the humidity is low, or when you’re doing designs with large, contiguous blocks of paste, like those with white backgrounds. You need no to little salt in a hot and humid summer, and a large amount of salt in the winter. Salt keeps the paste from cracking by increasing the hydroscropity of the paste. Too much, and the paste will become very loose and run. Too little, and the paste will crack in the dry air. I recommend using less than a teaspoon of paste when it’s 80-90% humidity, or none, or up to 2 tsp in the winter. If you live in a very dry climate, increase the amount beyond that.
- Also while the donuts are steaming, dissolve the calx in hot water and let it settle. Calx is very dusty and fine particled, you may wish to wear a mask when measuring it out.
- When the donuts are done, immediately pound them into a paste. This is traditionally done with a large suribachi, but you can also use a bread mixer. Do not use a cake mixer, the dough is too tough for the motor.
- Once the paste is fully mixed, you can add the salt gradually and continue beating. If it’s too tough to stir by hand, add a little hot water. You will want to beat for at least five minutes, until the paste becomes sticky and drips long strands of dough from the mortar.
- Add top water from the lime solution until the dough turns a golden dijion yellow. I usually set a piece of paste aside out of the mixing bowl so I can compare the color change. You don’t want a bright yellow, but more the color of like, undyed french mustard.
- If not using immediately, store the paste in a lidded container and pour a thin layer of fresh water over the top. My paste usually keeps for about 10 days, maximally, in a cold fridge. If the paste smells sour or off, discard it and make fresh.
- You can dilute the paste as needed to make it easy to spread, but do so incrementally and carefully.
Leave a Reply to Karen MillerCancel reply